For Kids

Creamy Roasted Tomato-Garlic Soup

Who doesn’t drool over an enticing bowl of rich & creamy Tomato Soup?

Simply put, this soup is INCREDIBLE!! With deep flavours and creamy texture, this is a soup the entire family will love and you’ll be asked to make again and again. We’ve made this dreamy soup in my Batch Cooking class and the participants loved it so much, some were making it again the very next day!

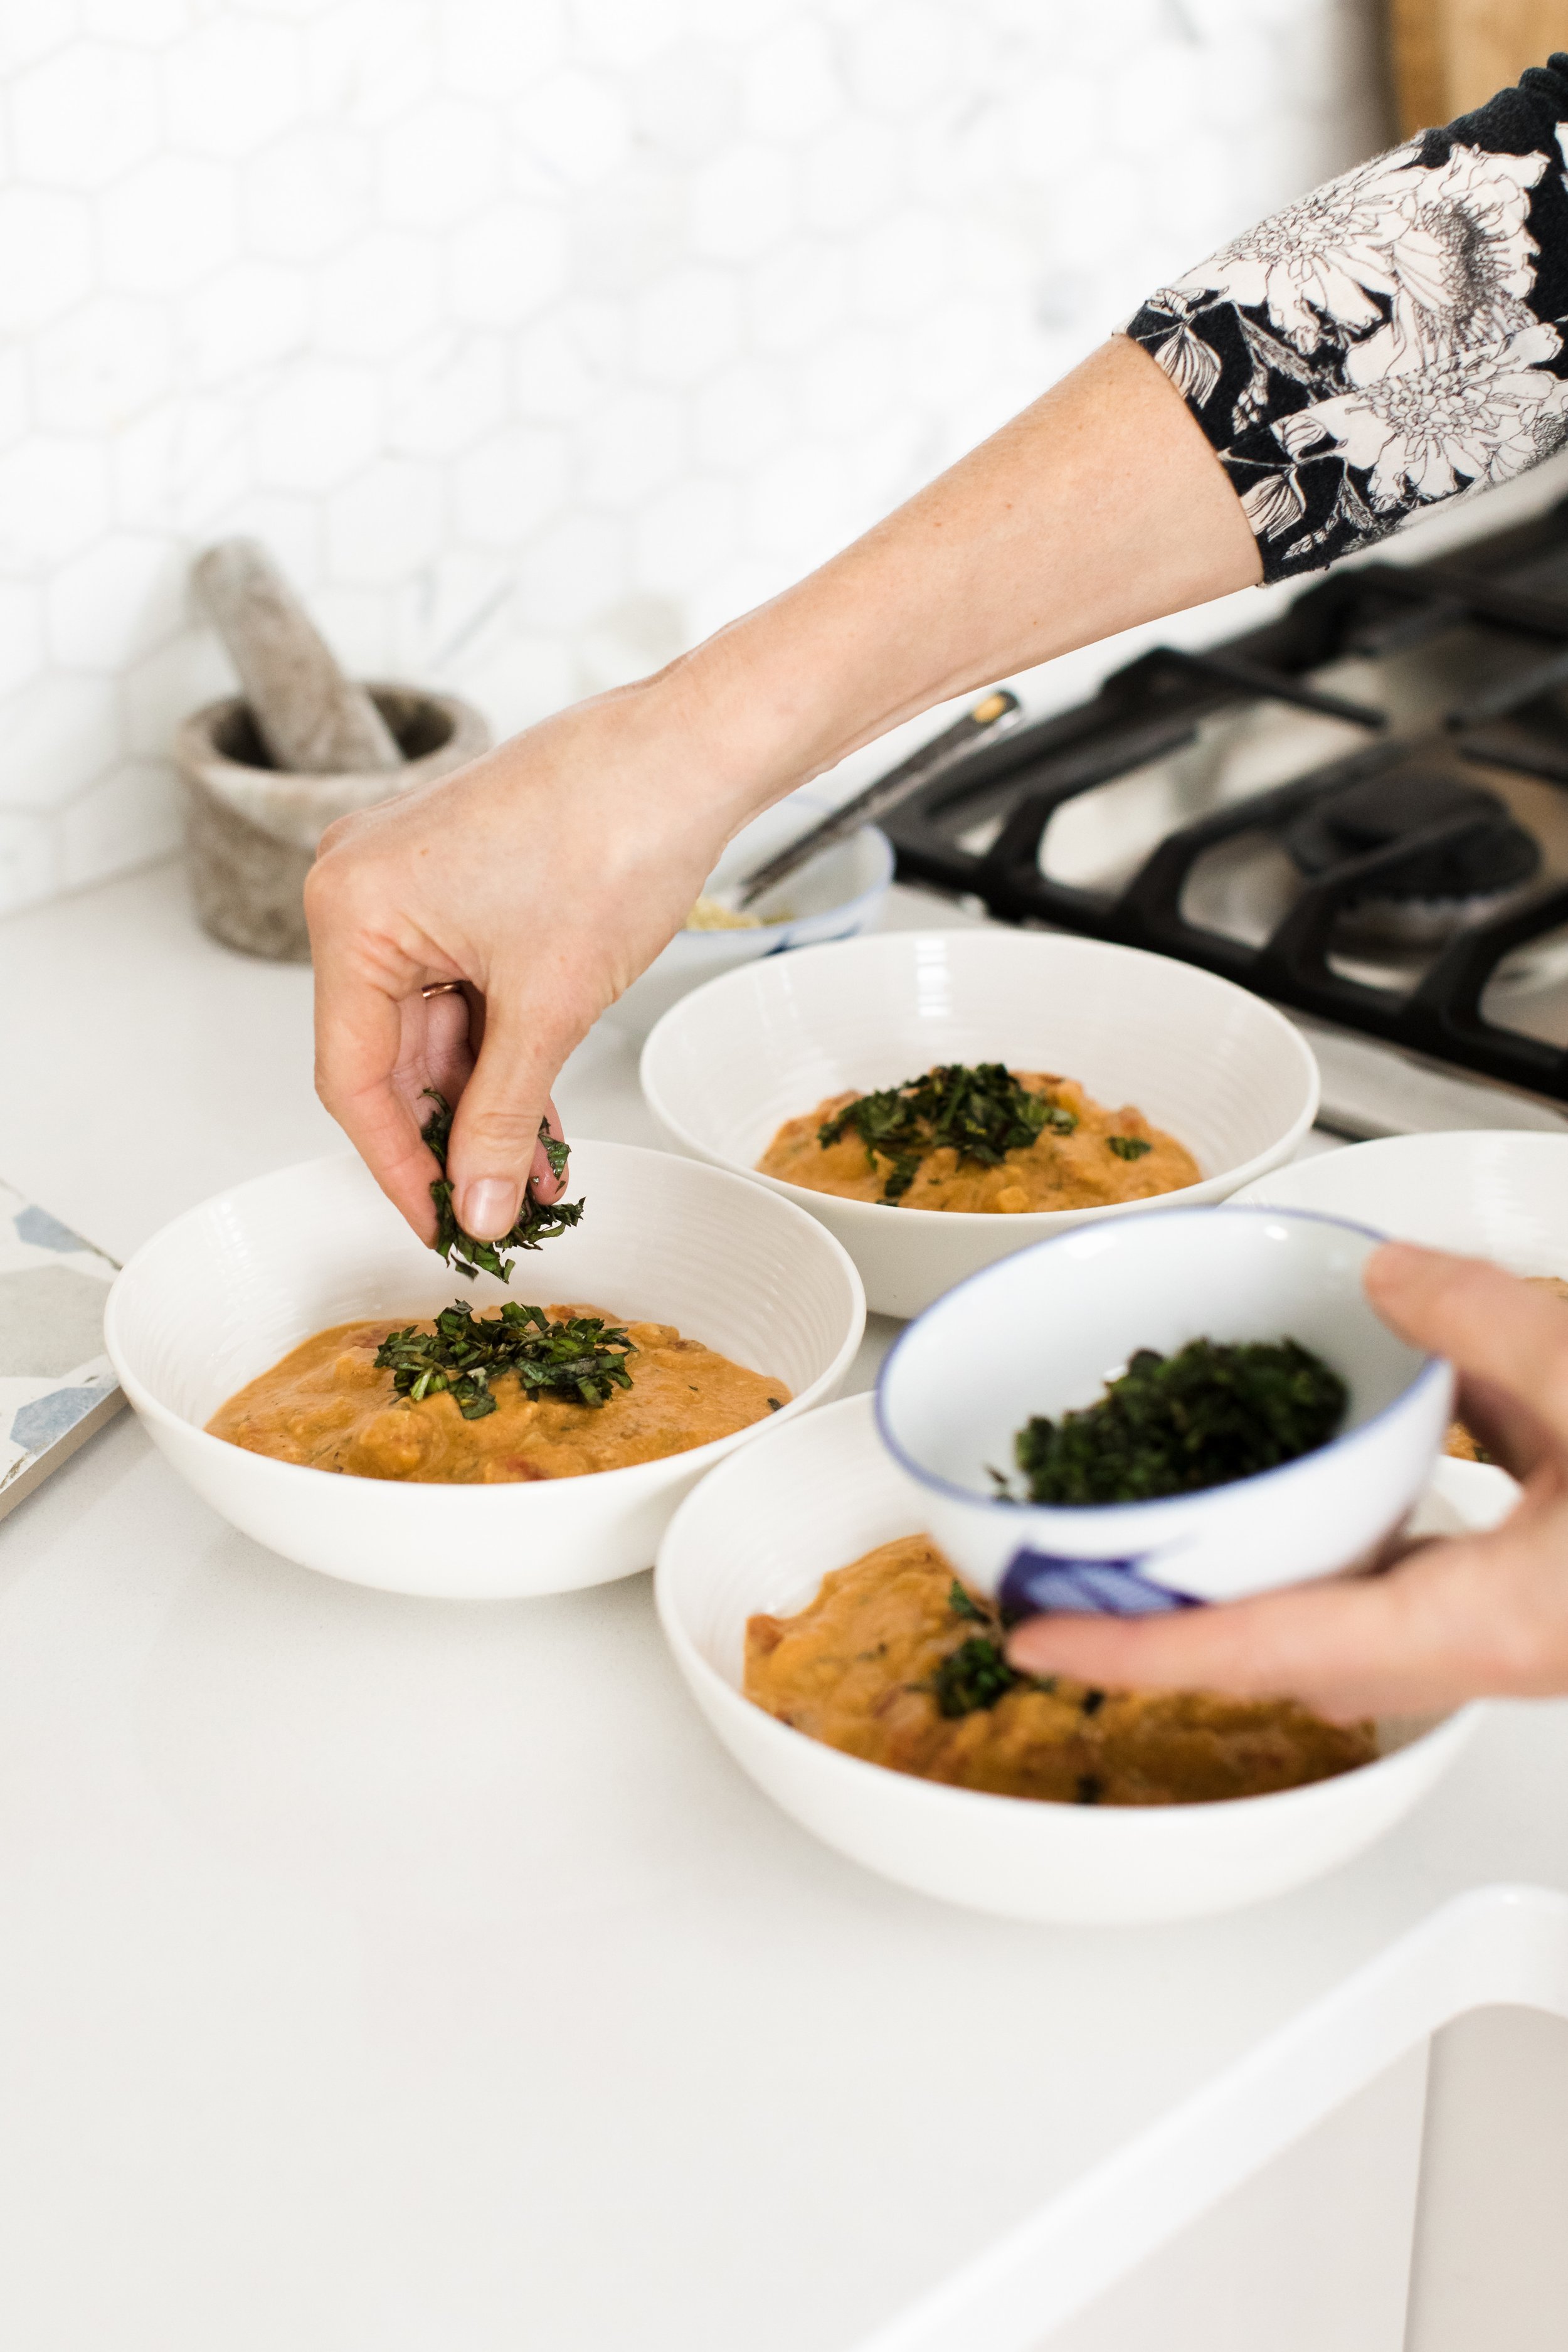
Yes, this soup is totally VEGAN, but….and….is missing absolutely nothing! I like to top it off with some pumpkin seed parmesan and a little sprinkle of fresh basil, but she holds her own just the way she is!

Do NOT skip the roasted tomato & garlic step of this soup, that’s what makes it so rich and deep with flavours.

Make this soup ASAP, trust me, it will warm your soul and make you feel good inside and out!

Creamy Roasted Tomato-Garlic Soup

6 medium tomatoes
1 large head of garlic
2 Tbsp avocado oil
½ tsp salt
Fresh pepper
1 large onion, diced
2 Tbsp coconut oil
3-4 cloves garlic, minced
1 ½ tsp salt
½ tsp oregano
½ tsp thyme
Lots of fresh pepper
1 – 28oz can diced tomatoes (fire roasted are best)
½ cup cashews, soaked overnight & drained
2 cups vegetable broth
1/3 – ½ cup fresh basil

  • Preheat your oven to 375F. Half tomatoes and separate cloves of garlic, leaving the peel on. Toss with avocado oil and season with salt & pepper and spread out on a large glass dish or a roasting pan. Roast for 35 – 45 minutes or until fragrant and lightly browning around the edges. Set aside to cool.

  • In a large soup pot, heat onion and coconut oil over medium heat. Once onions are soft, add garlic and seasonings and sauté several minutes until fragrant. Add your can of diced tomatoes and reduce heat to a simmer.

  • In your blender, place your roasted tomatoes and peeled garlic, drained cashews, and vegetable broth and blend until smooth. Pour over your onion and tomato mix in your pot and heat at a low simmer for 10 – 20 minutes. Add in fresh basil and adjust seasonings as needed.

Enjoy the goodness of this creamy soup and feel good in your soul ♥︎

Coconut Cherry Lime Popsicles

If you’re looking for a quick and easy, but incredibly yummy summer popsicle, here is a sweet & sour, fun-in-your-mouth, heat busting blast of deliciousness!!
Yes, they’re that good 😉

Popsicles are a great way to dose your kids up with some high quality nutrients and also offers a fun summer treat, which all kids love. Homemade versions definitely surpass any of the store bought, chemical-laden, generic pops out there with flying colours, and are just so easy, it’s silly not to have some on hand all summer long!

You can whip these up just the way they are, OR go the distance and add in a few layers…

Rainbow Popsicles.jpeg


Here I added a mango & spinach lime layer to mix things up and make rainbow pops (haha and look, those old points collecting sticks were actually from my childhood!). Yum!

But these cherry lime delights are just perfectly beautiful AND delicious just the way they are (just like you 😉).
Happy summer vibes!

Coconut Cherry Lime Popsicles

Cherry popsicles.jpeg

Makes 8-10 Large Popsicles
2 cups frozen cherries
1 can full fat coconut milk
Juice of 1-2 limes
2-3 Tbsp maple syrup
1/2 cup coconut water
Small pinch of salt

  • Blend all ingredients in your blender and distribute evenly among Popsicle molds. Allow to harden in the freezer for at least 4 hours.

Morning Apple Cinnamon Oatmeal

Apple Oatmeal 2.jpg

Need something new on your breakfast rotation?
I’ve been making this oatmeal for my family quite a long time and it feels like the right time to share it with you!

This recipe is super easy, uses ingredients you’ll likely have on hand, and is a very nourishing and delightful breakfast that all family members love. Stewing the apple chunks first is really what sets this oatmeal apart, so be sure to leave a bit of time to let the apples cook through until softened before adding in the oats. Once the oatmeal has cooked, don’t skip adding in those protein & beneficial fat-packed hemp hearts & chia seeds, and any additional nuts, seeds, ground flax, or fresh fruit you choose. These add ons push this simple meal into a more satiating and blood sugar balancing department to get everyone through a good morning feeling balanced, energised, and focused!

Happy Breakfast Making!

Looking for more Breakfast Tips? Read about Conquering the Breakfast Scramble here!

Morning Apple Cinnamon Oatmeal

Apple Oats.jpg

Serves 2
Cook time: 20 minutes
2 medium apples, peeled, cored and cubed
2 Tbsp coconut oil
1/4 tsp salt
1 tsp cinnamon
2/3 cup rolled oats
3/4 cup almond milk
1/4 cup water
1 tsp vanilla
2 Tbsp hemp hearts
2 Tbsp chia seeds
1/4 cup raisins
1 Tbsp maple syrup
Coconut kefir or yogourt or milk for serving
Optional add ins: ground flax, chopped nuts or seeds, fresh fruit

  • In a small sauce pan, warm apple chunks and coconut oil over a medium heat. Once hot, add salt and cinnamon and continue to cook, stirring often, until apple is softened (this will take a few minutes, approx: 7-10). Add oats and stir, toasting them slightly (about 2-3 minutes). Add milk and water and bring to an active simmer, stirring occasionally, until all the liquid is mostly absorbed (about 10 minutes). Remove from heat.

  • Stir in vanilla, hemp heart, raisins, and maple syrup. Serve with coconut kefir/yogourt, or with a drizzle of almond milk over top and any add ins your lovely sleepy head desires.

    If you make this oatmeal, please let me know how much you love it or what you did differently to make it your own! AND be sure to sign up for my Newsletter and don’t ever miss a new recipe or a new class offering ♥️

Black Bean & Cumin Spiced Cauliflower Tacos with Avocado Lime Crema

Tacos.JPG

To keep things interesting around here, during times of Covid-19 isolation, we’ve brought back taco night! I’ve been noticing how important it is to keep things engaging & somewhat challenging, coming up with new creative activities and little games that we can all play to keep it light.

Also, every one loves tacos!

Any kind of meal that involves a few different ingredient options that everyone can make on their own is great for kids and a good opportunity for creativity. We made fish tacos with a mango + avocado salsa this week and are talking about how to make a great mexi-spiced tofu taco….stayed tuned for that!

Don’t let the ingredients list length make you nervous, because most of these things you will already have on hand and, if you don’t, you can get creative and use up what’s calling to you from your fridge 😉

Black Bean & Cumin Spiced Cauliflower Tacos with Avocado Lime Crema

Tacos close.JPG

Makes 8 - 10 tacos
For the Cauliflower:
1 head cauliflower cut up into bite-sized bits
2-3 Tbsp coconut oil, melted
1 tsp cumin
½ tsp coriander
½ tsp chili powder
½ tsp salt
Fresh pepper
Avocado Lime Crema:
1.5 ripe avocados
Juice of 1 lime
1 small clove of garlic, minced
½ tsp cumin
¼ tsp onion powder
¼ tsp salt
2-3 Tbsp coconut kefir or coconut cream
For the rest of the Tacos:
1 can refried black beans, heated in a frying pan with a bit of coconut oil
Shredded lettuce (we use romaine)
Shredded purple cabbage
Chopped fresh tomatoes
Cashew sour cream
Salsa (fresh is best)
Fresh cilantro
Soft Taco Shells (our favourite brand is Abuelo’s, made in the Comox Valley)

  • For the cauliflower, preheat oven to 375F. Toss cauliflower pieces with oil and spices and spread out on a large glass-baking dish. Bake for 35-40 minutes or until crispy around the edges.

  • Meanwhile, prepare your avocado lime crema by blending all ingredients in a blender or with an immersion blender until smooth.

  • Prepare all other topping ingredients and warm your taco shells at 200F for roughly 10 minutes, or until just warm. To put together your tacos, start with a bit of refried beans, some shredded veg, the spiced cauliflower, and top with salsa and avocado lime crema. Devour immediately!

Make these tacos!
And may you find happiness in everything yummy 😋
Stay safe. Stay healthy. Remember laughter.


Morning Endurance Muffins

Muffins.jpg

This is my version of a morning glory muffin, but packed with a higher nutritional punch. We love these beauties because they are both robust and delicious and can get you through the morning hours without that blood sugar dip often associated with a morning muffin. As usual, the real food ingredients provide enough nutrition and macronutrient balance that the body will feel nourished and well fed. Yes, there are sweeteners in this muffin, but both maple syrup and coconut sugar are real food sugars with antioxidants, immune benefits, and lower glycemic index ratings.


Feel free to modify this recipe however you feel. If you are looking for a nut free version, simply remove the pecans and swap out the almond flour for a similar replacement flour such as sunflower seed flour (you can easily make this by blending sunflower seeds into a flour/meal in your food processor).


We love these muffins served warm, cut in half, with some coconut oil or almond butter, but straight up is perfectly lovely 😋

Morning Endurance Muffins

Muffins 3.jpg

Makes 12 - 16 muffins
Vegan, Gluten-free, Dairy-free, Plant-based, Super Yum

Ingredients:
2 chia eggs (2 Tbsp chia seeds + 6 Tbsp water)
1 overripe banana
1/3 cup maple syrup
1/4 cup applesauce
1/2 cup coconut sugar
1/2 cup almond milk (or other plant based milk)
1/4 cup coconut oil, melted
1 small apple, cored & grated
1/2 tsp salt
1 1/2 tsp baking soda
1 tsp cinnamon
1/2 tsp ground ginger
1/2 cup almond flour/meal
1 cup oat flour
1/2 cup oats
1 cup grated carrot
1/2 cup shredded coconut
1/2 cup raisins
1/2 cup pecans, roughly chopped
1/4 cup hemp hearts

Instructions:
To make your chia eggs, combine chia seeds and water in a small bowl and set aside.
Preheat the oven to 375F.
In the bowl of your food processor, place banana, maple syrup, applesauce, coconut sugar, milk, oil, grated apple, salt, baking soda, and spices and combine until smooth. Add flours, oats, and grated carrot and blend again, until just combined. Stir in remaining ingredients.
Spoon batter out evenly into lined muffin tins (12 - 16 muffins, depending on tin size).
Bake for 35 - 40 minutes, or until an inserted toothpick comes out clean and muffins are slightly browned on the outside. Cool & serve.

If you make these muffins, please let me know how they turn out for you AND if you make some modifications let us all know how they worked!! Happy Baking 💛

Double Chocolate Banana Cupcakes

Double Choc cupcakes.JPG

Yes these are decadent.
And chocolatey.
And an absolute treat.
And yes, you could make these for a birthday party or special occasion.
And yes, all taste buds would be satisfied and delighted and wonder where you got the recipe 😉
But.
BUT.
No, you needn’t wait.
No, you needn’t deny yourself these delicious chocolate banana cake-like delights, simply because no one is having a birthday or a party or an event of any kind at all.
Just make them because they are yummy and satisfying. No guilt. No shame. No negative BS of any kind necessary at all.
YES! You have my approval & support. Make these cupcakes just because you want one and eat it with intent and enjoyment and explore the sensory experience and feel really good about it.

Inspired by overripe bananas and a, perhaps hormonally encouraged, desire for something chocolate, these are SOOOOOOOO good. And easy. And if you eat anything like we do at our house, you’ll have most of these ingredients, if not all, on hand. Please enjoy them in a way that feels good to you. If you have a tendency to eat too many goodies when you have them hanging around then share them with your neighbours or friends or your neighbours friends or pop them in the freezer and eat one every now and again ☺️

Double Chocolate Banana Cupcakes

Choc cupcakes.JPG

Makes 12 Regular Size Cupcakes
Prep & Bake Time: 35 minutes

Ingredients:
2 large overripe bananas (really really dark brown & gross looking is best!)
2 Tbsp maple syrup
3 large eggs
2 cups almond flour
1/2 cup cacao powder
1/2 tsp salt
1 tsp cinnamon
1/2 tsp baking soda
3 Tbsp hemp hearts
2 tsp vanilla
1/3 cup coconut sugar
3/4 cup good quality chocolate chips

  • Preheat the oven to 350F and line a muffin tray with muffin cups.

  • In a large mixing bowl, mash banana with a fork until mushy and smooth. Add all other ingredients, except chocolate chips, and continue to mix with a fork. Finally, mix in 1/2 cup of chocolate chips and spoon out batter into your lined muffin cups.

  • With the last 1/4 cup of chocolate chips, sprinkle tops of muffins with roughly 3-4 chips and lightly press them into the batter.

  • Bake for 20 - 25 minutes until set and an inserted toothpick comes out clean. Allow to cool before serving, then devour!

    If you make these cupcakes, please let me know how they turned out for you!! Leave me a comment here or better yet, share a pic on instagram and tag me so that I can see your beauties!


Creamy Coconut Carrot Soup

Carrot soup .jpg

A simple weekday dinner or a fulfilling lunch, this soup is super simple to put together, nourishing for the belly and the soul, as well as totally delicious!
We tested this soup on a room full of 6 and unders, and got some super happy smiles and thumbs up from the littles and many happily surprised: “what did you put in that soup?” reactions from the parents. Always a huge compliment!

HINT: To make this soup taste extra amazing, make your own veggies stock: simply bring a pot of water and a bunch of loosely chopped vegetables to a boil, add salt, pepper, and any other desired herbs & spices, reduce heat and simmer for as many as 4 hours on low (I like to sauté the onions with some garlic & ginger with a bit of coconut oil first to add a bit of flavour). Strain out vegetables and here you have a delicious & simple vegetable broth. This kind of broth is great to make in the height of market season when there are loads of imperfect root vegetables like celeriac, parsnip, yams, potatoes, celery, carrots, & broccoli, just hanging about. YUM!

Creamy Coconut Carrot Soup

Creamy coconut carrot soup.JPG

1 large onion, diced small
3 Tbsp coconut oil
1 tsp salt
2 ½ Tbsp minced ginger
1 large or 2 small cloves garlic, minced
1” fresh turmeric, minced
2 cups carrots, peeled & chopped
4 cups vegetable stocks
1 can full-fat coconut milk
½ cup toasted pumpkin seeds, for serving (optional) or toasted large flaked coconut 😋

  • In a large soup pot, melt coconut oil and onions over medium heat. As onions become soft & translucent, add salt, ginger, garlic, turmeric, and carrots. Cook for about 10 minutes, stirring frequently, until carrots are slightly softened and mixture is fragrant.

  • Add vegetable stock, bring to a boil and then reduce to a medium-low simmer for 15 minutes. Add coconut milk and simmer another 5 – 10 minutes.

  • Serve with a sprinkle of toasted pumpkin seeds and/or a spoonful of coconut cream.

Like always, if you make this soup, please let me know how it went!
AND, if you don’t want to miss any upcoming recipes, be super to sign up for my email list below! I promise to only send out inspiration, upcoming class info & deliciousness!!

Thick Coconut Vanilla Chia Pudding

Chia pudding glass jar small.jpg

Chia pudding has got to be one of the simplest ways to make a yogourt style substitute without hardly any effort at all! I like to make a batch at the beginning of the week for quick and easy breakfast and/or snacks throughout the week.  It’s a great late morning snack to take with you on the go or to pop into your child’s lunch with a sprinkle of granola and fresh fruit.

It takes about 5 minutes to make and is a nutrient powerhouse, especially if you’ve had time to whip up your own Vanilla Cashew Coconut Milk (bonus points!) 😉

What we LOVE LOVE LOVE about Chia Seeds:

High Quality, Plant Protein
Supportive to Digestion & GI Tract Repair
Protective of Heart & Supportive of Cardiovascular Health
High in Antioxidants - Protective Against Brain Degeneration & Cancer
High in Fibre & Omega 3s
High in Minerals: Iron, Copper, Manganese, Phosphorus, & Zinc
Particularly High in Potassium, Calcium & Magnesium: Good for Bone Health & Development
Beneficial for Blood Sugar Stability & Diabetes
Beneficial for Athletes: Supports Metabolic Function, Strong Energy Levels & Endurance

Thick Coconut Vanilla Chia Pudding

1 can full fat coconut milk
½ cup almond milk
2 tsp vanilla
2 Tbsp maple syrup
1/3 cup chia seeds
Note: for Chocolate Chia Pudding, add 2 Tbsp cacao powder

  • Combine all ingredients in your blender, except chia seeds, until smooth. Pour chia seeds in to the bottom of a large glass mason jar and pour blended milk over top. Stir well with a spatula and place in the fridge.

  • Chill for about an hour, then return to the jar and stir again, making sure to stir up chia seeds that have pooled in the bottom. Chill for at least 4 hours, overnight is better.

  • Serve cold sprinkled with fruit, your favourite granola, or nuts and seeds.

Other Recipes that use Chia: Hippie Trail Cookies, Coconut Mango Blueberry Muffins 😋😋

Double Layer Almond Chocolate Fudge Cake with Chocolate Avocado Frosting

Chocolate Cake.jpg

The time has finally come to post this birthday cake!! 🤪

Every February, my son’s birthday comes around, and I find myself so busy trying to plan a party, come up with a cool gift, make awesome party food, hammer out a delicious AND nutrient rich birthday cake, while meeting all the requirements of the birthday boy…that when and if the time comes to write out the cake recipe and post about it, I’m just too bagged!

Well, this year is different, my friends.

Although none of the above changed in any way, I have taken the time this year to get this recipe to you because it has FINALLY become my favourite, decadent, no-non-food-weirdness-ever, chocolate birthday (or anyday) cake!! And it has been officially taste tested by a pack of the harshest critics….11 year old kiddos!

Several years in the making, here’s a birthday cake that can accommodate all the dietary restrictions, make all the tastebuds sing, is moist and not overly dense, AND satisfies my NUTRITIONISTA REAL FOOD requirements (which is not always that easy!).

Double Layer Almond Chocolate Fudge Cake
with Chocolate Avocado Frosting

Chocolate Cake Side.jpg

Ingredients:
3 cups almond flour
1/4 cup coconut flour
3/4 cup cacao powder
1/2 cup coconut sugar
2 tsp baking soda
1 tsp salt
3 eggs, room temperature (for a vegan cake, replace eggs with 3 flax or chia eggs)
1 can full fat coconut milk
1/2 cup coconut oil, melted
1/4 cup applesauce
1 Tbsp vanilla
2 Tbsp maple syrup
Chocolate Avocado Frosting:
1 cup dark chocolate chunks
1/4 cup coconut oil
3 ripe avocados
1/2 tsp salt
1 Tbsp vanilla
1/4 cup cacao powder
1/4 cup maple syrup
Instructions:

  • Line 2 x 7” cake pans with parchment paper and lightly grease them with coconut oil. Preheat the oven to 350F.

  • In a large bowl, whisk together the flour, cacao powder, sugar, baking soda & salt, until there are no lumps or clumps.

  • In a separate medium bowl, combine eggs, coconut milk, oil, applesauce, vanilla, and maple syrup, and whisk together until smooth. Pour wet ingredients into the dry mix and combine gently with a large spatula. Do not over-mix.

  • Pour evenly into your 2 cake pans and bake for 30 - 40 minutes until an inserted toothpick comes out clean. Cool completely, preferably overnight, before frosting.

  • For the frosting: In a double boiler (or a glass bowl set over top of a medium pot with a few inches of water) melt chocolate chunks and coconut oil until runny. Transfer melted chocolate mix to the food processor and add in all other ingredients. Combine until smooth and thick. Adjust sweetness as desired (dark chocolate chunk sweetness will vary).

  • For cake assembly: Remove one cake from pan (don’t forget the parchment!) and place on a large serving plate. Evenly spread a thick layer of frosting over the top of the cake (I like to use a small spatula or a bread knife for this). Carefully remove the second cake from its pan and set on top of the bottom layer. Spread all remaining frosting over the top and along the sides of the cake to cover completely. Cake will keep on the countertop for roughly one day, refrigerate leftovers (if there are any 😉).

If you make this cake, please drop me a note with your feedback or kitchen dancing enthusiasm!! I want to know how it went and if I need to make any adjustments to the recipe!
Happy cake making celebration 🎉


Double Chocolate Granola Brownies

Granola brownies from above.jpg

Chocolate brownie + granola bar.
It just happened.
And it is fabulous!

This is a dense bar that’s perfect for an active day on the slopes, snack attack in the kids’ lunchbox, and a long day’s work in need of an afternoon pick-me-up! Loaded with mineral rich cacao powder, blood sugar stabilizing dates & oats, full spectrum amino acid hemp hearts, extra protein in almond butter and chopped almonds, and intensified in taste by dried cranberries and shredded coconut, I’m not convinced that this bar is missing anything! Except maybe some warm bellies 😋


As always:
no gluten,
no dairy,
no refined sugar,
no confusing food labels.
Use real food & feel real good!
You will love these, I am so super sure.

DOUBLE CHOCOLATE GRANOLA BROWNIES

Granola brownies on parchment.jpg

Prep Time: 15 minutes
Bake Time: 25 minutes
Total Time: 40 minutes
Category: Vegan, Gluten-Free, Dairy-Free, Snacks, Healthy Treat, Kid Approved
Serving: 12 medium sized bars

Ingredients:

2/3 cup medjool dates, pitted
1/2 cup almond butter, smooth or crunchy
1/4 cup maple syrup
1/4 cup coconut oil
2 tsp vanilla
1/4 cup cacao powder
1 1/2 cups oats
1/4 tsp salt
1/4 cup hemp hearts
1/4 cup dried cranberries
1/4 cup unsweetened shredded coconut
1/4 cup mini chocolate chips
For Topping:
1/4 cup melted chocolate
2 Tbsp unsweetened shredded coconut
Instructions:
1. Preheat oven to 350F. Line a medium glass dish with parchment - mine is 11 x 7”.

2. In a food processor, combine dates, almond butter, maple syrup, coconut oil, and vanilla, until well combined. Add oats, cacao powder, and salt, and process until just combined. Transfer mixture to a medium bowl.

3. Add hemp hearts, cranberries, chocolate chips, and coconut, and stir together with a wooden spoon. Transfer mixture to your lined pan and press with wet hands to evenly distribute.

4. Bake for 25 - 30 minutes until edges brown slightly. Remove from heat and allow to cool.

5. Once mostly cooled, drizzle melted chocolate over top and sprinkle with shredded coconut. Transfer brownies to the fridge to solidify before cutting into squares. Keep refrigerated.

Did you make these? Tell me how they turned out!
Want to make incredible Holiday Chocolates? Grab this Ebook today!
L
ooking for more recipes like this? Check these out!

Bonk Bars

Bonk-Bars-Star-.jpg

I have to admit that I have a big time soft spot for my Bonk Bars.
They were one of my first original recipes that people were really excited about. On top of that, the honest-to-gosh-golly-goodness truth is that I just LOVE them SO much. They are my absolute favourite bar to have hanging around when I’m training for a distance run, rehearsing like mad for a dance show, or just being the busy body, high-functioning human that I am. They are THE perfect afternoon slump, pick-me-up bar with all those great combinations that we love so much: macronutrient balance, nutrient-density, and total flavour jam!

These bars were inspired by a good friend who is hypoglycemic and tends to “bonk” (have a blood sugar crash inducing fits of rage and/or extreme grumpiness) if he doesn’t eat good food regularly.  Loaded with blood-sugar stabilizing fiber (dates), fats (coconut oil & chia), proteins (nuts & seeds), complex carbs (oats), and natural sweetness, these are fool-proof bars for active people, athletes, teenagers, regular “bonkers”, and sweet-treat lovers everywhere. Easy to throw together and incredibly satisfying, these will keep well for weeks in the fridge (I dare you to try) and freeze well too!
Stay grump-free.
Look out for your friends.
Prevent “Bonking”.

Print

Bonk Bars

Prep Time: 20 minutes

Total Time: 20 minutes

Category: Snack, Healthy Treat, Power Snack

Cuisine: Vegan, Real food, Nutrient-dense, Vegetarian, Raw

Yield: 16 bars

Bonk-Bar-Stack-LG.jpg


Ingredients

  • 1 cup medjool dates

  • 1 cup almond butter

  • 1 cup oats

  • 3 Tbsp coconut oil, melted

  • ¼ cup sunflower seeds

  • ¼ cup sesame seeds

  • ¼ cup pumpkin seeds

  • ¼ cup shredded coconut

  • 3 Tbsp chia seeds

  • 1/4 tsp salt

  • 1/4 cup raisins

  • 1/4 cup chocolate chips

  • ¼ cup goji berries (mulberries/golden berries)

Instructions

  1. Soak dates in boiled water until soft (about 7-10 minutes).

  2. In food processor, combine dates and almond butter until smooth. Add oats and coconut oil and pulse until roughly combined. Transfer mixture to a large bowl.

  3. Add all remaining ingredients and combine.

  4. Pour into a lined 8 x 8 square pan and press down with wet hands until evenly distributed and smooth.

  5. Refrigerate for at least 1 hour before cutting into squares. Store in fridge.


If you try these Bars and love them (or not), let me know how they worked out for you!!

Love these? Want more recipes like this? Check these out:
Sesame Chocolate Power Balls

The Ultimate Cookie

Banana Oat Bars

Banana Oat Bars.jpg

Inspired by some very ripe bananas, a hungry family, and the need to have something on hand for either a quick breakfast or avoiding an afternoon crash, these bars are super easy to whip up, satisfying, and full of flavour. They are gently sweet and so moist, they might be able to pass as cake.  AND a little chocolatey goodness is always well received! A great recipe for little people, ravenous teenagers, and busy people alike. Enjoy!

Banana-Oat-Bars mine.jpg


Banana Oat Bars

Prep time: 15 mins
Bake time: 15-20 mins

Ingredients

2 ¼ cups oats
¼ cup ground flaxseeds
½ tsp baking powder
½ tsp baking soda
¼ tsp salt
1 tsp cinnamon
3 very ripe bananas
2 tsp vanilla
¼ cup applesauce
¼ cup honey
½ cup coarsely chopped almonds (or other nuts of choice)
¼ cup unsweetened dried coconut
1/3 cup chocolate chips

Chocolate Sauce:
3 Tbsp cacao
2 Tbsp coconut oil, melted
1 Tbsp honey

Instructions

  • Preheat the oven to 350F.

  • Place oats in your food processor and grind into a coarse flour. Place flour in a bowl and whisk together other dry ingredients.

  • Combine bananas, vanilla, applesauce and honey in your food processor and process until creamy. Stir into your dry mixture.

  • Stir in almonds, coconut and chocolate chips.

  • Pour into a lined 8 x 8 pan and smooth the top. Bake for 15-20 minutes until an inserted toothpick comes out clean and the edges are slightly browned. Cool.

  • To make chocolate sauce, stir together all ingredients in a small bowl and drizzle over bars. If the chocolate sauce is too thick, place bowl over a steaming pot of boiled water for a few minutes until slightly melted.

Feeding little (or big) hungry bellies something to feel good about!


Easy Chewy Granola Bars

Granola-bars-.jpg

It’s taken me a good while and several tries to come up with a granola bar recipe that is full of good stuff, stays chewy, and is quick and easy to throw together. Here it is. These are super popular with the kiddos, my active lady friends, and the backcountry boys alike.  This is a dependable, fool proof recipe, that turns out well every time.  Feel free to experiment and add your own flare!
Note: if your kids can’t bring nuts to school, simply swap out the almond butter for sunflower seed butter, pumpkin seed butter, or tahini!

Easy Chewy Granola Bars

Granola bar single.jpg

Ingredients

1/2 cup almond butter
1/2 cup honey
2 tsp vanilla
2 tsp cinnamon
Good pinch of salt (1/4 tsp)
2 Tbsp coconut oil, melted
1/8 cup coconut sugar
1/2 cup pumpkin seeds
1/2 cup shredded unsweetened coconut
2 cups oats
1/2 cup dried cranberries
1/2 cup good quality (high cacao content) chocolate chips
1/4 cup water

Instructions

  • Preheat oven to 350F and line an 8 x 8 pan with parchment.

  • Combine almond butter and honey in a small saucepan over low heat until just melted. Remove from heat and transfer to a large mixing bowl.  Add in all remaining ingredients, stirring until well-combined (I will often use my hands for this).  If the mixture seems dry, add a few Tbsps of water at a time until desired consistency is reached.

  • Pour mixture into your lined baking pan and press down with wet hands until evenly distributed. Bake for 30-45 minutes until edges are slightly browned.  Cool completely and cut into squares (I like to pop it into the freezer for 10 minutes before cutting).  Will keep refrigerated for up to a month.


Coconut Banana Muffins

Banana-Muffins-tray-.jpg

Our summer has finally chilled out enough to turn my oven back on and it’s good timing because my boys were craving some muffins and I was dying to create.  I also happened to have some pretty brown, fruit fly lovin’, bananas begging to be a part of something fantastic!

These muffins are vegan, gluten-free, and as sweet as brown are your bananas! (The browner the better). Note: if your bananas aren’t quite there yet, pop them in a brown paper bag overnight to quicken the ripening period.

Coconut Banana Muffins

single-muffin.jpg

Ingredients:

2 cups DIY gluten free flour blend (I use this one)
1 tsp baking powder
1 tsp baking soda
1/2 tsp himalayan sea salt
4 large, very ripe, bananas
1/2 cup coconut sugar
1/4 cup coconut oil, melted
1/2 cup coconut cream (if you don’t have any coconut cream, scoop off the cream from a can of coconut milk)
2 tsp vanilla extract
1 cup shredded, unsweetened, coconut (1/4 cup reserved)
1/3 cup high cacao content chocolate chips

Instructions:

  • Preheat oven to 350F. Line muffin tin with parchment paper or reusable silicon liners.

  • In a large bowl, combine the flour, baking soda, baking powder, and salt, and whisk together.

  • In a medium bowl, mash bananas with a fork. Add in sugar, oil, cream, and vanilla, and combine. Pour wet mixture into dry and stir with a large spoon.  Stir in 3/4 cup of shredded coconut and chocolate chips.

  • Spoon muffin mix into the tins and sprinkle with remaining coconut.

  • Bake for 22-25 minutes until slightly brown around the edges and an inserted toothpick comes out clean.

  • Cool completely and store covered with a dish towel to enable air circulation.

Note: I like to set half the batch aside to freeze for lunches and watch the others get devoured in just a few days. Enjoy!

The Ultimate Cookie

Ultimate Cookie.jpg

What makes a really good cookie?

And by good, I mean health benefiting, energy boosting, and super satisfying, just to be clear. A truly good cookie can be everything you want it to be AND make your body, mind, and soul happy.

What do we love most about cookies?  They’re chewy, sweet, salty, satisfying, and usually contain chocolate.

When constructing the healthy cookie, we can honour all of these delicious qualifications with a few simple alterations to the average cookie recipe.

Healthify Your Cookie:

  • Chewiness: something to hold your cookie together. Some good health benefiting suggestions: chia + water, ground flax +
    water, eggs, and nut butters.

  • Sweetness: oh so necessaire!! What’s key to gaining ground in the daily health challenge is to swap out those refined sweetness wannabes (and I mean permanently) for body-loving goodness such as honey, maple syrup, bananas, or dates.

  • Salty: this one’s easy! Just say no to iodized salt. For true mineral uptake and to receive actual nutrition from salt, choose good quality sea salt or pink himalayan salt.

  • Satisfaction: what makes a cookie’s satisfaction meter shoot through the roof is not the sugar and chocolate, my friends, it is the fat + carbohydrate + protein quotient. Using all 3 macronutrients in a power snack allows you to feel full longer, to keep your blood sugar levels stable, and to boost your energy and brainpower in a way that doesn’t mess with your metabolism. Some ideas: for good fat: coconut oil/nuts/seeds; good protein: nuts/seeds/hemp hearts; and good carbohydrates: oats/oat flour/almond meal/banana.

  • Chocolate: be choosy about chocolate! Real dark chocolate is full of beneficial minerals and antioxidants, but don’t let the store shelves fool you! There are many variations on chocolate out there will a LOT of added nonsense.  Find some dark goodies with as few ingredients as possible (3), look for cacao in the ingredients list and choose minimal sweetness.

Here’s my latest and most ingenious cookie recipe that I am so proud of and that my family and I did the kitchen happy dance for when I first took them out of the oven! The absolute bonus? They’re SO easy!

The Ultimate Cookie

ultimate-single-cookie.jpg

2 Tbsp chia seeds + 2 Tbsp water
2 ripe bananas
⅓ cup honey
⅓ cup almond butter
1 tsp vanilla
½ heaping tsp cinnamon
Good pinch of sea salt
¼ cup hemp hearts
1 ½ cup oats
⅓ cup raisins
⅓ cup chocolate chips

  • In a small bowl, whisk together chia seeds and water and let sit 10 minutes.

  • In a medium bowl, whisk wet ingredients together with a fork.

  • Add in dry ingredients and combine. Fold in raisins and chocolate chips. Form into cookies of whatever size you like and place on a parchment lined baking sheet.

  • Bake at 325 for 25 mins.

Vanilla Cashew Coconut Milk

cashew-milk-.jpg

Making your own nut milk has unending health benefits.
The store bought ones are mostly water, loaded with preservatives to extend shelf life, sweetened with added sugars, and bulked up with stabilizers and thickeners.

One of the most common additives we find in store-bought nut milks is carrageenan. There are piles of studies that link this preservative to intestinal inflammation, liver & colorectal cancers, as well as immune suppression and fetal toxicity & defects.  Packaged nut milks also tend to have the addition of health depleting vegetable oils and are often fortified with vitamins and minerals that are difficult to absorb and may stress the digestive system and the kidneys.

Making nut milk your self ensures that you know exactly what’s in there.

There is no processing that removes the nutrient qualities of the nuts (or the coconut in this case), you get to choose your quality of water, you may sweeten it with whatever you like or omit what you don’t, and the satisfaction just has no substitute.

It may seem overwhelming to think about regularly pulling off homemade nut milk to feed your family. But honestly, once you get into the groove of soaking the night before and allotting 10 minutes of blending and squeezing, it becomes something far more attainable than just giving it a pass because it’s easier to buy it. The benefits far out-weigh the hassleand it feels pretty good to watch your loved ones glug down your homemade goodness.

This here is our current most favourite day-to-day nut milk that we consume in our house. Feel free to swap in the nut of your choice or reduce the sweetness. I’ve been using cashews lately because they are creamy and more affordable than almonds, but this milk is wonderful with almonds.

Even if you are unable to keep up with the homemade nut milk demands, just give it a try a few times and see how it feels. My guess: it’s gonna feel pretty darned good.

Print

Vanilla Cashew Coconut Milk

Prep Time: 10 minutes

Total Time: 10 minutes

Category: Breakfast, Drink, Snacktime, Anytime

Cuisine: Vegan, Real food, Nutrient-dense, Vegetarian

Yield: 6-8 servings

jar milk.jpg
  • Ingredients

    • 1 cup cashews, soaked overnight

    • ½ cup shredded coconut, soaked overnight

    • 5 cups water

    • 2 medjool dates

    • 2 tsp vanilla

    • Pinch sea salt

Instructions

  1. Soak cashews and coconut overnight.

  2. Drain and rinse cashews and coconut.

  3. Place all ingredients in a blender and blend until smooth and creamy.

  4. Strain through a nut milk bag, squeezing as much liquid as possible, and transfer to a large glass container.

  5. Will keep for 3-5 days in the fridge.


Be the kitchen super star I know you can be.
Know what’s in your food & make it your self.

3 After-School Smoothies Your Kids Will Love

blackberry-smoothies-.jpg

Every parent is familiar with the after school blood sugar crash. The kids come home from school, rockin’ the grumps, dragging their feet, dumping their backpacks and mitts and hat and jacket and whatever else they’ve got all over the floor while they whine that they are SOOOOOOOOOO hungry! They “can’t handle anything” and must eat right this minute!
When you make a suggestion, they let out an exasperated sigh and give you the look of hangry death.

I hope you are laughing (and not crying) by now, because you’ve seen this a thousand times.

Well, fellow Feeding-Hangry-Kids Enthusiasts, I’ve got a plan for you:

Make it a smoothie.
In fact, let them make it themselves. 

We’ve been on the after-school smoothie train here for a while and let me tell you, it’s changed the atmosphere in our house considerably. Ok fine, so the dumping of all the clothing is still a work-in-progress (you got me there), but my son will often come in from school and head straight for the freezer. He’ll pull out whatever frozen fruit we have and line up some other tasty ingredients on the counter (often coconut milk, hemp hearts, almond butter, vanilla, cacao) and hit up the blender. It is such an effective way to nip the hangry quickly, deliciously, and plus, he’s become quite the smoothie maker (we are still working on the cleaning up part  ).

Here are some of our favourite recipes that have become staples over the last few years. I will often use these recipes with Kids Cooking Camps and after-school programs and the kids love to try coming up with their own creations. I believe that giving kids some reins in the kitchen early is a great way to set them up with the desire to cook. It also nurtures a more connective relationship with food and provides them with some basic guidelines for good nutrition & a general set of kitchen skills.

Good Morning Sunshine

1 ½ cup spinach (or other leafy greens)
1 cup coconut water
1 orange, peeled and diced
1 cup frozen mango or pineapple or a mix of both
Juice of 1 lime
Pinch of salt

  • Place all ingredients in your blender and blend until smooth.

Strawberry Shortcake Smoothie

1 cup frozen strawberries
1 cup coconut milk
¼ cup grated beets
1-2 handfuls of chopped spinach
2 Tbsp hemp hearts
1-2 Tbsp honey (optional)
1 Tbsp coconut oil
1 tsp vanilla

  • Place all ingredients in your blender and blend until smooth. Serve immediately. Makes 2-3 servings.

chocolate-smoothies.jpg


Afternoon Pick-Me-Up Chocolate Smoothie

½ cup coconut milk
½ cup water
2 Tbsp cacao powder
Pinch salt
½ – 1 whole banana
1 pitted medjool date
2 Tbsp almond butter
1 Tbsp coconut oil
A few ice cubes

  • Place all ingredients in your blender and combine until smooth.

Stay SMOOTH & Don’t let the After-School Hangrys get you down!

Like always, if you try these smoothies and love them, please let me know!!
Better yet, take a pic and tag me on facebook or instagram!

Looking for more healthy kid inspiration?