Desserts

Decadent Chocolate Banana Bread

Double Chocolate Banana Bread.jpg

To be fair, this drool worthy loaf could actually be cake, disguised as “banana bread” in order to make it sound healthier. It’s one of those super decadent & delicious beauties that when you serve it to your friends & family, they won’t have a clue how real food focused, gluten & dairy-free, or vegan, and health supportive it actually is! Ha ha ha (she-devil laughing 😈)!
So, you could totally make it into a larger square brownie pan and call it dessert for sure, serve it up with some coconut whip cream or ice cream and even get away with it at a birthday party. No kidding 😉
Note: Cupcakes/muffins would definitely work too, although you would need to adjust the baking time.

That all being said, it should probably come with a warning: you may want to devour the entire thing in one sitting!! So take appropriate precautions: hide it from smaller fingers or nibbling kitchen invaders, and find a special time to cut yourself a lovely slice, sit down with your novel or your cat, tune in, and savour every bite instead! You deserve it.

Decadent Chocolate Banana Bread

(adapted from: Smitten Kitchen)
Makes 1 loaf
1 flax egg: 1 Tbsp ground flax + 3 Tbsp water
3 medium, overripe bananas
1/2 cup coconut oil, melted
3/4 cup coconut sugar
2 tsp vanilla
1 tsp baking soda
1/2 tsp himalayan sea salt
1 tsp ground cinnamon
1 cup gluten free flour blend (I use this one)
1/2 cup cacao powder (definitely use the good stuff here!)
1 cup high quality chocolate chips
1/2 cup chopped walnuts

  • Preheat your oven to 350F. Line your loaf pan with parchment.

  • In a small bowl, make your flax egg by combining ground flax with water. Set aside.

  • In a large bowl, mash bananas with a fork. Add oil, sugar, vanilla, baking soda, salt, cinnamon, and continue to mash with your fork. Add in flax egg.

  • Add flour and combine well with a fork, batter should be quite smooth. Lastly, stir in chocolate chips and walnuts.

  • Pour batter into lined loaf pan and bake for 45-55 minutes until an inserted toothpick comes out clean. Allow to completely cool before cutting (warning: this will be hard 😫 but you can do it!).

    If you make this banana bread/cake/cupcake/decadent deliciousness, please drop me a comment below and let me know how yours turned out!! And please share around the recipe with others who could use a little chocolatey goodness in their lives ♥️

Intensely Good Raw Key Lime Pie

Key lime.JPG

I’ve made many of these pies in my years as a Nutritionist, but they have continuously evolved. In the beginning, they contained 1 cup or more of Agave Syrup for sweetener, or Soy Lecithin for thickening, neither of which I can feel comfortable about promoting. So I’ve tried many times to get it right: the flavour balance, the consistency, not too sweet, not to tart.
I am finally satisfied.

Of note for this pie: it MUST set in the fridge overnight or you will be attempting to serve up a gooey pile of mush, which is not ideal. So be sure to make this recipe the night BEFORE you serve, and if you are serving up some coconut whipped cream along side, pop those cans of coconut milk in the fridge too so that you are entirely prepared for the dessert challenge and need only that 10 minutes to whip up your cream!! 😉

Intensely Good Raw Key Lime Pie

Key lime crust.JPG

Makes 1 large 8” round pie or 12 individual, muffin sized tarts
Ingredients:
For the Crust:
3/4 cup packed, pitted medjool dates (note, if your dates are dry, soak them in boiling water for 5-10 minutes)
1/2 cup almonds
1/2 cup pecans
1/2 cup shredded, unsweetened coconut
1 tsp vanilla
1/4 tsp salt
1/2 cup oats
For the Filling:
1/2 cup cashews, soaked overnight & rinsed
2 ripe avocados
2/3 cup freshly squeezed lime juice
1/2 cup coconut cream
2/3 cup maple syrup
2/3 cup coconut oil, melted
1/4 tsp salt
Instructions:

  • For the crust, blend all ingredients in your food processor until a coarse meal is formed. Mix should stick together. Press evenly into a greased pie plate with wet hands, bringing the crust mix up the sides. Place crust in the fridge while you make the filling.

  • For the filling, combine all ingredients in your food processor until smooth (this may take several minutes), scraping the sides a few times. Pour filling over your crust and set pie in the fridge or freezer overnight. If serving from the freezer, allow pie to defrost roughly 20minutes before serving.
    Serve pie with coconut whipped cream and fresh raspberries, if you have them 😋

Coconut Whipped Cream

Whipped cream berries.jpg

Simple.
Easy.
Delicious.
Dairy-free whipped cream.
Need I say more?
Note: Coconut milk cans MUST be refrigerated overnight in order for this cream to whip properly. DO NOT SKIP THIS STEP!

Coconut Whipped Cream

Ingredients:
2 cans full-fat coconut milk (refrigerated overnight)
Note:
You could also use cans of coconut cream, your volume will increase slightly.
2 Tbsp maple syrup
2 tsp vanilla

Instructions:

  • Place your beaters and a medium glass/stainless bowl in the freezer for 10 minutes.

  • Open coconut milk cans upside down, pouring off the coconut water (reserve for smoothies 😉) and remove only the cream into your cold bowl, adding all other ingredients.

  • Whip with a hand mixer until thick and creamy. Serve immediately.

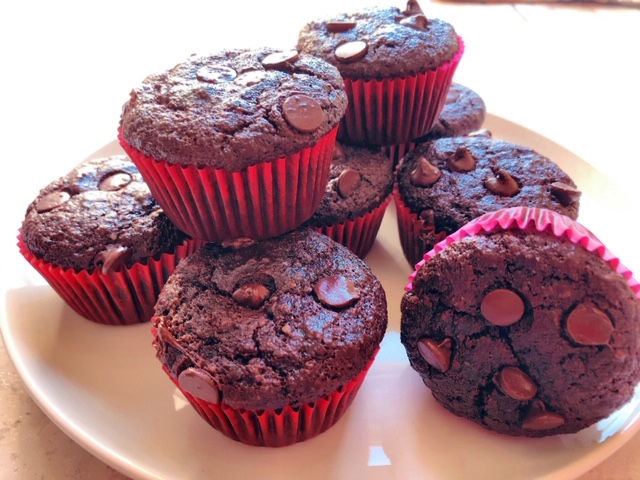
Double Chocolate Banana Cupcakes

Double Choc cupcakes.JPG

Yes these are decadent.
And chocolatey.
And an absolute treat.
And yes, you could make these for a birthday party or special occasion.
And yes, all taste buds would be satisfied and delighted and wonder where you got the recipe 😉
But.
BUT.
No, you needn’t wait.
No, you needn’t deny yourself these delicious chocolate banana cake-like delights, simply because no one is having a birthday or a party or an event of any kind at all.
Just make them because they are yummy and satisfying. No guilt. No shame. No negative BS of any kind necessary at all.
YES! You have my approval & support. Make these cupcakes just because you want one and eat it with intent and enjoyment and explore the sensory experience and feel really good about it.

Inspired by overripe bananas and a, perhaps hormonally encouraged, desire for something chocolate, these are SOOOOOOOO good. And easy. And if you eat anything like we do at our house, you’ll have most of these ingredients, if not all, on hand. Please enjoy them in a way that feels good to you. If you have a tendency to eat too many goodies when you have them hanging around then share them with your neighbours or friends or your neighbours friends or pop them in the freezer and eat one every now and again ☺️

Double Chocolate Banana Cupcakes

Choc cupcakes.JPG

Makes 12 Regular Size Cupcakes
Prep & Bake Time: 35 minutes

Ingredients:
2 large overripe bananas (really really dark brown & gross looking is best!)
2 Tbsp maple syrup
3 large eggs
2 cups almond flour
1/2 cup cacao powder
1/2 tsp salt
1 tsp cinnamon
1/2 tsp baking soda
3 Tbsp hemp hearts
2 tsp vanilla
1/3 cup coconut sugar
3/4 cup good quality chocolate chips

  • Preheat the oven to 350F and line a muffin tray with muffin cups.

  • In a large mixing bowl, mash banana with a fork until mushy and smooth. Add all other ingredients, except chocolate chips, and continue to mix with a fork. Finally, mix in 1/2 cup of chocolate chips and spoon out batter into your lined muffin cups.

  • With the last 1/4 cup of chocolate chips, sprinkle tops of muffins with roughly 3-4 chips and lightly press them into the batter.

  • Bake for 20 - 25 minutes until set and an inserted toothpick comes out clean. Allow to cool before serving, then devour!

    If you make these cupcakes, please let me know how they turned out for you!! Leave me a comment here or better yet, share a pic on instagram and tag me so that I can see your beauties!


Happy Mama Hormone Balancing Chocolate Mousse

Hormone-Choc-Mousse.jpg

If you are a woman, or know a woman, you need this recipe.

That’s it.

The ladies crave chocolate, okay?! Particularly at certain times during their cycle. There is a reason for this and it goes beyond a typical chocolate craving: women crave chocolate during the week leading up to menses because as the body prepares to lose extra volumes of blood, it demands more nutrients, particularly minerals. Real, unprocessed, high-cacao content chocolate (no, not mars bars & snickers, my Loves) is very high in minerals and the perfect mineral booster pre-menses (in small doses of course!). Eating a particularly nutrient-dense diet during this time encourages regular hormonal function, decreasing excess inflammation and reducing stress on the adrenals and the endocrine system.

Other Hormone Balancing Ingredients in this Recipe:

  • Avocado: Full of fiber, potassium, magnesium, vitamin E, B-vitamins, and Folic acid, avocados are a powerhouse food for hormone balance. They are a great choice for balancing insulin metabolism in your body and are also anti-inflammatory.

  • Coconut Oil: Provides necessary building blocks for proper hormone function, stimulates the immune system & metabolic function, and helps to balance mood disruptive blood sugars 

  • Tahini: I love love love tahini and use it liberally in many of my recipes. This beauty seed butter is loaded with phosphorous, magnesium, potassium, iron, and is one of the best plant-based sources of absorbable calcium. It is also helpful in liver detoxification, is high in protein, is alkaline, and promotes healthy skin and cell growth.

  • Maca: Maca is an endocrine adaptogen, gaining a gleaming reputation for its positive influence on hormone regulation. Maca stimulates and nourishes the hypothalamus and pituitary glands, which can have positive influences on the thyroid, pancreas, adrenal, ovarian and testicular glands.

My Dear Ladies:
Eat Chocolate. Not Too Much. Choose Good Quality. Eat with Joy.


Print

Happy Mama Hormone Balancing Chocolate Mousse

Choc-Mousse-2.jpg

Ingredients

  • 1 avocado

  • 1 Tbsp coconut oil

  • 2 Tbsp cacao powder

  • 2 tsp maca powder

  • 1/8 tsp sea salt

  • 1 Tbsp honey

  • 1 Tbsp tahini

  • 1/4 tsp vanilla

Instructions

  1. Combine all ingredients in your food processor or blender and blend until smooth.

  2. Serve immediately.

  3. Number of servings: 1 

Want to learn more about balancing hormones?


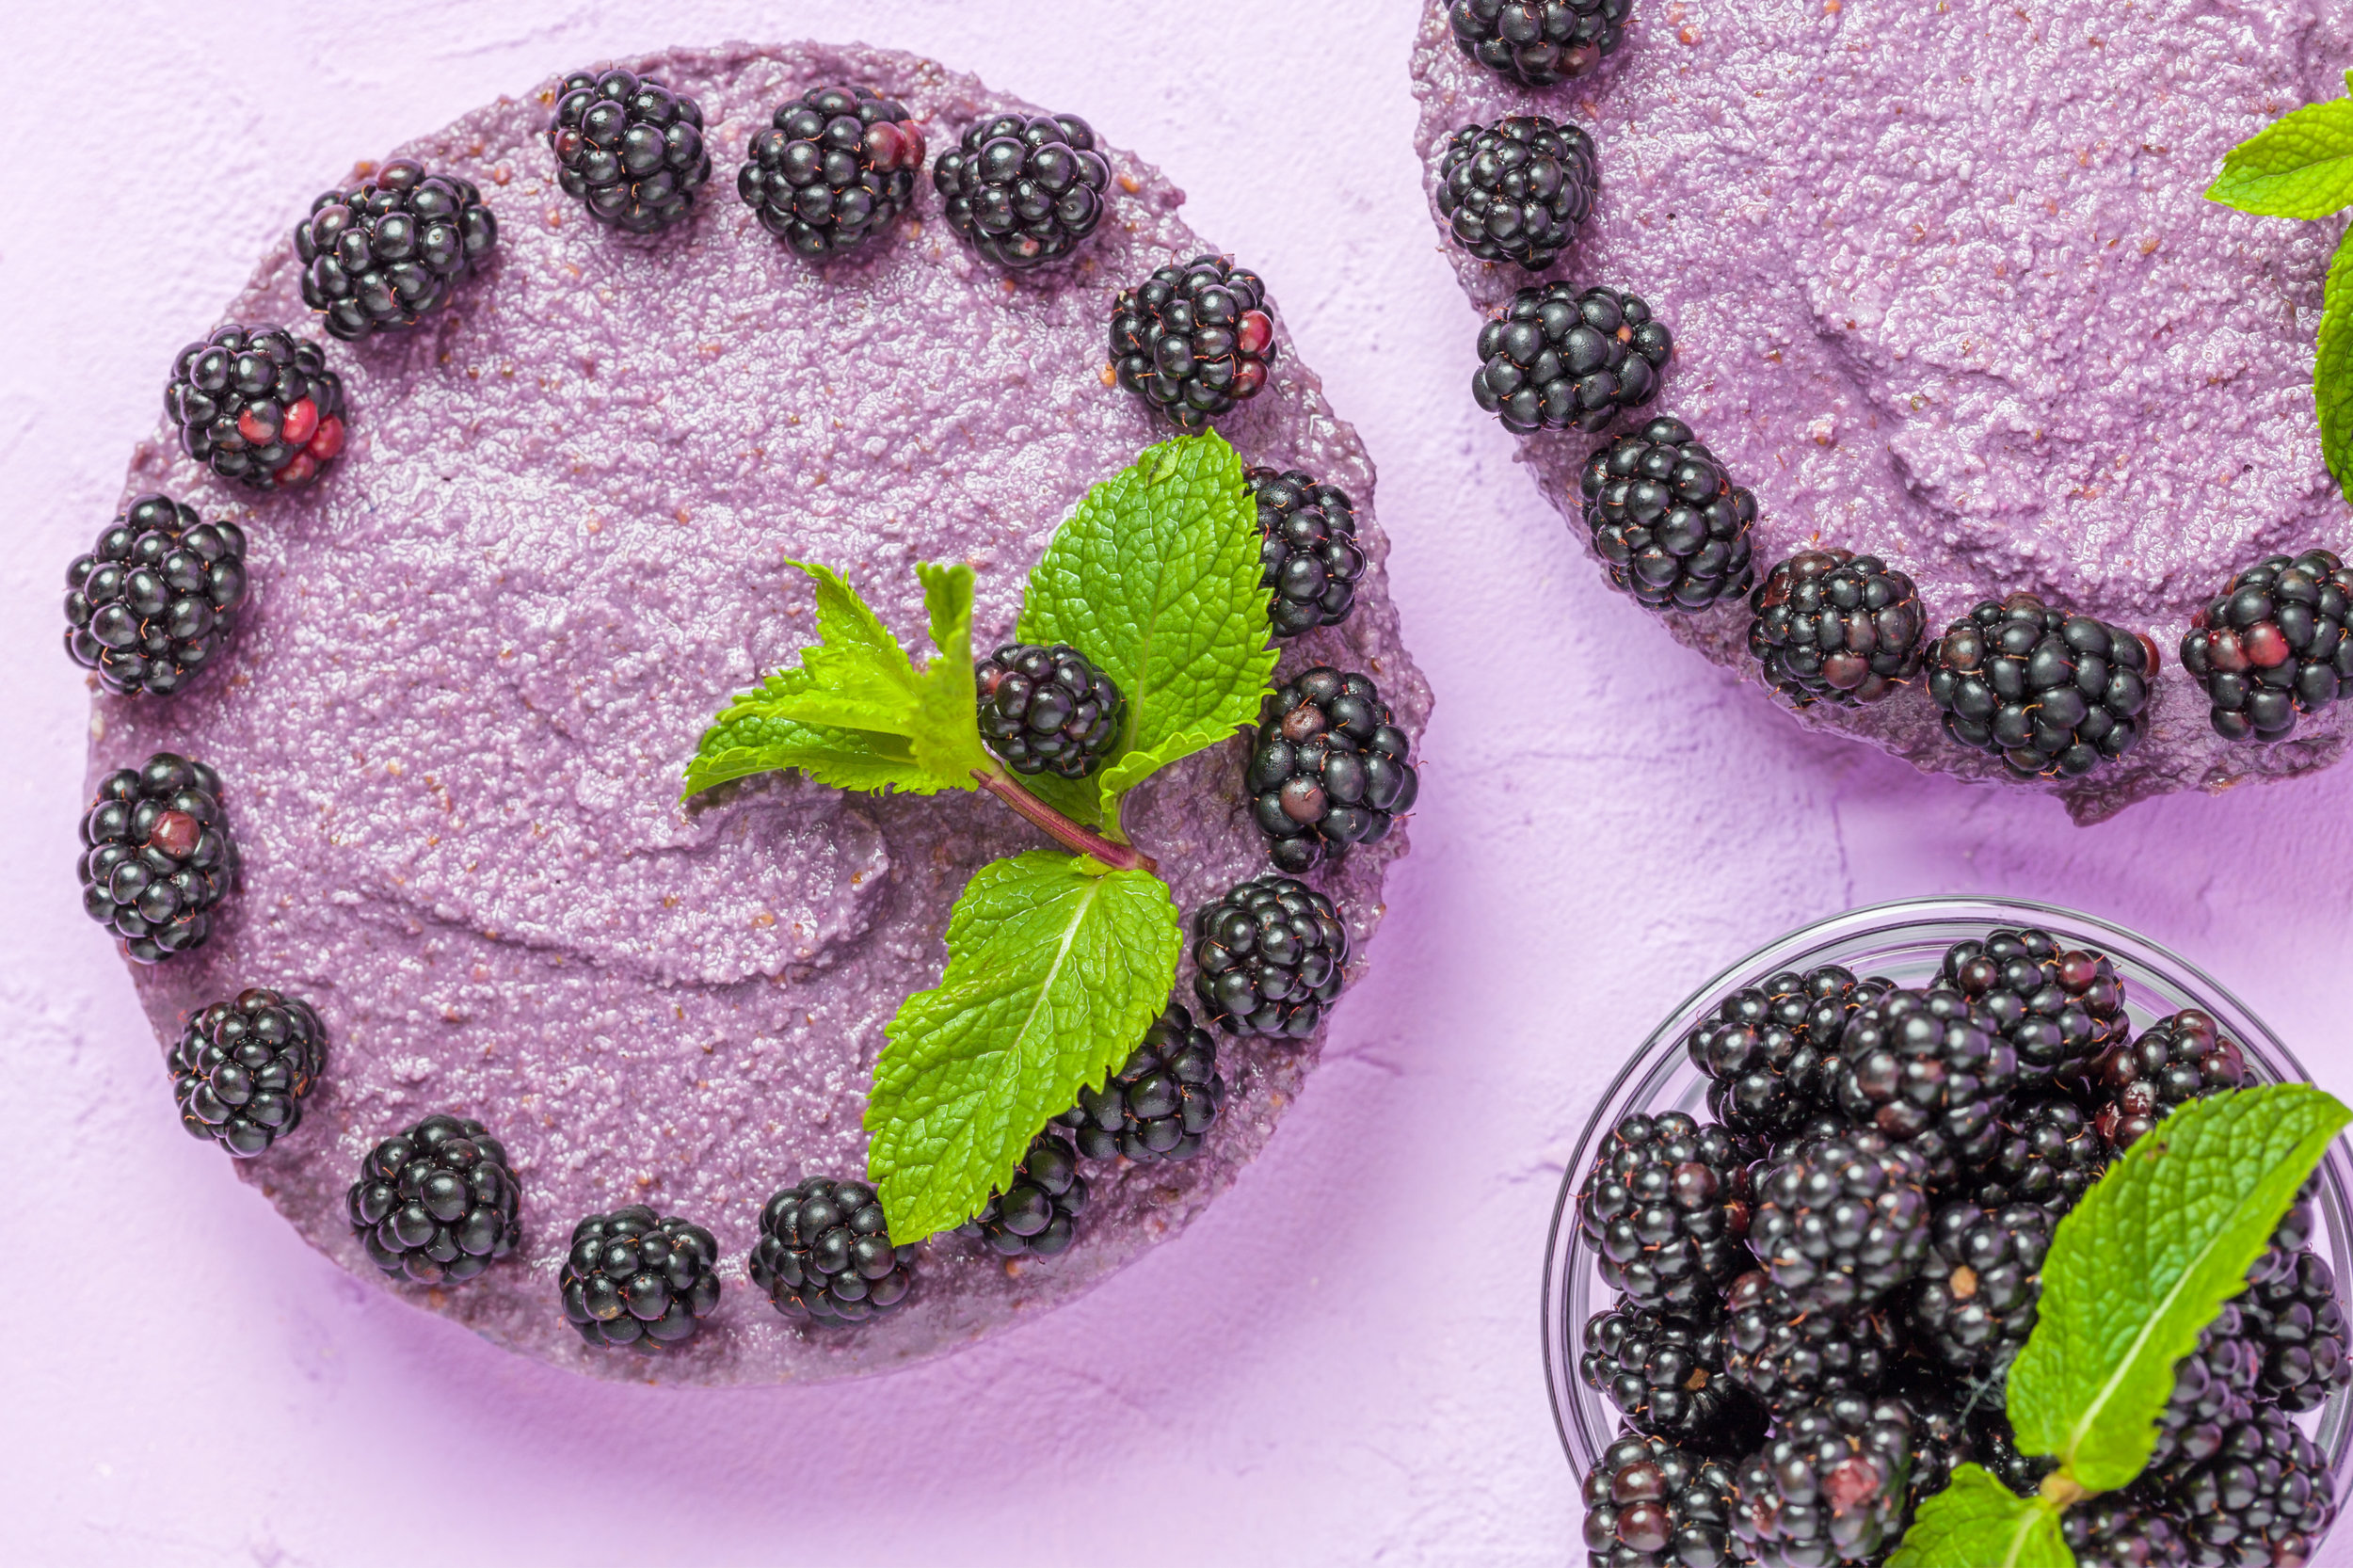
Blackberry Lemon Cashew Cheesecake

Blackberry Cheesecake (1).jpg

It all started with a vision (it usually does) of rich purple hues, a little tartness, a little sweetness, and a whopping load of flavour.  This recipe is really easy and loaded with high-quality, nutrient dense ingredients, which I love.  It finishes without the heaviness often accompanied by rich, sweet desserts and will leave you with energy as opposed to weight. I love this cake, it’s at the top of my list at the moment.  I just used this recipe at a Vegan Cooking workshop last weekend and it was a total hit!
The only warning I have for you is that this must be made the night before to allow time for the cashew filling to set.  I would slice it straight out of the freezer, but leave it to warm up a bit before serving.

Enjoy. Share. Or don’t. Above all, feel good about this one.

Lemon Blackberry Cashew Cheesecake

Ingredients

Crust:
1 cup medjool dates
½ cup pecans
½ cup almonds
¼ cup shredded, coconut
1 tsp vanilla
Pinch of salt

Filling:
1 ½ cups cashews, soaked overnight
1 cup blackberries
1/3 cup fresh lemon juice
1/3 cup maple syrup
1 tsp vanilla
¼ cup coconut cream (from a can of coconut milk)

Instructions

  • To make the crust, combine all ingredients in your food processor and process until well combined and mixture sticks together. Press into the bottom of a lined 7” round spring-form cake pan. Place in the freezer.

  • For the filling, combine all ingredients in food processor and process until smooth (this make take several minutes), scraping sides. Pour over crust and gently tap cake pan to settle ingredients. Place in the freezer overnight.

Not much more to say about this one, but ENJOY!

If you try this recipe, please leave a comment below and let me know how it went!

Ginger Plum Crisp

Ginger Plum Crisp.jpg

It is Fall Harvest and plums are in abundance! This crisp is super simple but really really good. Gluten-free and made will all ingredients that live in my house, it’s an easy one to pull off for a dinner party, potluck, or just because there are loads of plump purple goodies begging to be baked! I served the leftovers to my boys in the morning with a dollop of coconut kefir and we all felt good about that!

plums-for-crisp.jpg

Print

Ginger Plum Crisp

Prep Time: 15 minutes

Cook Time: 45 minutes

Total Time: 1 hour

Category: Dessert, Breakfast, Snack, Tea time

Cuisine: Vegan, Real food, Nutrient-dense

Serving Size: 6

plum crips baked.jpg

Ingredients

  • 3 cups diced plums

  • 1 heaping Tbsp minced ginger

  • 2 Tbsp maple syrup

  • Good pinch of sea salt

  • For the Topping:

  • 1 cup oats

  • 1/3 cup oat flour

  • 1/4 cup slivered almonds

  • 1 tsp cinnamon

  • 1/2 tsp ginger powder

  • 1/4 tsp sea salt

  • 2 Tbsp coconut sugar

  • 1 Tbsp maple syrup

  • 3 Tbsp melted coconut oil

Instructions

  1. Preheat oven to 350F.

  2. In a medium bowl, combine plums, minced ginger, maple syrup, and sea salt. Spread evenly along the bottom of a small glass or ceramic baking dish (mine is 6 x 8).

  3. For the topping, combine all ingredients in your mixing bowl and spread over top of the fruit bottom.

  4. Bake for 40-45 minutes until edges begin the brown and you see the juices boiling along the sides.

  5. Serve with coconut whip cream or coconut vanilla ice cream.

Layered Lemon Chocolate Cheesecake

Layered-cake-side-.jpg

Creamy Coconut Lemon Filling meets Avocado Chocolate Mousse.
Oh.
Yes.

This cake not only looks spectacular, inciting noises of mmm’s and ahh’s, it is also quite easy to whip up. It’s not overly sweet, which I love, the decadence takes care of providing so much flavour and nutrient density, that extra sweetness is just unnecessary. As with all raw cheesecakes, you do need a little fore thought, as these decadent desserts need to set overnight in the freezer. I will usually make a layered style cake like this on a day when I’m puttering around the house or am doing some batch cooking or prep. It’s best to let each layer harden before adding the next, so don’t rush this process.
Do feel free to make this style of cheesecake your own, depending on what you have on hand or what’s in season. You may feel like adding a cup or so of fresh raspberries or peaches to the middle layer or covering the chocolate mousse with toasted coconut flakes and raw cacao nibs. Note on the chocolate mousse layer, this also makes an incredible icing - you can increase the sweetness a little, if you like, and use it as a chocolate frosting for cupcakes or chocolate cake 😋. Definitely be careful not to leave it unattended on your kitchen counter, as it may gain some finger marks or mysteriously lose volume….
Any which way, I have ultimate confidence in the satisfaction level of this layered beauty.
However you make it, share it, and be sure to savour every bite!

Layered Lemon Chocolate Cheesecake

Prep Time: 35 minutes
Total Time: 35 minutes + 1 hour 20mins for freezing time
Category: Vegan, Dessert, Cheesecake, Decadent
Cuisine: Vegan, Real food, Nutrient-dense, Vegetarian
Yield: 10-12

Layered-chz-cake.jpg

Ingredients

For the Crust:
1/2 cup pecans
1/2 cup almonds
1/2 cup shredded coconut
1 cup medjool dates (or other soft dates), pitted
2 Tbsp raw cacao nibs
1/4 cup cacao powder
Good pinch of salt
A little water if needed (2 Tbsp)

For the Cashew-Lemon Cheesecake:
2 cups soaked cashew pieces (soaked at least 4 hours)
1/4 cup fresh lemon juice
1 cup coconut cream
2 tsp vanilla
1/4 tsp salt
1/3 cup maple syrup/honey

Chocolate Avocado Mousse:
2 ripe avocados
1/2 tsp salt
1/4 cup melted coconut oil
1/2 cup cacao powder
2 tsp vanilla
1/3 cup maple syrup/honey

Instructions

  • For the Crust: Combine all ingredients in your food processor and process until a coarse meal forms (do not over-process or it will lose it's crunchy-goodness appeal). If the mix is quite dry, add a few Tbsps of water until it sticks together. With wet hands, press crust into a lined 8 x 8 springform cake pan. Place cake pan in the freezer for 10 - 20 minutes until set.

  • For the Cheesecake Filling: Combine all ingredients in your food processor and combine until smooth. This may take several minutes. Note: if it looks like the mixture has curdled, just continue processing, it will become creamy with a little patience. Pour over crust and return to the freezer to set for at least 1 hour.

  • For the Chocolate Mousse: Combine all ingredients in your food processor and combine until smooth. Pour over top of the hardened cheesecake and smooth top with a spatula. Return cake to the freezer and allow to set overnight.

  • When it is time to remove the cake from the pan, run a thin knife under very hot water and slide it along the sides of the pan. While still quite frozen, use this warmed knife method to cut the cake into slices. I recommend allowing the cake to soften before serving - rest on the counter for 15-20 minutes.

    *Notes: It is important to remember to soak the cashews overnight the night before. The cake will also need an hour to harden in between adding the cashew layer and topping with the mousse.