Dairy Free

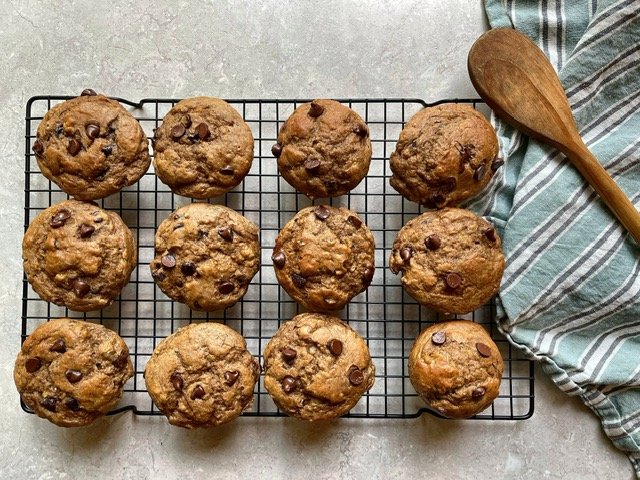
Simple Banana Oat Muffins

Having a teenager around means that having grab & go real food goods available makes for less standing in front of the wide open fridge door staring 🙄
While I don’t do a ton of baking, I do like to have some healthy snacks on-hand as often as possible. We are an active family and are often running out the door for a hike, bike, a climb, or a wind foiling session. When I can create recipes that I feel good about feeding my family AND that are also quick & easy to whip up, it’s just one less thing that I can not worry about, if just for a few days.

NOTE: If you don’t have oat flour, you can make it by popping oats into your food processor and blending until nice and smooth. You’ll need about 3 cups of oats for this recipe. The flour will work the same in the muffins, the texture may vary slightly.

Simple Banana Oat Muffins

Makes 14 - 16 Regular Muffins
3 large bananas
1/4 cup applesauce
1/3 cup maple syrup
2 eggs
2 tsp vanilla
2 3/4 cups oat flour
1/4 tsp salt
1 tsp baking soda
1 tsp baking powder
2 tsp cinnamon
3/4 cup good quality chocolate chips
Optional Add Ins: chopped walnuts, raisins, or hemp hearts

  • Preheat the oven to 350F.

  • In a medium bowl, mash bananas with a fork. Add all other wet ingredients and whisk together until smooth.

  • Add in the flour, salt, baking soda & powder, and cinnamon, and stir until smooth. Stir in 1/2 cup of the chocolate chips.

  • Divide your batter amongst 14 - 16 lined, regular muffin cups. Top each muffin with a few of the remaining chocolate chips. Bake for 25 - 28 minutes, or until an inserted toothpick comes out clean.

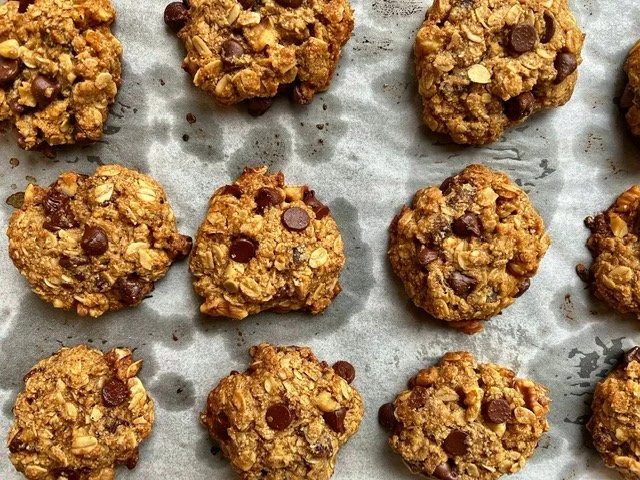
Chewy Oatmeal Cookies with Apricots & Walnuts

As you may be aware already, I LOVE me a solid cookie recipe that’s easy, comprised of all real food ingredients, quick, foolproof, and positively delicious! And here it is!

There’s nothing too fancy about these cookies, except that they have DRIED APRICOTS, which gives them a unique flavour AND enhances their nutrient punch. In our house, we LOVE organic dried apricots and eat them fairly regularly, partly because of their nutrient value, partly because we simply love them. Nutritionally, what I love about dried apricots is that they are relatively high in iron, as well as vitamin A, both essential nutrients the body needs to get through the diet regularly. They also contain some potassium & calcium, and are a good source of soluble fiber, making them supportive of good digestion. Be sure that you choose ORGANIC dried apricots, as the bright orange, non-organic ones, have been preserved with sulfur dioxide, which irritates the respiratory tract and can contribute to restricted breathing, asthma, and increased risk of respiratory infection. Look for a good organic source (they should be brown in colour) and give them a little smush to see if they are moist and soft.
Better yet, dehydrate some fresh apricots, when in season, and store them to use throughout the rest of the year (you keener you!).

Substitution Ideas:

Nut-free: Although I haven’t tried yet, you could try substituting Oat Flour for the Almond Flour and either omit the Walnuts or replace them with Sunflower Seeds or Hemp Hearts or a mix of both
Vegan: Substitute the egg with either a Chia Egg (1 Tbsp chia seeds + 3 Tbsps water) or a Flax Egg (1 Tbsp ground flaxseed + 3 Tbsp water)
Apricots: Any dried fruit would work well here: dried apples, mango, cherries, or cranberries/raisins
Coconut Sugar: Any granulated sugar will work as a substitute here, although I’m not a fan of white or brown processed sugar. A demerara/turbinado or cane sugar would be a better choice.
Chocolate-free: Not recommended 😉

Easy Chewy Oatmeal Cookies with Apricots & Walnuts

Makes about 16 Medium Cookies
1 cup almond flour
1 cup oats
¼ cup ground flaxseed
1 tsp baking powder
3/4 tsp cinnamon
1/4 nutmeg
1/2 sea salt
1/3 cup coconut sugar
1 egg (sub a chia or flax egg for vegan)
1 1/2 tsp vanilla
1/2 cup coconut oil, melted
1/2 cup chocolate chips
1/3 cup chopped walnut pieces
1/3 cup chopped dried apricots

  • Preheat oven to 350F.

  • Whisk together all dry ingredients.

  • Whisk together all wet ingredients.

  • Add wet ingredients into dry, then stir in chocolate chips. Walnuts, and apricots.

  • On a lined pan, place 1-2 Tbsp sized balls, 2-3” apart, and flatten them slightly (mix will be quite wet).

  • Bake for 20 - 25 minutes, until lightly browned around the edges.
    NOM NOM Cookie Time! 🍪

I would HIGHLY suggest doubling the recipe and popping half in the freezer for lunches, snacktime, or a sweet treat hankering!

ENJOY! As always, if you make these cookies, please leave me a comment below and/or take a pic & post on Facebook or IG - don’t forget to tag me!


Easy Coconut Yogourt

Decadent and delicious in that thick & sour way that yogourt is, this recipe is guaranteed to be a win, can save money on those store bought variations that are not that good, and is also incredibly gut supportive.

I’ve been making my own coconut yogourt for quite some time now and have given this recipe out countless times to workshop participants and clients. Those non-dairy folk who make it regularly, find that it opens many doors, love the versatility, and are often surprised by how easy it is to keep up with. This is one of those staple recipes that turns out every single time and is incredibly reliable.
To remind you again: this is SUPER EASY!!

About Coconut Kefir/Yogourt

The term Kefir refers to a fermented milk beverage.  Traditionally made with dairy milk, coconut kefir is much thicker with the consistency of yogourt, slightly sour, including all the health boosting goodness of a probiotic rich food.

Health Benefits of Coconut Kefir/Yogourt:

Stops sugar cravings
Aids in digestion and reduces inflammation in the intestines
Liver cleansing
High in minerals (calcium, potassium, zinc, selenium)
Cleansing effect on the endocrine system (thyroid, adrenals, pituitary, ovaries)
Increases energy
High in good quality fat
Supportive for heart health

Easiest Coconut Kefir/Yogourt

1 can full fat organic coconut milk (best brands to use for this recipe: Thai Kitchen & Earth’s Choice - the Cha brand will curdle)

1 probiotic capsule (50 billion) - if you have a probiotic with a lesser strain count, add as many as you need to make a 50 billion total

  • In your blender, blend the coconut milk can contents until smooth - don’t skip this.

  • Open the contents of your probiotic capsule (s) into a sterilized glass jar. Pour the blended coconut milk over the probiotic bacteria and stir with a non-metallic spoon or spatula until well-combined. Fasten your lid on loosely.

  • Place your jar on the counter to ferment for 24 - 48 hours (not in direct sunlight). You’ll know your yogourt has fermented long enough when there are tiny little bubbles in the top layer and it smells a little sour. You can also taste it with a non-metallic spoon to see if it has that desired sourness. Mine always takes 2 days.

  • Once the fermenting process is finished, transfer the yogourt to the fridge. It will thicken once refrigerated, so don’t worry if it seems runny.

  • Your coconut yogourt will keep refrigerated for 5 - 7 days.

My Favourite Ways to Include Coconut Yogourt in the Diet:

✓ In Smoothies
✓ Topped with fresh or frozen fruit, a drizzle of maple syrup, & chopped nuts & seeds
✓ As is
✓ With 2 Tbsp of ground flaxseeds to support hormonal health & balance, and for hormone detoxification
✓ In creamy popsicle filling
✓ As a base for creamy sauces: tzatziki, herbed dressings/dips, in avocado lime crema

ENJOY!
If you make this Coconut Yogourt, please leave me a comment and let me know how it went! ♡

Coconut Curry Cauliflower Soup with Ramen

Just.

YUM.

This soup is deeply nourishing and satisfying and originally went without the ramen noodles, but we’ve just decided that it’s better with! You could easily bulk up this soup with some cooked chicken or baked tofu, but we love it just the way it is. This makes an easy, nourishing weeknight meal, that will likely provide you with lunch or dinner a few times over.

Cooking Tip:

SLOW AND LOW IS THE WAY TO GO!
I see a lot of folks these days opting for the Instapot or an Air-Fryer because of the huge upside of convenience. While I do truly understand the demand for quick meal delivery, nutritionally speaking, these are not good options for nutrient value. Both methods are quick cooking and use high heat, having some pretty grave detrimental effects on the nutritional quality of your food and your health long term.

Health Detriments of High-Heat Cooking:

  • Cooking food at high temperatures changes its chemical structure, producing toxic products called NFCs, such as trans-fatty acids (TFAs) and advanced glycation end-products (AGEs), both of which damage blood vessels and can contribute to high blood pressure and hardening of the arteries

  • Advanced Glycation End Products (AGE’s) are a culprit in many disease processes, such as degenerative eye diseases & cataracts, diabetes, heart disease, stroke, renal disease, aging and Alzheimer’s disease

  • Excessive glycosylation leads to impaired bodily functions, decreased immune function, increased autoimmune disease, diabetes, and increased free radical damage throughout the body, thus increased Cancer risk

  • High heat cooking destroys 30 - 50% of mineral value and 90 - 100% of enzymes, which are needed for all metabolic activity in the body

  • Proteins become coagulated, making them less accessible and usable for the body, impacting the body’s ability to break them down and, thus, damaging the digestive system

Coconut Curry Cauliflower Soup

Serves 6-8
3 Tbsp coconut oil
1 large onion, diced

1 tsp salt

4 cloves garlic, minced

2 Tbsp fresh ginger, minced

1/2 a hot pepper, seeds removed and minced (optional)

3 cups chopped cauliflower (about 1 medium)

2 celery stalks, diced
4 cups sliced shiitake mushrooms
1 red pepper, thinly sliced
1 stalk fresh lemongrass, minced, or 1 Tbsp lemongrass paste
4 cups vegetable broth/stock
2 Tbsp red curry paste

1 can of full fat coconut milk
2 blocks of gluten-free ramen noodles
2 Tbsp tamari
1 Tbsp toasted sesame oil

1 Tbsp maple syrup
Juice of 1 lime
1 bunch cilantro
Salt and fresh pepper to taste

  • Heat coconut oil in a large pot on medium. Add the onions and cook until lightly softened. Add salt, garlic, ginger, and saute another few minutes. Add celery, cauliflower, mushrooms and peppers and sauté until vegetables are slightly softened (10 mins). 


  • Heat your broth in a medium pot and whisk in the curry paste.

  • Add the curried broth, coconut milk, and lemongrass. 


  • Bring the soup to a boil and then simmer on low, covered, for 15 mins 
or until the vegetables are tender. 


  • Add your blocks of ramen and simmer another 8 - 10 minutes, stirring with a fork to separate the noodles.

  • Add the tamari, toasted sesame oil, maple syrup, and lime juice. Season with salt and pepper to taste. Stir in 
chopped cilantro and serve. 


ENJOY ♡
If you make this recipe, please let me know in the comments below how much you loved it or what you did differently!

References:
High Heat Cooking & Cardiovascular Disease

Unwanted Health Consequences of High Heat Cooking

Health Dangers of High Heat Cooking

Decadent Chocolate Banana Bread

Double Chocolate Banana Bread.jpg

To be fair, this drool worthy loaf could actually be cake, disguised as “banana bread” in order to make it sound healthier. It’s one of those super decadent & delicious beauties that when you serve it to your friends & family, they won’t have a clue how real food focused, gluten & dairy-free, or vegan, and health supportive it actually is! Ha ha ha (she-devil laughing 😈)!
So, you could totally make it into a larger square brownie pan and call it dessert for sure, serve it up with some coconut whip cream or ice cream and even get away with it at a birthday party. No kidding 😉
Note: Cupcakes/muffins would definitely work too, although you would need to adjust the baking time.

That all being said, it should probably come with a warning: you may want to devour the entire thing in one sitting!! So take appropriate precautions: hide it from smaller fingers or nibbling kitchen invaders, and find a special time to cut yourself a lovely slice, sit down with your novel or your cat, tune in, and savour every bite instead! You deserve it.

Decadent Chocolate Banana Bread

(adapted from: Smitten Kitchen)
Makes 1 loaf
1 flax egg: 1 Tbsp ground flax + 3 Tbsp water
3 medium, overripe bananas
1/2 cup coconut oil, melted
3/4 cup coconut sugar
2 tsp vanilla
1 tsp baking soda
1/2 tsp himalayan sea salt
1 tsp ground cinnamon
1 cup gluten free flour blend (I use this one)
1/2 cup cacao powder (definitely use the good stuff here!)
1 cup high quality chocolate chips
1/2 cup chopped walnuts

  • Preheat your oven to 350F. Line your loaf pan with parchment.

  • In a small bowl, make your flax egg by combining ground flax with water. Set aside.

  • In a large bowl, mash bananas with a fork. Add oil, sugar, vanilla, baking soda, salt, cinnamon, and continue to mash with your fork. Add in flax egg.

  • Add flour and combine well with a fork, batter should be quite smooth. Lastly, stir in chocolate chips and walnuts.

  • Pour batter into lined loaf pan and bake for 45-55 minutes until an inserted toothpick comes out clean. Allow to completely cool before cutting (warning: this will be hard 😫 but you can do it!).

    If you make this banana bread/cake/cupcake/decadent deliciousness, please drop me a comment below and let me know how yours turned out!! And please share around the recipe with others who could use a little chocolatey goodness in their lives ♥️

Healing Coconut Curry Stew

Coconut Curry Stew.JPG

It is not surprising to me that we are seeing more and more folks interested in transitioning towards vegan eating. Time and time again, when evaluating diet styles that are making a difference longterm and ones that are simply a temporary trend, the plant-based or vegan style of eating has the best results. When we are looking at decreasing inflammation in the body, reducing blood pressure and clogged arteries, rebalancing fluctuating mood and mental difficulties, augmenting energy and endurance capabilities, reducing risk for disease development, and increasing quality of life with regards to our planet earth and the economy, we are seeing improvement, consistently.

But people need to choose for themselves, find the education that resonates with them and their lifestyle, and take directives that align with their intuitive nature. I feel as though the one thing that I can do over and over in order to help people make decisions that feel right for their health & meet their individual needs, besides offering dependable information and support, is to provide DELICIOUS & NOURISHING RECIPES.
It is my passion and a gift that I am happy to give (plus this is the BEST way to make a convincing argument 😉).

So here is a most nutrient rich stew that can support thriving health on so many levels: lots of protein, antioxidants, plant based fats, loaded with nutrient dense plants of differing colours, variety, and plentiful in micronutrients & minerals, supportive to the immune system, and warming for the soul 💛.

Enjoy this stew as a weeknight staple, feed it to a crowd, or dish it out into mason jars and give it away as a handmade, heart warming gift. Any which way, it is sure to make your mouth smile and your belly happy!

Healing Coconut Curry Stew

Makes 12 - 14 Servings
Ingredients:
1 large onion, diced
3 Tbsp coconut oil
2 tsp salt
2” ginger, minced
4 cloves garlic, minced
1 - 2 red peppers, sliced
2 cups broccoli, chopped
2 cups mushrooms (any kind), sliced thick
1 can chickpeas, drained & rinsed
2 cups purple cabbage, sliced
2 cans coconut milk (full fat)
4 cups vegetables stock
2 Tbsp red curry paste
1 tsp turmeric
1 tsp cumin
2 tsp curry powder
Lots of fresh pepper
I head kale, stemmed and chopped
Juice of 1 lime
1 - 2 Tbsp tamari
1 Tbsp maple syrup
Fresh cilantro for serving
Instructions:
In a large soup pot, melt coconut oil and saute onions over medium heat until translucent. Add salt, ginger, garlic and prepared vegetables and saute further until fragrant and slightly softened. Add curry paste and all other seasonings and stir until well combined. If pot gets a bit dry, add a little of your stock or water and continue to saute a few minutes more.
Pour stock and coconut milk over your veggies and lower temperature to a low-medium and simmer for about 20 minutes. Add kale, lime juice, tamari and maple syrup and simmer another 10 minutes until all vegetables are cooked through. Taste and adjust seasonings as needed. Serve with fresh cilantro, more lime, and/or toasted cashew pieces - yum! 😋

As with all of my recipes, if you make this stew, please comment here or take a lovely pic and share it on social media (be sure to tag me! 😊).
Help me spread the yummy food vibes and support one another in our effort to feel good about what we eat. LONGTERM.

Intensely Good Raw Key Lime Pie

Key lime.JPG

I’ve made many of these pies in my years as a Nutritionist, but they have continuously evolved. In the beginning, they contained 1 cup or more of Agave Syrup for sweetener, or Soy Lecithin for thickening, neither of which I can feel comfortable about promoting. So I’ve tried many times to get it right: the flavour balance, the consistency, not too sweet, not to tart.
I am finally satisfied.

Of note for this pie: it MUST set in the fridge overnight or you will be attempting to serve up a gooey pile of mush, which is not ideal. So be sure to make this recipe the night BEFORE you serve, and if you are serving up some coconut whipped cream along side, pop those cans of coconut milk in the fridge too so that you are entirely prepared for the dessert challenge and need only that 10 minutes to whip up your cream!! 😉

Intensely Good Raw Key Lime Pie

Key lime crust.JPG

Makes 1 large 8” round pie or 12 individual, muffin sized tarts
Ingredients:
For the Crust:
3/4 cup packed, pitted medjool dates (note, if your dates are dry, soak them in boiling water for 5-10 minutes)
1/2 cup almonds
1/2 cup pecans
1/2 cup shredded, unsweetened coconut
1 tsp vanilla
1/4 tsp salt
1/2 cup oats
For the Filling:
1/2 cup cashews, soaked overnight & rinsed
2 ripe avocados
2/3 cup freshly squeezed lime juice
1/2 cup coconut cream
2/3 cup maple syrup
2/3 cup coconut oil, melted
1/4 tsp salt
Instructions:

  • For the crust, blend all ingredients in your food processor until a coarse meal is formed. Mix should stick together. Press evenly into a greased pie plate with wet hands, bringing the crust mix up the sides. Place crust in the fridge while you make the filling.

  • For the filling, combine all ingredients in your food processor until smooth (this may take several minutes), scraping the sides a few times. Pour filling over your crust and set pie in the fridge or freezer overnight. If serving from the freezer, allow pie to defrost roughly 20minutes before serving.
    Serve pie with coconut whipped cream and fresh raspberries, if you have them 😋

Layered Lemon Chocolate Cheesecake

Layered-cake-side-.jpg

Creamy Coconut Lemon Filling meets Avocado Chocolate Mousse.
Oh.
Yes.

This cake not only looks spectacular, inciting noises of mmm’s and ahh’s, it is also quite easy to whip up. It’s not overly sweet, which I love, the decadence takes care of providing so much flavour and nutrient density, that extra sweetness is just unnecessary. As with all raw cheesecakes, you do need a little fore thought, as these decadent desserts need to set overnight in the freezer. I will usually make a layered style cake like this on a day when I’m puttering around the house or am doing some batch cooking or prep. It’s best to let each layer harden before adding the next, so don’t rush this process.
Do feel free to make this style of cheesecake your own, depending on what you have on hand or what’s in season. You may feel like adding a cup or so of fresh raspberries or peaches to the middle layer or covering the chocolate mousse with toasted coconut flakes and raw cacao nibs. Note on the chocolate mousse layer, this also makes an incredible icing - you can increase the sweetness a little, if you like, and use it as a chocolate frosting for cupcakes or chocolate cake 😋. Definitely be careful not to leave it unattended on your kitchen counter, as it may gain some finger marks or mysteriously lose volume….
Any which way, I have ultimate confidence in the satisfaction level of this layered beauty.
However you make it, share it, and be sure to savour every bite!

Layered Lemon Chocolate Cheesecake

Prep Time: 35 minutes
Total Time: 35 minutes + 1 hour 20mins for freezing time
Category: Vegan, Dessert, Cheesecake, Decadent
Cuisine: Vegan, Real food, Nutrient-dense, Vegetarian
Yield: 10-12

Layered-chz-cake.jpg

Ingredients

For the Crust:
1/2 cup pecans
1/2 cup almonds
1/2 cup shredded coconut
1 cup medjool dates (or other soft dates), pitted
2 Tbsp raw cacao nibs
1/4 cup cacao powder
Good pinch of salt
A little water if needed (2 Tbsp)

For the Cashew-Lemon Cheesecake:
2 cups soaked cashew pieces (soaked at least 4 hours)
1/4 cup fresh lemon juice
1 cup coconut cream
2 tsp vanilla
1/4 tsp salt
1/3 cup maple syrup/honey

Chocolate Avocado Mousse:
2 ripe avocados
1/2 tsp salt
1/4 cup melted coconut oil
1/2 cup cacao powder
2 tsp vanilla
1/3 cup maple syrup/honey

Instructions

  • For the Crust: Combine all ingredients in your food processor and process until a coarse meal forms (do not over-process or it will lose it's crunchy-goodness appeal). If the mix is quite dry, add a few Tbsps of water until it sticks together. With wet hands, press crust into a lined 8 x 8 springform cake pan. Place cake pan in the freezer for 10 - 20 minutes until set.

  • For the Cheesecake Filling: Combine all ingredients in your food processor and combine until smooth. This may take several minutes. Note: if it looks like the mixture has curdled, just continue processing, it will become creamy with a little patience. Pour over crust and return to the freezer to set for at least 1 hour.

  • For the Chocolate Mousse: Combine all ingredients in your food processor and combine until smooth. Pour over top of the hardened cheesecake and smooth top with a spatula. Return cake to the freezer and allow to set overnight.

  • When it is time to remove the cake from the pan, run a thin knife under very hot water and slide it along the sides of the pan. While still quite frozen, use this warmed knife method to cut the cake into slices. I recommend allowing the cake to soften before serving - rest on the counter for 15-20 minutes.

    *Notes: It is important to remember to soak the cashews overnight the night before. The cake will also need an hour to harden in between adding the cashew layer and topping with the mousse.