Dips

Green Goddess Hummus

If you are familiar with my recipes, you know that I’m a BIG fan of quick, easy, AND delicious combinations. This hummus is one of those.

Loaded with quality protein (white beans, sunflower seeds, tahini, hemp hearts), fats (sunflower seeds, tahini, olive oil, hemp hearts) and carbohydrates (beans, tahini, spinach, parsley), this blend of nutrient powerhouses will definitely meet your energy demands and give your tastebuds a happy dance at the same time!

A note on White Beans:

Easier on Digestion than Garbanzo Beans: while I’m also a big fan of chickpeas, the butter beans have a tendency to be a little easier on the digestive system and, for those who struggle with chickpeas 👋🏽, the butter bean is a great substitute (and also provides a nice, creamy texture).

Degenerative Disease Prevention: Both beans and legumes contain a reliable source of non-digested compounds like fiber, phenolics, peptides and phytochemicals that are associated with reduced risk of many degenerative diseases, namely cancer and heart disease.

Cardiovascular Support: The high fiber quotient and mineral makeup of beans have been associated with lowered blood cholesterol and blood pressure, making them an important staple for cardiovascular disease prevention.

Fiber Content: Both beans and legumes have a diverse fiber profile, supportive of healthy digestion, and providing the body with good satiation, which may encourage healthy weight.

Quality Plant Protein: Consuming a diet high in quality plant protein will help keep the body satiated, energized, nourish the muscles, the brain, and support good immune, hormone, and digestive function. All beans are wonderful sources of plant protein and should be mainstays in a healthy, balanced diet.

Green Goddess Hummus

Makes aprox. 2 cups
1 can butter beans
1/3 cup tahini
2 cups packed baby spinach
½ cup packed parsley
¼ cup sunflower seeds
¼ cup hemp hearts
2 cloves garlic, minced
2 Tbsp fresh lemon juice
¼ cup olive oil
1 tsp cumin
½ tsp coriander
1 tsp salt
Fresh pepper
1 tsp maple syrup

  • Place all ingredients in your food processor and combine until smooth.

Easy Coconut Yogourt

Decadent and delicious in that thick & sour way that yogourt is, this recipe is guaranteed to be a win, can save money on those store bought variations that are not that good, and is also incredibly gut supportive.

I’ve been making my own coconut yogourt for quite some time now and have given this recipe out countless times to workshop participants and clients. Those non-dairy folk who make it regularly, find that it opens many doors, love the versatility, and are often surprised by how easy it is to keep up with. This is one of those staple recipes that turns out every single time and is incredibly reliable.
To remind you again: this is SUPER EASY!!

About Coconut Kefir/Yogourt

The term Kefir refers to a fermented milk beverage.  Traditionally made with dairy milk, coconut kefir is much thicker with the consistency of yogourt, slightly sour, including all the health boosting goodness of a probiotic rich food.

Health Benefits of Coconut Kefir/Yogourt:

Stops sugar cravings
Aids in digestion and reduces inflammation in the intestines
Liver cleansing
High in minerals (calcium, potassium, zinc, selenium)
Cleansing effect on the endocrine system (thyroid, adrenals, pituitary, ovaries)
Increases energy
High in good quality fat
Supportive for heart health

Easiest Coconut Kefir/Yogourt

1 can full fat organic coconut milk (best brands to use for this recipe: Thai Kitchen & Earth’s Choice - the Cha brand will curdle)

1 probiotic capsule (50 billion) - if you have a probiotic with a lesser strain count, add as many as you need to make a 50 billion total

  • In your blender, blend the coconut milk can contents until smooth - don’t skip this.

  • Open the contents of your probiotic capsule (s) into a sterilized glass jar. Pour the blended coconut milk over the probiotic bacteria and stir with a non-metallic spoon or spatula until well-combined. Fasten your lid on loosely.

  • Place your jar on the counter to ferment for 24 - 48 hours (not in direct sunlight). You’ll know your yogourt has fermented long enough when there are tiny little bubbles in the top layer and it smells a little sour. You can also taste it with a non-metallic spoon to see if it has that desired sourness. Mine always takes 2 days.

  • Once the fermenting process is finished, transfer the yogourt to the fridge. It will thicken once refrigerated, so don’t worry if it seems runny.

  • Your coconut yogourt will keep refrigerated for 5 - 7 days.

My Favourite Ways to Include Coconut Yogourt in the Diet:

✓ In Smoothies
✓ Topped with fresh or frozen fruit, a drizzle of maple syrup, & chopped nuts & seeds
✓ As is
✓ With 2 Tbsp of ground flaxseeds to support hormonal health & balance, and for hormone detoxification
✓ In creamy popsicle filling
✓ As a base for creamy sauces: tzatziki, herbed dressings/dips, in avocado lime crema

ENJOY!
If you make this Coconut Yogourt, please leave me a comment and let me know how it went! ♡

Easy Vegan Cashew Pesto

Vegan Cashew Pesto.jpeg

We all look for that golden sauce that will boost and brighten a dish, especially when fresh herbs are in season and widely available. This is an easy to whip up pesto with no extra steps of toasting or soaking, that is creamy and smooth and can act as a dip, a sauce, or even a dressing. Oh and it’s rich in flavour, bright in colour, and can uplift a wearied soul in one mouth full!
We’ve been eating it by the spoonful over here - I like to spread it on a rice cake or cracker for a quick snack and my son likes it on toast. As a meal, I would serve this pesto alongside some roasted veggies, as a pasta or gnocchi sauce, over top of baked yams, tossed with roasted cauliflower, or with a piece of fish or chicken, if that’s your style.
Any way you like it, be sure to gobble it up while basil is abound and throw a few jars in your freezer for a fresh hit during the colder months.

Easy Vegan Cashew Pesto

1/2 cup cashews
3 Tbsp hemp hearts
3 cups fresh basil, packed
3 cloves garlic, minced
3 - 4 Tbsp Nutritional Yeast
Juice of 1 large lemon (1/4 cup)
1/2 tsp sea salt
2 - 4 Tbsp unsweetened almond milk

  • Place all ingredients in your food processor and blend until smooth (this will take several minutes). Store in a glass jar for 5 - 7 days in the fridge or for 1 - 2 months in the freezer.


    If you make this pesto, be sure to let me know how it turns out in the comments below! Or better yet, post a pic on IG or FB and give me a tag 😊

Lemon Kale Pesto

Lemon Kale Pesto.jpg

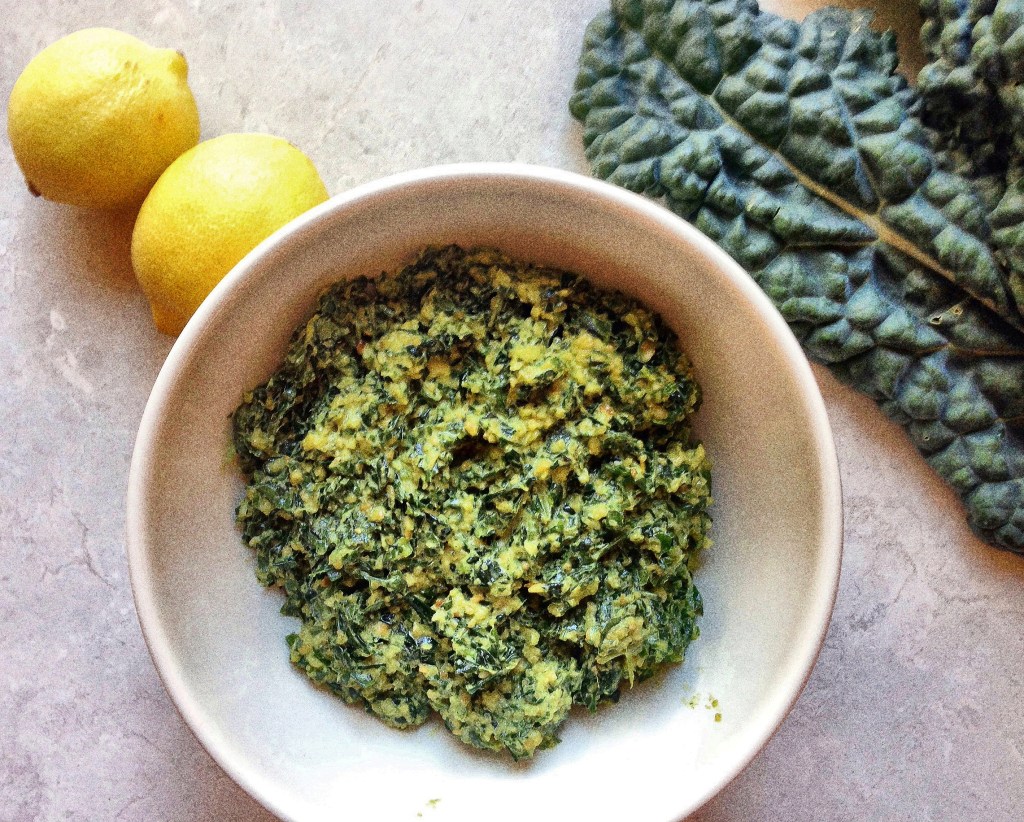
Deep in the summer swing, with armloads of both kale and basil, this pesto came together simply (& deliciously) and has been made several times since (the kids even made it at my Kids Cooking Camp and it was an absolute success)! With the summer days sailing by as fast as they do, I haven’t had much time to post this recipe. Here it is now and, don’t worry, the basil and kale should still be in abundance for a while yet.

So far, we’ve served this up straight with tortilla chips, alongside some lovely barbeque’d salmon, on top of lentil veggie burgers with roasted yams, and in a crusty bread sandwich with roasted peppers. We’ve decided that it will pretty much get along with anyone (just my kind of spread)!

Print

Lemon Kale Pesto

Prep Time: 25 minutes

Total Time: 25 minutes

Category: Dips, Snacks, Main Meals

Cuisine: Vegan, Plant-Based, Nutrient-Dense

Kale Pesto w lemons.jpg


Ingredients

  • 4 cups kale, stemmed, chopped & loosely packed

  • Juice 1 lemon

  • 1 tsp salt

  • 2 cups basil, loosely packed

  • 3 Large cloves garlic, minced

  • 3 Tbsp nutritional yeast

  • ½ cup toasted pine nuts

  • 2 Tbsp olive oil

  • Fresh black pepper

Instructions

  1. In a medium bowl, combine kale, lemon juice and salt. Massage with hands until wilted and softened. Set aside.

  2. In a medium frying pan, toast pine nuts over medium heat until just lightly browned.

  3. In a food processor, combine all ingredients. Blend until smooth or desired consistency is reached (I like mine quite smooth - 5-7 minutes scraping sides in between).

  4. Serve with tortilla chips or crackers, along side some roasted yams or on top of baked portabellos, with veggie burgers or bbq salmon. Anyway you shake it: yum!


Try this pesto! Feed it to your kids! Tell me how it goes!

Curried Sunflower Seed Spread

sunflower-dip-w-crackers-.jpg

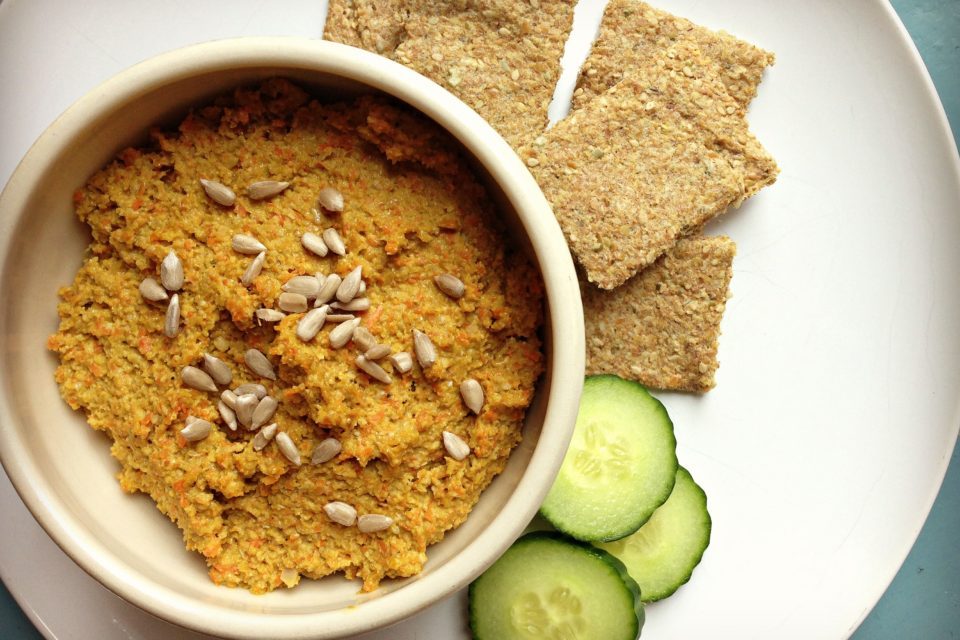
Here’s a pretty simple, easy to bang-off, “dinner party impresser” of a spread.  The only real pre-emptive here is that the sunflower seeds need to soak for a few hours before hand.  I love to use seeds as a base for sauces, dressings, and spreads, because they are nutritional powerhouses, high in protein, and super satisfying.  I’ve got big respect for the sunflower seed; they make great seed butter, are high in magnesium, vitamin E, selenium, support the cardiovascular system, help regulate mood, and are an excellent source of good quality fat.

Note: always keep your seeds refrigerated to preserve the integrity of the oils and to keep them fresh and tasting scrumptious.

Curried Sunflower Seed Spread

Ingredients

1 cup sunflower seeds, soaked 2 hour minimum
1 cup carrots, roughly chopped
1 inch fresh turmeric, minced
1.5 inch fresh ginger, minced
1/3 cup cashew butter
1/2 tsp salt
1/2 tsp curry powder
1/4 tsp cumin
1 Tbsp tamari
Fresh ground pepper to taste

Instructions

  • Drain and rinse sunflower seeds and place them in the bowl of your food processor along with all other ingredients. Process until smooth (this will take about 5 minutes), scraping sides frequently with spatula.

  • Serve with chopped veggies and homemade crackers or use as a filling in a tortilla or nori wrap.

  • Will keep refrigerated for up to 7 days.

Easiest (Make It Anywhere) Guacamole

Guacamole.jpg

When we are travelling to warmer climates during the winter, chasing the sun and yearning to stand by the ocean’s side, feeding my family well can sometimes be a challenge. I often find myself leaning back on my basic knowledge and training, being creative without being too bold, as my kitchen tools and ingredients are much more limited than at home.

The biggest part of eating well on a vacation, is to source out good local food. I will generally begin this process before we travel, searching for farmer’s markets or local farms, Health food stores or best traveller store reviews. My husband is a lot more bold than I am with new people, so he’s great to have on holiday (for many many reasons  ), as he’s pretty breezy about chatting up the locals to find out where we can get our hands on some organic fruits & veggies and if there’s anywhere to find fresh fish.

When putting meals together, I tend to rely on a few staples, although it will depend what’s in season wherever we are. Avocados tend to be easy to find in the warmer climates, limes, garlic & tomatoes, too. Once I know I can put together some easy guac, than the doors open up for lots of meals & snacks.

I’ve been making guacamole for as long as I can remember being capable in the kitchen. It has gotten better over the years, I must admit. For me, guacamole tends to be a little of this and a little of that, mash it all up and give it a taste, kinda thing, but I thought I’d write a recipe out for those of you that don’t like to wing it  or are still building your kitchen confidence. This one’s for you!

Print

Easiest (Make it Anywhere) Guacamole

Prep Time: 10 minutes

Total Time: 10 minutes

Category: Dip, Snacks, Appetizer, Vegan, Gluten-free, Dairy-free

Cuisine: Vegan, Real food, Nutrient-dense

avocado.jpg

Ingredients

  • 1 large, ripe avocado

  • Juice of 1 lime

  • 1 clove garlic, minced

  • 1 Tbsp minced red onion

  • 1 medium tomato, diced

  • ½ tsp cumin

  • ½ tsp salt

  • Freshly ground pepper

Instructions

  1. In a small-medium sized bowl, mash avocado and lime juice with a fork.

  2. Add garlic, onion, tomato and spices and mash further with a fork.

  3. Serve immediately.


Our favourite dishes with Guac? Fish tacos, veggie burritos, guac & chips, baked yams with guac, morning eggs’n guac, and layered guac’n bean dip. Be creative. Or don’t. But do try this Guac recipe, it’s a hit every time!