Morning Endurance Muffins

Muffins.jpg

This is my version of a morning glory muffin, but packed with a higher nutritional punch. We love these beauties because they are both robust and delicious and can get you through the morning hours without that blood sugar dip often associated with a morning muffin. As usual, the real food ingredients provide enough nutrition and macronutrient balance that the body will feel nourished and well fed. Yes, there are sweeteners in this muffin, but both maple syrup and coconut sugar are real food sugars with antioxidants, immune benefits, and lower glycemic index ratings.


Feel free to modify this recipe however you feel. If you are looking for a nut free version, simply remove the pecans and swap out the almond flour for a similar replacement flour such as sunflower seed flour (you can easily make this by blending sunflower seeds into a flour/meal in your food processor).


We love these muffins served warm, cut in half, with some coconut oil or almond butter, but straight up is perfectly lovely 😋

Morning Endurance Muffins

Muffins 3.jpg

Makes 12 - 16 muffins
Vegan, Gluten-free, Dairy-free, Plant-based, Super Yum

Ingredients:
2 chia eggs (2 Tbsp chia seeds + 6 Tbsp water)
1 overripe banana
1/3 cup maple syrup
1/4 cup applesauce
1/2 cup coconut sugar
1/2 cup almond milk (or other plant based milk)
1/4 cup coconut oil, melted
1 small apple, cored & grated
1/2 tsp salt
1 1/2 tsp baking soda
1 tsp cinnamon
1/2 tsp ground ginger
1/2 cup almond flour/meal
1 cup oat flour
1/2 cup oats
1 cup grated carrot
1/2 cup shredded coconut
1/2 cup raisins
1/2 cup pecans, roughly chopped
1/4 cup hemp hearts

Instructions:
To make your chia eggs, combine chia seeds and water in a small bowl and set aside.
Preheat the oven to 375F.
In the bowl of your food processor, place banana, maple syrup, applesauce, coconut sugar, milk, oil, grated apple, salt, baking soda, and spices and combine until smooth. Add flours, oats, and grated carrot and blend again, until just combined. Stir in remaining ingredients.
Spoon batter out evenly into lined muffin tins (12 - 16 muffins, depending on tin size).
Bake for 35 - 40 minutes, or until an inserted toothpick comes out clean and muffins are slightly browned on the outside. Cool & serve.

If you make these muffins, please let me know how they turn out for you AND if you make some modifications let us all know how they worked!! Happy Baking 💛

Banana Date Energy Cookies

Banana Energy Cookies.jpg

Inspired by an upcoming Hiking & Yoga Retreat, this cookie has so much endurance, I’m convinced it will get us up and over the Alpines with loads of energy and excitement for more adventure!
Over the years, the cookie has morphed into something very different from what it used to be. Growing up, cookies usually came in a box, were treats or rewards for good behaviour or for special occasions, and you would always grab handfuls of them (dip them in milk, maybe), and never just one. Sometimes we made cookies with white flour & white sugar, eggs, vanilla, etc. Other times, we bought that weird pre-made cookie dough that you could just cut up into rounds and throw in the oven (remember that?!) or we would eat it right out of the package with a spoon 🤢.

These days, as an adult, a Mom, an athlete, a Nutritionist, an advocate for Positive Body Image, I can’t remember the last time I bought cookies that came in a package, my son wouldn’t have a clue what I was talking about if I told him about the store bought cookie dough, and white flour or sugar doesn’t live in our home, EVER.
So cookies, to me, are an entirely different wonder!
When we have cookies lying around our house now, that same excitement takes place in the brain: we may even salivate slightly in our mouths, due to the lovely aromas, we might anticipate them being cool enough to eat, if they are baked, and we are sad when the batch is all gone. BUT it is rare for anyone to indulge in more than 1 cookie at a time. Because they are made with real food ingredients, are nutrient-dense, are high in carbohydrates, protein, AND fats, they are extremely satisfying to the senses, the belly, and the glucose receptors. This style of cookie can, not only, make you feel that sense of joy that you love, but ALSO fuel your body in just one delightful little package.
THIS COOKIE can get you through that 2 hr hike or afternoon power run, a trip to the gym, or a long afternoon at the office, I guarantee. It may even save your soul in the hours of after-school, inundated with tiny, hungry, raging monsters 😈!!

Bake Them.
Enjoy Them.
Share Them.

Banana Energy Cookies hand.jpg

Banana Date Energy Cookies

Makes 12 large cookies
Ingredients:
3 ripe bananas
1 cup dates, pitted (if hard, soak in boiling water for 5 minutes & drain)
1/4 cup coconut oil
1 tsp pure vanilla
1 tbsp honey (optional)
1  tsp cinnamon
¼ tsp baking powder
¼ tsp salt
2 cups rolled oats
2 Tbsp hemp hearts
¼ cup mini chocolate chips
¼ cup raisins

  • In your food processor, combine bananas, dates, coconut oil, vanilla, honey, cinnamon, baking powder, and salt, until well blended. Add oats to the processor and blend until combined, but not overly smooth (you want bits of oats for texture).

  • Remove mix from processor and stir in hemp hearts, chocolate chips, and raisins. Shape into rounds on a parchment lined cookie sheet and bake 350 for 20 - 25 minutes or until slightly browned around the edges.

As always, if you make these cookies & love them, please let me know AND share them around on social media! I appreciate your support as much as you appreciate yummy cookie recipes! 😋

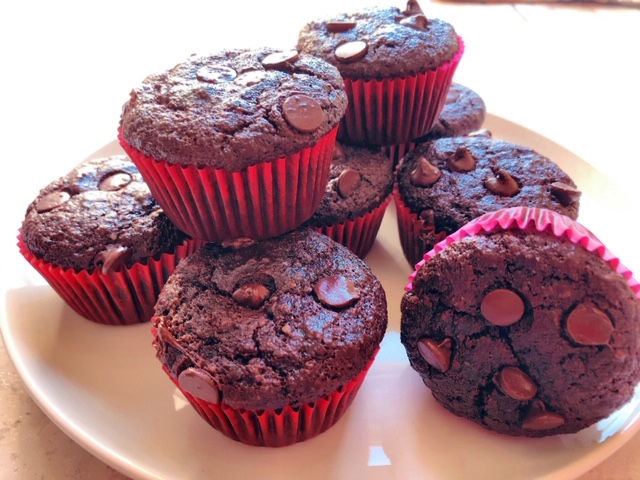
Double Chocolate Banana Cupcakes

Double Choc cupcakes.JPG

Yes these are decadent.
And chocolatey.
And an absolute treat.
And yes, you could make these for a birthday party or special occasion.
And yes, all taste buds would be satisfied and delighted and wonder where you got the recipe 😉
But.
BUT.
No, you needn’t wait.
No, you needn’t deny yourself these delicious chocolate banana cake-like delights, simply because no one is having a birthday or a party or an event of any kind at all.
Just make them because they are yummy and satisfying. No guilt. No shame. No negative BS of any kind necessary at all.
YES! You have my approval & support. Make these cupcakes just because you want one and eat it with intent and enjoyment and explore the sensory experience and feel really good about it.

Inspired by overripe bananas and a, perhaps hormonally encouraged, desire for something chocolate, these are SOOOOOOOO good. And easy. And if you eat anything like we do at our house, you’ll have most of these ingredients, if not all, on hand. Please enjoy them in a way that feels good to you. If you have a tendency to eat too many goodies when you have them hanging around then share them with your neighbours or friends or your neighbours friends or pop them in the freezer and eat one every now and again ☺️

Double Chocolate Banana Cupcakes

Choc cupcakes.JPG

Makes 12 Regular Size Cupcakes
Prep & Bake Time: 35 minutes

Ingredients:
2 large overripe bananas (really really dark brown & gross looking is best!)
2 Tbsp maple syrup
3 large eggs
2 cups almond flour
1/2 cup cacao powder
1/2 tsp salt
1 tsp cinnamon
1/2 tsp baking soda
3 Tbsp hemp hearts
2 tsp vanilla
1/3 cup coconut sugar
3/4 cup good quality chocolate chips

  • Preheat the oven to 350F and line a muffin tray with muffin cups.

  • In a large mixing bowl, mash banana with a fork until mushy and smooth. Add all other ingredients, except chocolate chips, and continue to mix with a fork. Finally, mix in 1/2 cup of chocolate chips and spoon out batter into your lined muffin cups.

  • With the last 1/4 cup of chocolate chips, sprinkle tops of muffins with roughly 3-4 chips and lightly press them into the batter.

  • Bake for 20 - 25 minutes until set and an inserted toothpick comes out clean. Allow to cool before serving, then devour!

    If you make these cupcakes, please let me know how they turned out for you!! Leave me a comment here or better yet, share a pic on instagram and tag me so that I can see your beauties!


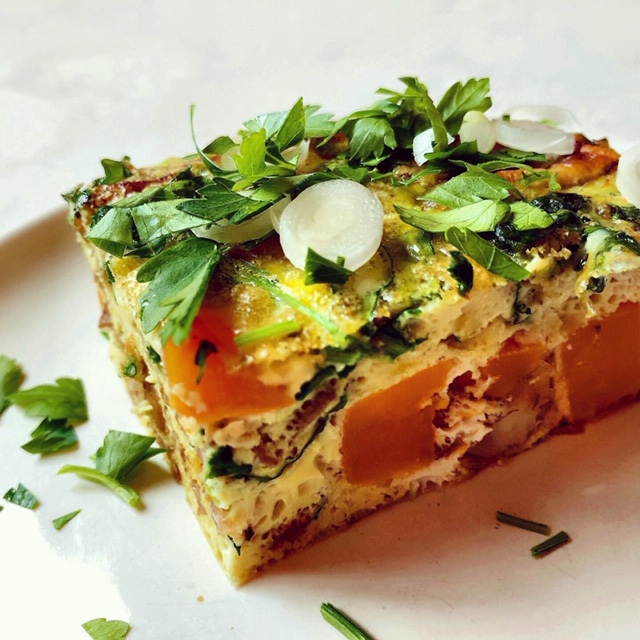
Butternut Quiche with Caramelized Onions

Quiche slice.JPG

This beautifully flavoured quiche is a wonderful dish for a crowd or a special Sunday morning brunch. I recently served this up to a group at a retreat, and they were SO in love that they have inspired me to share the recipe on the website.
You will need a bit of time to caramelize the onions and roast the squash, but the steps in this dish are so worth the time commitment 😉
As always, feel free to modify the recipe to suit your taste buds and preferences. You can easily swap out the butternut for a different squash or add sautéed mushrooms and/or sun-dried tomatoes. Keep in mind that because the onions are caramelized, there is a bit of a sweet taste to this quiche, so modifying too much might work against you.

Butternut Quiche with Caramelized Onions

quiche in pan.JPG

Serves 6
Dairy-free, Gluten-free

1 medium onion, sliced
1 Tbsp avocado oil
2 Tbsp balsamic vinegar
1/2 small butternut squash, cut into 1/2” cubes
2 Tbsp coconut oil
Salt & pepper
7 eggs
1/4 cup full fat coconut milk
1/2 teaspoon salt
½ tsp dried sage
1/4 tsp dried thyme
¼ cup nutritional yeast
1 cup packed fresh spinach, chopped
Fresh parsley, green onion, tomato slices, and/or avocado for serving

  • Preheat oven to 400 degrees.

  • Slice one large onion and place into a large saucepan. Add avocado oil and balsamic vinegar. Cook the onion slices on medium/high, stirring frequently. Once the onions start to get translucent, turn the heat to medium/low and cook until they start to caramelize. This will take roughly 30 minutes.

  • While the onions are cooking, cut the butternut squash into 1/2″ cubes and place in an 8x8 glass dish, coat with 2 Tbsp coconut oil and season with salt and pepper.

  • Roast the squash for 20 - 25 minutes, until slightly softened.
    Once squash is done, lower the oven temperature to 375 degrees.

  • Let the squash and onions cool slightly. Combine the eggs, coconut milk, spinach, dried herbs, butternut squash, and caramelized onions in a large bowl. Mix well then pour back into your 8x8 glass dish still greased from the squash.

  • Bake for 45-55 minutes, or until the centre of the quiche is set - you can check by simply wiggling the pan slightly to see if the eggs are firm. Serve with parsley, green onions, fresh tomato, and/or sliced avocado.

    If you make this recipe, please leave me a comment and tell me how it turned out for you!! I’d love to hear from you 😊

Creamy Vegan Coleslaw with Tangy Cashew Dressing

Coleslaw.JPG

We often don’t give coleslaw enough credit. It shows up around bbq season as a potluck companion, weaving in and out of our spring and summer evenings without much fuss: neither a fan favourite, nor a neglected dish.
When asked about coleslaw, most just shrug with a bit of a “meh” approach.
Poor coleslaw.

Let me attempt to change your thoughts on coleslaw, my friend.

There’s a few ways to “do” coleslaw.

#1: Dump out a plastic bag of pre chopped cabbage and squeeze on top some kind of goopy dressing containing weird ingredients coming from a weird package .
#2: Buy a head of cabbage, shred it, add mayo + celery salt + lemon and call it coleslaw.
#3: Put a little thought and time into your coleslaw making: finely shred cabbage by hand, add a few other tasty vegetables, some fresh herbs, and create a delicious & health supportive dressing that serves both your body AND your taste buds 😋

In general, the more you put in to your food, the more you will get out of it.
And a little effort can really go a long long way!

What I love about this recipe is that it’s versatile, but also a bit more interesting than your average bag + dressing coleslaw 😉. I’ve tossed in some shredded kale and fresh herbs for green, added flavour, but also to increase the nutrient quotient of the dish. The dressing is practically a nutrient powerhouse all on its own, with fermented coconut milk, cashews, fresh lemon, apple cider vinegar, and garlic!

What’s in it for you?

  • Cabbage: anti-inflammatory, anticancer, antioxidant, supports digestion, cardiovascular function & boosts immunity. High in calcium, magnesium, phosphorus, potassium, folate, and Vitamin C.

  • Kale: supports healthy skin & hair, improves digestion, reduces inflammation, lowers blood pressure, improves vision and is anticancer. High in calcium, magnesium, phosphorus, potassium, Vitamin C, A, & K, and folate.

  • Coconut Kefir: detoxifying, promotes healthy gut bacteria & improved digestion, reduces inflammation, supports liver & brain health, anti-fungal, anti-bacterial, anti-candida, and supports a strong immune system.

  • Lemon: improves heart health, prevents kidney stones, reduces indigestion, detoxifying, promotes healthy teeth, hair, & skin. High in Vitamin C, calcium, & potassium.

Creamy Vegan Coleslaw with Tangy Cashew Dressing

Coleslaw dressed.JPG
cashew dressing.JPG

Ingredients:
Serves 8 - 12
1 large head of green cabbage, shredded thin
1/2 large head of purple cabbage, shredded thin
1 bunch of lacinato kale, stemmed & chopped thin
3-4 large carrots, peeled and grated
1/2 bunch of parsley, chopped
1/2 bunch of dill or cilantro, chopped
1 bunch of green onions, diced
1/2 cup sunflower seeds, toasted
Dressing:
1/2 cup cashews, soaked overnight (see note)
1 cup coconut kefir or yogourt (preferably homemade - will post a recipe for this soon!)
1/3 cup fresh lemon juice
1/4 cup apple cider vinegar
2 Tbsp Dijon
1 tsp salt
1 tsp onion powder
1-2 cloves garlic, minced
Fresh pepper
2 tsp maple syrup for a sweeter dressing (optional)

  • Prep the salad by preparing all ingredients, except sunflower seeds, and tossing them in a very large bowl.

  • For the dressing, combine all ingredients in your high speed blender and combine until smooth.

  • Toss the salad with the dressing until evenly distributed and well coated. Allow to marinate for at least 2 hours before serving.

  • Before serving, add in your toasted sunflower seeds and garnish with more fresh herbs if desired. Enjoy!


Creamy Coconut Carrot Soup

Carrot soup .jpg

A simple weekday dinner or a fulfilling lunch, this soup is super simple to put together, nourishing for the belly and the soul, as well as totally delicious!
We tested this soup on a room full of 6 and unders, and got some super happy smiles and thumbs up from the littles and many happily surprised: “what did you put in that soup?” reactions from the parents. Always a huge compliment!

HINT: To make this soup taste extra amazing, make your own veggies stock: simply bring a pot of water and a bunch of loosely chopped vegetables to a boil, add salt, pepper, and any other desired herbs & spices, reduce heat and simmer for as many as 4 hours on low (I like to sauté the onions with some garlic & ginger with a bit of coconut oil first to add a bit of flavour). Strain out vegetables and here you have a delicious & simple vegetable broth. This kind of broth is great to make in the height of market season when there are loads of imperfect root vegetables like celeriac, parsnip, yams, potatoes, celery, carrots, & broccoli, just hanging about. YUM!

Creamy Coconut Carrot Soup

Creamy coconut carrot soup.JPG

1 large onion, diced small
3 Tbsp coconut oil
1 tsp salt
2 ½ Tbsp minced ginger
1 large or 2 small cloves garlic, minced
1” fresh turmeric, minced
2 cups carrots, peeled & chopped
4 cups vegetable stocks
1 can full-fat coconut milk
½ cup toasted pumpkin seeds, for serving (optional) or toasted large flaked coconut 😋

  • In a large soup pot, melt coconut oil and onions over medium heat. As onions become soft & translucent, add salt, ginger, garlic, turmeric, and carrots. Cook for about 10 minutes, stirring frequently, until carrots are slightly softened and mixture is fragrant.

  • Add vegetable stock, bring to a boil and then reduce to a medium-low simmer for 15 minutes. Add coconut milk and simmer another 5 – 10 minutes.

  • Serve with a sprinkle of toasted pumpkin seeds and/or a spoonful of coconut cream.

Like always, if you make this soup, please let me know how it went!
AND, if you don’t want to miss any upcoming recipes, be super to sign up for my email list below! I promise to only send out inspiration, upcoming class info & deliciousness!!

Green Curry Soup with Sesame Tofu

Curry soup 1.jpg

Warming to the soul, gentle on the belly, and all around satisfying, this is a soup that is incredibly versatile in that you can throw in any veggies you have lying around, serve with soaked brown rice for the big eaters (did I say teenager?) or swap in chicken for tofu, if that’s your fancy.
I find this recipe quick & easy because these are all ingredients that I mostly have in the house, so long as I have about a 25 minute window to get dinner on the table, this soup can make that happen!

But first, a quick word on Tofu…

A while back, we were a bit scared off of soy in the health industry due to its phytoestrogen content. Phytoestrogens are plant compounds and dietary estrogens that can only be consumed through food sources. Due to increases in hormone dysfunction and estrogen dominance issues in both men and women, there have been concerns about the regular consumption of phytoestrogens and their affect on thyroid function, reproductive development, and breast cancer risk. Like so many foods, the consumption of estrogen containing foods is problematic for some and beneficial for others.
As with all fluctuations in nutritional information, is it always important to do what is right for you, as an individual, with differing preferences, needs, history, and health struggles. If consuming estrogen of any kind is problematic for you, likely it is safest to steer clear. For many others, consuming tofu as part of a balanced, plant-based diet, can be health promoting.

Why consuming Tofu could be beneficial:


Soy consumption may actually lower your risks for breast cancer:

“Estrogen has positive effects in some tissues and potentially negative effects in others. For example, high levels of estrogen can be good for the bones but can increase the likelihood of developing breast cancer. Ideally, you’d like what’s called a “selective estrogen receptor modulator” in your body that would have proestrogenic effects in some tissues and antiestrogenic effects in others.
Well, that’s what soy phytoestrogens appear to be. Soy seems to lower breast cancer risk, an antiestrogenic effect, but can also help reduce menopausal hot-flash symptoms, a proestrogenic effect. So, by eating soy, you may be able to enjoy the best of both worlds. “1

More good news:


”According to Marji McCullough, ScD, RD, strategic director of nutritional epidemiology for the American Cancer Society, epidemiologic studies that followed large populations of healthy women for many years either have shown no association between soy and breast cancer or a protective association from eating soy. Even breast cancer survivors may not need to worry. Three studies looking at women’s eating habits and other lifestyle factors after breast cancer found that, in the combined total of 9,000 breast cancer survivors studied, eating soy actually lowered the risk of breast cancer recurrence, even in women with estrogen receptor–positive tumors (although less so), and regardless of whether they were taking tamoxifen.”2

As with all foods that have been processed in any way, choosing the right kind makes all the difference!

  • Choose organic & non-GMO

  • Check the label for weird preservatives & added “flavours”

  • Buy plain (I prefer firm) and marinate yourself - keep reading for a super delicious & versatile marinade

  • Buy sprouted or fermented where possible - these will be more digestible & will make the nutrient value more accessible

My favourite, locally processed Tofu:

Silver king tofu.jpg

No, we are not affiliates, I just like their product and always love to support local as much as possible!

Ok, so now that you’ve expanded your knowledge base on tofu 🤓, you’ve earned the recipe!

Green Curry Soup with Sesame Tofu

Sesame baked tofu.jpg

For the Sesame Baked Tofu:

1 block of tofu drained (I like to slice it into 1/2 - 1” slabs and wrap it in a tea towel on a plate. Then I’ll put lots of weight on top to drain all the water out, usually a large stack of plates, and leave it to drain for an hour or so)
3 Tbsp wheat-free tamari
1.5 Tbsp sesame oil
Lots of fresh pepper

Cut drained tofu into small cubes and toss with all other ingredients in a medium bowl. Allow to marinade for roughly 1/2 an hour. Bake @ 350F for 35-40 minutes, stirring and flipping cubes occasionally, until browned and a bit crispy. Remove from oven and set aside.

For the Soup

Curry soup close up.jpg

1 large onion, diced
3 Tbsp coconut oil
1/2 tsp salt
1 Tbsp minced fresh ginger
3-4 cloves garlic, minced
1 1/2 cups chopped cauliflower
1 1/2 cups chopped broccoli
1 cup diced or thinly sliced red pepper
4 cups vegetable stock
1 can full fat organic coconut milk
3 Tbsp green curry paste
1 Tbsp sesame oil
3 Tbsp wheat-free tamari
1 Tbsp maple syrup
Fresh pepper
1 recipe sesame baked tofu
2 large handfuls of chopped kale/swiss chard/spinach or a blend
Lime wedges for serving
Fresh cilantro for serving

  • In a large soup pot, sauté onion with coconut oil and salt over medium heat until softened. Add ginger, garlic, and cauliflower, broccoli, & red pepper, and sauté another few minutes until fragrant.

  • Add stock, coconut milk, curry paste, sesame oil, tamari, maple syrup and pepper, and stir well with a spatula to remove any clumps. Bring to a gentle boil, then reduce heat to low and allow to simmer for 20 - 30 minutes or until all vegetables are soft but not mushy.

  • Add tofu and greens and allow greens to wilt and tofu to heat through. Serve with a squeeze of lime and fresh cilantro. You may wish to add a few scoops of rice, quinoa, or rice noodles for a larger, more dense meal. Enjoy!

If you make this soup, please let me know how it goes!! Better yet, take a most beautiful pic and post it on Instagram or Facebook and tag me 😋! I want to know if you are using my recipes!

Don’t want to miss a recipe or an upcoming workshop? Sign up for the Newsletter below!


Resources:

1 - Greger, Michael, M.D., FACLM, “How Not To Die”, pg. 195
2 - Thalheimer, Judith C., RD, LDN, https://www.todaysdietitian.com/newarchives/040114p52.shtml

Thick Coconut Vanilla Chia Pudding

Chia pudding glass jar small.jpg

Chia pudding has got to be one of the simplest ways to make a yogourt style substitute without hardly any effort at all! I like to make a batch at the beginning of the week for quick and easy breakfast and/or snacks throughout the week.  It’s a great late morning snack to take with you on the go or to pop into your child’s lunch with a sprinkle of granola and fresh fruit.

It takes about 5 minutes to make and is a nutrient powerhouse, especially if you’ve had time to whip up your own Vanilla Cashew Coconut Milk (bonus points!) 😉

What we LOVE LOVE LOVE about Chia Seeds:

High Quality, Plant Protein
Supportive to Digestion & GI Tract Repair
Protective of Heart & Supportive of Cardiovascular Health
High in Antioxidants - Protective Against Brain Degeneration & Cancer
High in Fibre & Omega 3s
High in Minerals: Iron, Copper, Manganese, Phosphorus, & Zinc
Particularly High in Potassium, Calcium & Magnesium: Good for Bone Health & Development
Beneficial for Blood Sugar Stability & Diabetes
Beneficial for Athletes: Supports Metabolic Function, Strong Energy Levels & Endurance

Thick Coconut Vanilla Chia Pudding

1 can full fat coconut milk
½ cup almond milk
2 tsp vanilla
2 Tbsp maple syrup
1/3 cup chia seeds
Note: for Chocolate Chia Pudding, add 2 Tbsp cacao powder

  • Combine all ingredients in your blender, except chia seeds, until smooth. Pour chia seeds in to the bottom of a large glass mason jar and pour blended milk over top. Stir well with a spatula and place in the fridge.

  • Chill for about an hour, then return to the jar and stir again, making sure to stir up chia seeds that have pooled in the bottom. Chill for at least 4 hours, overnight is better.

  • Serve cold sprinkled with fruit, your favourite granola, or nuts and seeds.

Other Recipes that use Chia: Hippie Trail Cookies, Coconut Mango Blueberry Muffins 😋😋

Double Layer Almond Chocolate Fudge Cake with Chocolate Avocado Frosting

Chocolate Cake.jpg

The time has finally come to post this birthday cake!! 🤪

Every February, my son’s birthday comes around, and I find myself so busy trying to plan a party, come up with a cool gift, make awesome party food, hammer out a delicious AND nutrient rich birthday cake, while meeting all the requirements of the birthday boy…that when and if the time comes to write out the cake recipe and post about it, I’m just too bagged!

Well, this year is different, my friends.

Although none of the above changed in any way, I have taken the time this year to get this recipe to you because it has FINALLY become my favourite, decadent, no-non-food-weirdness-ever, chocolate birthday (or anyday) cake!! And it has been officially taste tested by a pack of the harshest critics….11 year old kiddos!

Several years in the making, here’s a birthday cake that can accommodate all the dietary restrictions, make all the tastebuds sing, is moist and not overly dense, AND satisfies my NUTRITIONISTA REAL FOOD requirements (which is not always that easy!).

Double Layer Almond Chocolate Fudge Cake
with Chocolate Avocado Frosting

Chocolate Cake Side.jpg

Ingredients:
3 cups almond flour
1/4 cup coconut flour
3/4 cup cacao powder
1/2 cup coconut sugar
2 tsp baking soda
1 tsp salt
3 eggs, room temperature (for a vegan cake, replace eggs with 3 flax or chia eggs)
1 can full fat coconut milk
1/2 cup coconut oil, melted
1/4 cup applesauce
1 Tbsp vanilla
2 Tbsp maple syrup
Chocolate Avocado Frosting:
1 cup dark chocolate chunks
1/4 cup coconut oil
3 ripe avocados
1/2 tsp salt
1 Tbsp vanilla
1/4 cup cacao powder
1/4 cup maple syrup
Instructions:

  • Line 2 x 7” cake pans with parchment paper and lightly grease them with coconut oil. Preheat the oven to 350F.

  • In a large bowl, whisk together the flour, cacao powder, sugar, baking soda & salt, until there are no lumps or clumps.

  • In a separate medium bowl, combine eggs, coconut milk, oil, applesauce, vanilla, and maple syrup, and whisk together until smooth. Pour wet ingredients into the dry mix and combine gently with a large spatula. Do not over-mix.

  • Pour evenly into your 2 cake pans and bake for 30 - 40 minutes until an inserted toothpick comes out clean. Cool completely, preferably overnight, before frosting.

  • For the frosting: In a double boiler (or a glass bowl set over top of a medium pot with a few inches of water) melt chocolate chunks and coconut oil until runny. Transfer melted chocolate mix to the food processor and add in all other ingredients. Combine until smooth and thick. Adjust sweetness as desired (dark chocolate chunk sweetness will vary).

  • For cake assembly: Remove one cake from pan (don’t forget the parchment!) and place on a large serving plate. Evenly spread a thick layer of frosting over the top of the cake (I like to use a small spatula or a bread knife for this). Carefully remove the second cake from its pan and set on top of the bottom layer. Spread all remaining frosting over the top and along the sides of the cake to cover completely. Cake will keep on the countertop for roughly one day, refrigerate leftovers (if there are any 😉).

If you make this cake, please drop me a note with your feedback or kitchen dancing enthusiasm!! I want to know how it went and if I need to make any adjustments to the recipe!
Happy cake making celebration 🎉


Hippie Trail Cookies

Hippie trail cookies AMC.jpg

These cookies were specifically designed for an afternoon pick-me-up. They are the perfect nutrient packed punch that will give you a little hit of sweetness, flavour, and crunch, but are designed to keep your blood sugars stable, your energy levels strong & steady, your cells nourished, and your mind clear! What I call the magic 3, these lovelies contain all 3 macronutrients: carbohydrates, protein, & fat, a magic combination that slows the glucose distribution, giving you energy, but in an even and sustainable fashion.
Have one in the afternoon, after a run, a walk, a long morning of computer work, or a tough meeting, and take notice how far they get you into the early evening - I’m betting you will be surprised 😉

You can feel good about these cookies!


They are: plant-based, vegan, gluten & dairy-free, grain-free, sweetened with coconut sugar - which is a minimally refined sweetener that has minimal affect on blood sugar, they contain beneficial nutrients, vitamins & minerals, AND are satisfying for the palette & the soul!

Hippie cookies 2 AMC.jpg

Hippie Trail Cookies

1 1/4 cups almond flour
1/3 cup vegan dark chocolate chips/chunks
2 Tbsp sunflower seeds
1 Tbsp sesame seeds
2 Tbsp hemp hearts
2 Tbsp chia seeds
1/4 cup shredded unsweetened coconut
1/2 tsp baking powder
1/4 tsp sea salt
1/3 cup unrefined coconut sugar
3 Tbsp unrefined coconut oil, melted
1 tsp vanilla
2-4 Tbsp water

  • In a large mixing bowl, stir together almond flour, chocolate chips, seeds, coconut, baking powder, salt, and coconut sugar.

  • Add the melted coconut oil, vanilla, and 2 Tbsp of water, adding more water as needed. Mix should stick together.  

  • Loosely cover and chill in the refrigerator for at least 30 minutes or overnight. 

  • Preheat oven to 350 F. With your hands, roll dough into roughly 2-3 Tbsp sized balls and place on your lined cookie sheet. Flatten the cookies slightly. They will not spread much, so they can be quite close together.

  • Bake for 20-25 minutes or until the undersides are golden brown and the tops appear slightly puffy and cracked.

Did you make these cookies? How did they turn out? I’d love your feedback, leave a comment below ☺️

Looking for more recipes like this? Check these ones out!

Yam & Quinoa Salad with Sesame Ginger Dressing

Sesame Yam & Q Salad close up.JPG

I am a die hard salad lover, I’m not gonna hide it!
But even for us die hards, you really must continue to mix it up in the kitchen or the salad ho hum boredom, can’t stand that same bloody balsamic vinaigrette one more day, takes over. During the winter months, it’s a great move to mix in some seasonal root vegetables with your leafy greens to shake up the salad routine. By also adding a high protein & complex carbohydrate component in the quinoa, this salad is a well rounded meal that will last you quite a few days!

Why we love Yams 🧡

  • Yams are a great source of vitamin C, fibre, potassium, manganese, and B vitamins

  • Yams are a starchy vegetable, made up of carbohydrates and dietary fiber which helps stabilize blood sugar levels - beneficial for diabetes

  • They are known to reduce cardiovascular disease due to their high B6 content

  • High in antioxidants and beneficial to proper function of the immune system

  • Rich in minerals: vitamin A, C, B, thiamin, niacin, riboflavin and folic acid, as well as calcium, copper, potassium, manganese, iron and phosphorus

  • High vitamin A contained in the yam is converted into beta-carotene which helps to maintain healthy mucous membranes in the eyes, aiding night vision and age related vision loss, and also supports healthy bone development and provides protection from lung and mouth cancers

Why we love Quinoa 💛

  • Quinoa is gluten-free, high in protein and one of the few plant foods that contain all nine essential amino acids

  • It is high in fiber, magnesium, B vitamins, iron, potassium, calcium, phosphorus, vitamin E and various beneficial antioxidants

  • Contains plant compounds called flavanoids known for their anti-inflammatory, anti-viral, anti-cancer, anti-depressant qualities

  • Is low on the Glycemic Index which makes it great for stabilizing blood sugar levels

Yam & Quinoa Salad with Sesame Ginger Dressing

Sesame Yam & Q Salad.JPG

Ingredients:

1 medium sized Yam, cut into 1” cubes
1-2 Tbsp coconut oil
1/4 tsp salt
Fresh pepper
3/4 cup uncooked quinoa
1 1/2 cups water
2-3 cups packed spinach leaves, chopped small
1/4 cup minced red onion
1 red pepper, diced small
1/3 cup toasted sesame seeds
2 Tbsp hemp hearts
1/3 cup fresh cilantro (optional)
For the Sesame Ginger Dressing:
2 tsp fresh ginger, minced or grated
1 clove garlic, minced
2 Tbsp tamari
2 Tbsp sesame oil
1 Tbsp maple syrup
1/4 cup rice vinegar
1/2 cup olive oil
1/4 tsp salt
Fresh pepper
Instructions:

  • Toss cubed yams in melted coconut oil and season with salt & pepper. Roast @ 375F for 25 minutes or until cooked through but not mushy. Cool slightly.

  • Cook quinoa by combining dry quinoa with water. Season with a little salt and 1 tsp of coconut oil, if desired. Cool slightly.

  • For the dressing, combine all ingredients in a glass jar and shake or stir until well combined.

  • In a medium salad bowl, combine all salad ingredients with a fork. Coat with roughly 1/4 - 1/3 cup of the dressing, adjusting seasonings and volume of dressing as you go. Note: start with a smaller amount of dressing and add a little more at a time so as to not have it be too soaked.

  • Will keep up to 5 days in the fridge.

If you try this recipe, PLEASE let me know how it turned out & how much you loved it (and even if you didn’t 😉) AND if you’d like more recipes like this one, sign up for the Newsletter below!

My ongoing advice for this New Year of 2019: EAT MORE PLANTS!!

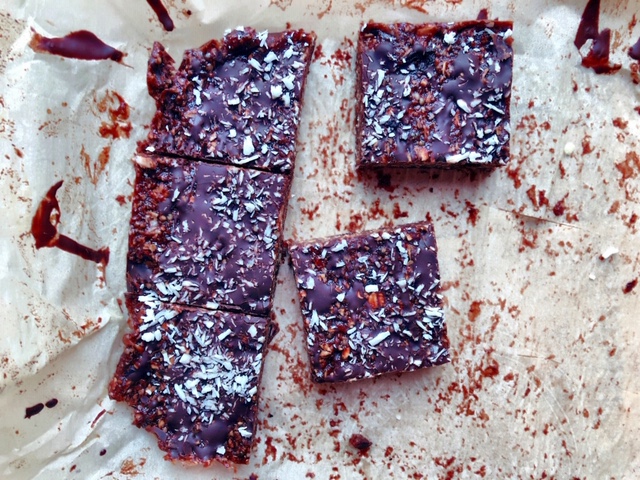
Double Chocolate Granola Brownies

Granola brownies from above.jpg

Chocolate brownie + granola bar.
It just happened.
And it is fabulous!

This is a dense bar that’s perfect for an active day on the slopes, snack attack in the kids’ lunchbox, and a long day’s work in need of an afternoon pick-me-up! Loaded with mineral rich cacao powder, blood sugar stabilizing dates & oats, full spectrum amino acid hemp hearts, extra protein in almond butter and chopped almonds, and intensified in taste by dried cranberries and shredded coconut, I’m not convinced that this bar is missing anything! Except maybe some warm bellies 😋


As always:
no gluten,
no dairy,
no refined sugar,
no confusing food labels.
Use real food & feel real good!
You will love these, I am so super sure.

DOUBLE CHOCOLATE GRANOLA BROWNIES

Granola brownies on parchment.jpg

Prep Time: 15 minutes
Bake Time: 25 minutes
Total Time: 40 minutes
Category: Vegan, Gluten-Free, Dairy-Free, Snacks, Healthy Treat, Kid Approved
Serving: 12 medium sized bars

Ingredients:

2/3 cup medjool dates, pitted
1/2 cup almond butter, smooth or crunchy
1/4 cup maple syrup
1/4 cup coconut oil
2 tsp vanilla
1/4 cup cacao powder
1 1/2 cups oats
1/4 tsp salt
1/4 cup hemp hearts
1/4 cup dried cranberries
1/4 cup unsweetened shredded coconut
1/4 cup mini chocolate chips
For Topping:
1/4 cup melted chocolate
2 Tbsp unsweetened shredded coconut
Instructions:
1. Preheat oven to 350F. Line a medium glass dish with parchment - mine is 11 x 7”.

2. In a food processor, combine dates, almond butter, maple syrup, coconut oil, and vanilla, until well combined. Add oats, cacao powder, and salt, and process until just combined. Transfer mixture to a medium bowl.

3. Add hemp hearts, cranberries, chocolate chips, and coconut, and stir together with a wooden spoon. Transfer mixture to your lined pan and press with wet hands to evenly distribute.

4. Bake for 25 - 30 minutes until edges brown slightly. Remove from heat and allow to cool.

5. Once mostly cooled, drizzle melted chocolate over top and sprinkle with shredded coconut. Transfer brownies to the fridge to solidify before cutting into squares. Keep refrigerated.

Did you make these? Tell me how they turned out!
Want to make incredible Holiday Chocolates? Grab this Ebook today!
L
ooking for more recipes like this? Check these out!

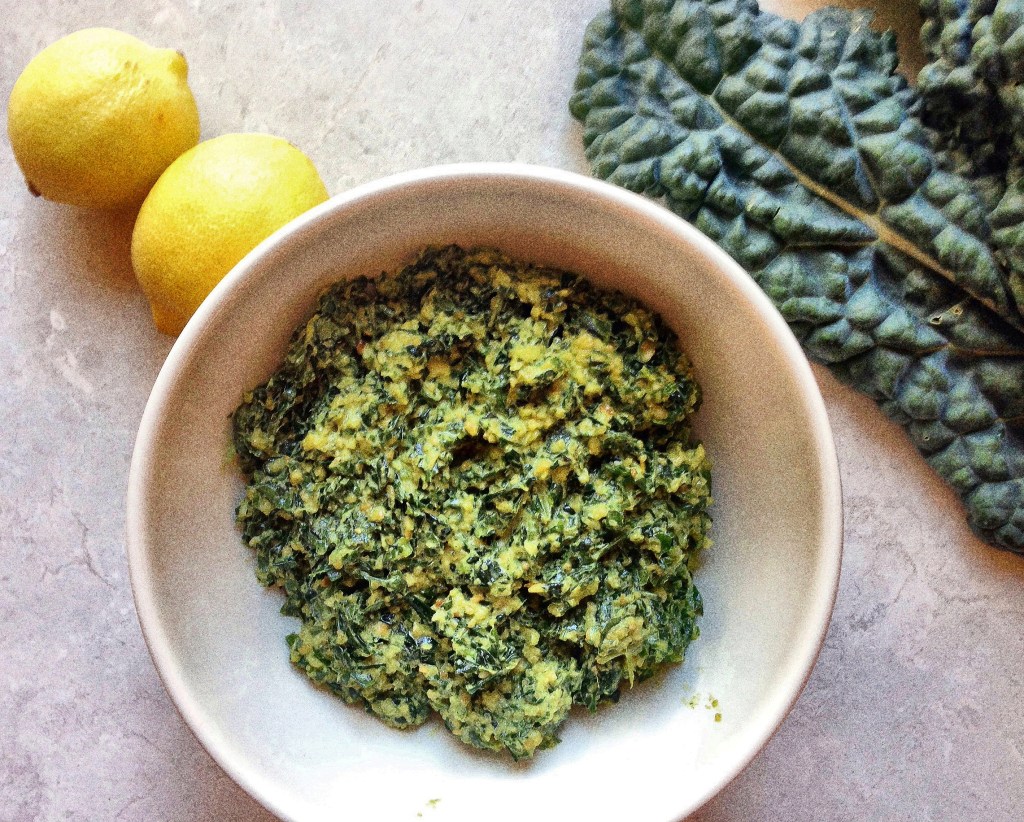
Lemon Kale Pesto

Lemon Kale Pesto.jpg

Deep in the summer swing, with armloads of both kale and basil, this pesto came together simply (& deliciously) and has been made several times since (the kids even made it at my Kids Cooking Camp and it was an absolute success)! With the summer days sailing by as fast as they do, I haven’t had much time to post this recipe. Here it is now and, don’t worry, the basil and kale should still be in abundance for a while yet.

So far, we’ve served this up straight with tortilla chips, alongside some lovely barbeque’d salmon, on top of lentil veggie burgers with roasted yams, and in a crusty bread sandwich with roasted peppers. We’ve decided that it will pretty much get along with anyone (just my kind of spread)!

Print

Lemon Kale Pesto

Prep Time: 25 minutes

Total Time: 25 minutes

Category: Dips, Snacks, Main Meals

Cuisine: Vegan, Plant-Based, Nutrient-Dense

Kale Pesto w lemons.jpg


Ingredients

  • 4 cups kale, stemmed, chopped & loosely packed

  • Juice 1 lemon

  • 1 tsp salt

  • 2 cups basil, loosely packed

  • 3 Large cloves garlic, minced

  • 3 Tbsp nutritional yeast

  • ½ cup toasted pine nuts

  • 2 Tbsp olive oil

  • Fresh black pepper

Instructions

  1. In a medium bowl, combine kale, lemon juice and salt. Massage with hands until wilted and softened. Set aside.

  2. In a medium frying pan, toast pine nuts over medium heat until just lightly browned.

  3. In a food processor, combine all ingredients. Blend until smooth or desired consistency is reached (I like mine quite smooth - 5-7 minutes scraping sides in between).

  4. Serve with tortilla chips or crackers, along side some roasted yams or on top of baked portabellos, with veggie burgers or bbq salmon. Anyway you shake it: yum!


Try this pesto! Feed it to your kids! Tell me how it goes!

Easy Lunchbox Cookies

Lunchbox-Cookies-sheet-.jpg

It’s fairly easy to find cookie recipes online these days, but it’s my experience that most cookie recipes contain unnecessary added sugars, flour, and oil, and can be tricky for people with food intolerances or allergies.  This recipe makes a really nice cookie, that’s super satisfying, easy to make, and uses only real food ingredients. The flour used here is oat, but you could sub another light gluten-free flour such as brown rice, or a blend. Another option would be to make your own oat flour by simply blending some oats in your food processor until a flour-like consistency is met and use that. Also, if you want to make a nut-free cookie here, simply swap out the nut butter for a seed butter like sunflower.

I’m calling these a “lunchbox” cookie because they keep well, are not high in sugar or refined ingredients, and will absolutely qualify the kiddos’ requirements for a treat-like snack to take to school.
Some Mom (or Dad) advice: double the batch and throw the 2nd batch in the freezer – simply pop a frozen cookie in your kids lunchbox in the morning and it’s defrosted a few hours later. High-fives all around!

Print

Easy Lunchbox Cookies

Prep Time: 15 minutes

Cook Time: 15 minutes

Total Time: 30 minutes

Category: Healthy Snacks, Healthy Treats, Cookies

Cuisine: Plant-Based, Nutrient-Dense

Yield: 12

lunchbox-cookies-stack-no-filter.jpg

Ingredients

  • 1/2 cup almond butter

  • 1/4 cup honey

  • 1 tsp vanilla

  • 3/4 cup oats

  • 1/2 cup oat flour

  • 1/4 tsp salt

  • 1/2 tsp baking soda

  • 3 Tbsp coconut oil, melted

  • 1/4 cup raisins

  • 1/4 cup chocolate chips

Instructions

  1. Preheat your oven to 350F.

  2. In a medium bowl, combine almond butter, honey, and vanilla with a spoon. Add in all other ingredients and mix well until combined. Use wet hands to work the dough to a nice consistency.

  3. On lined baking sheets, roll about 1 1/2 Tbsps of dough in wet hands and press slightly. Leave at least a few inches between your cookies as they will expand while baking.

  4. Bake 12-16 minutes until slightly browned on the edges. Makes roughly 12 medium sized cookies.


Did you make these cookies? Tell me how they turned out!
Looking for more lunchbox inspiration? Try these Easy Chewy Granola Bars or these Coconut Mango Blueberry Muffins


Comforting Lentil Stew

Lentil-Stew--.jpg

In times of endless change, the soul desires comfort: soothing, calming energy, warm baths and thick socks. We may crave grounding practices, getting our hands in the dirt, dancing bare foot; we may yearn for gentler sounds, mellow music and empty houses. Our cravings of comfort are natural and normal; our body and mind meshing with the ebb and flow of the seasons, the dynamics of changing weather and the rotation of the earth.

Our cravings for foods are no different. Warmer weather melds with garden veggies, leafy greens, cold juices, and fresh fruit; the colder air brings a desire for warmth in stews and soups, chilli and tea. Tune in to these cycles; tune in to your cravings. What does your body need? What does your soul need? What are your cravings trying to tell you?

Here is a stew to comfort you on a cold day; a day of change or uncertainty; a day of grief or despair; a day you desire to be nurtured. This stew is both hearty and gentle, simmered with healing foods and flavoured with subtle notes. Make this stew for a friend in need, a tuckered child, or for your own asking soul. Be soothed. Be satisfied.

I could eat this stew all day. Every day. I’m not kidding.

Print

Comforting Lentil Soup

Lentil-Stew-2.jpg

Ingredients

  • 2 Tbsp coconut oil

  • 1 large onion, diced

  • 1 1/2 tsp salt

  • 4 cloves garlic, minced

  • 1 Tbsp fresh ginger, minced

  • 2 stalks celery, diced

  • 2 carrots, peeled and diced

  • 2 tsp cumin

  • 1 1/2 tsp dried thyme

  • 1 tsp turmeric

  • 1/2 tsp freshly ground pepper

  • 2 cups fresh tomatoes, diced

  • 3/4 cup french lentils, soaked (4-6 hours) and rinsed

  • 4 cups vegetable stock

  • 1 can full fat coconut milk

  • 3 cups Swiss chard, rinsed and chopped

  • 1/4 cup fresh lemon juice

Instructions

  1. In a large soup pot, melt coconut oil over medium heat. Add onions and salt and saute until softened. Add garlic, ginger, celery, carrots, and spices and stir for a few minutes until fragrant. Add tomatoes, lentils, stock, and coconut milk, and bring to a boil. Reduce heat and simmer for 25-35 minutes until vegetables are tender.

  2. Add Swiss chard and lemon juice and simmer another 7-10 minutes until the chard is wilted and the flavours have blended. Adjust seasoning, as desired. Serve immediately, although, as with most stew, this will get better with a little age. Feel free to divide the stew amongst freezer safe containers and freeze some for an easy, nutrient-packed, weekday meal. Enjoy!


A note on lentils: Lentils are one of my favourite foods! They are earthy and grounding, high in soluble fibre, which makes them great for digestion and for maintaining stable blood sugars. They are a great source of plant-based protein and iron, and are supportive in proper energy production and metabolism function. Plus, they are tasty little guys and so satisfying for the belly!

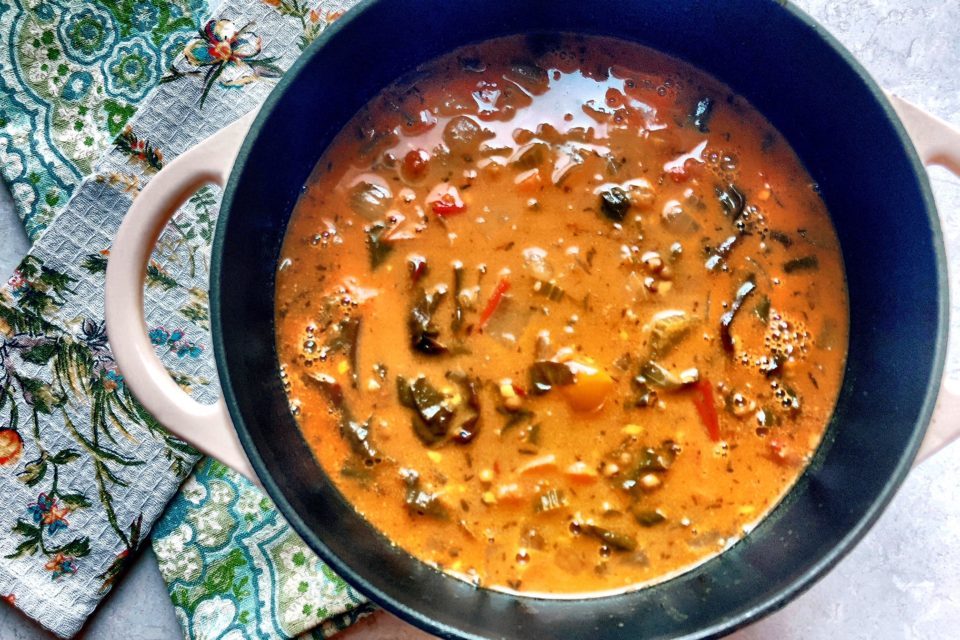
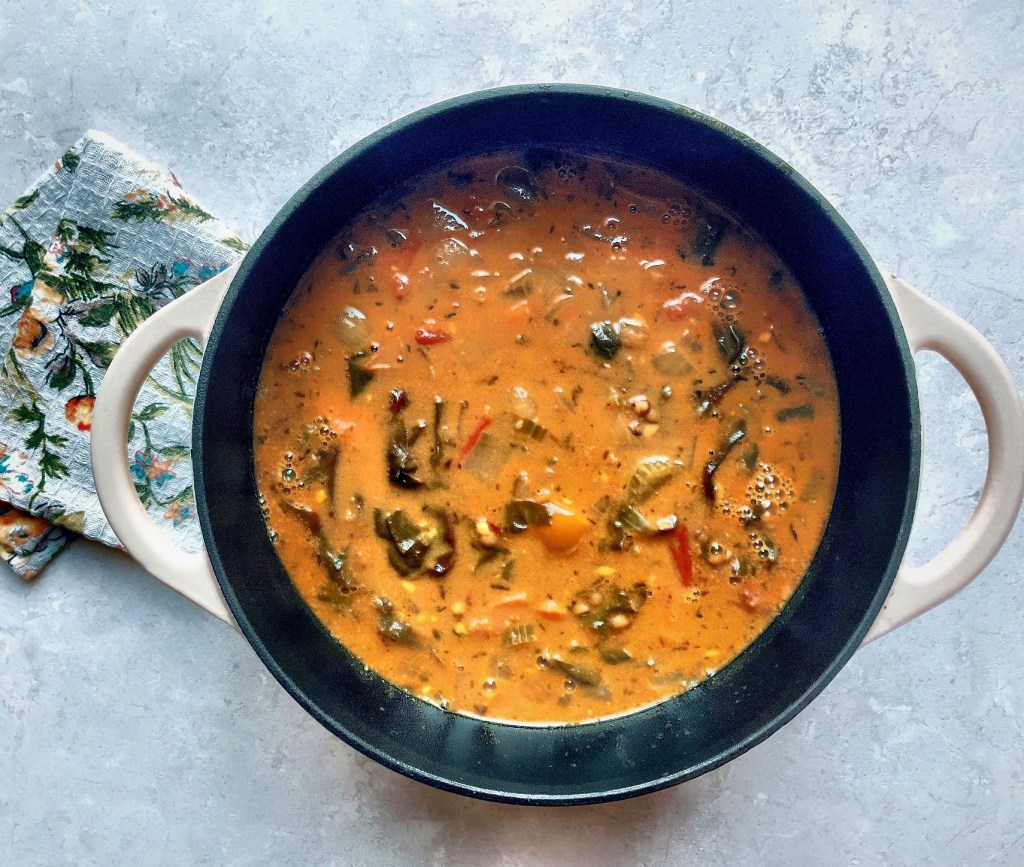
Veggie Squash Chili

Veg-Squash-Chili-.jpg

I am SO in love with this Chili!!
The crisp Fall air has officially moved in to our little nestled village and I’m craving warmth in every way.
This Veggie Squash Chili is so loaded with comfort: it’s full flavour & mellow spice, the fulfilling density of squash and black beans, and the complete satiating sensation that comes with a warming bowl of goodness on a dark October night! Best thing? My kid devours it with “umm’s” and “ohh’s” and requests for its presence in his lunch box. As a parent (and a Nutritionist), my feeling on this is = SLAM DUNK!

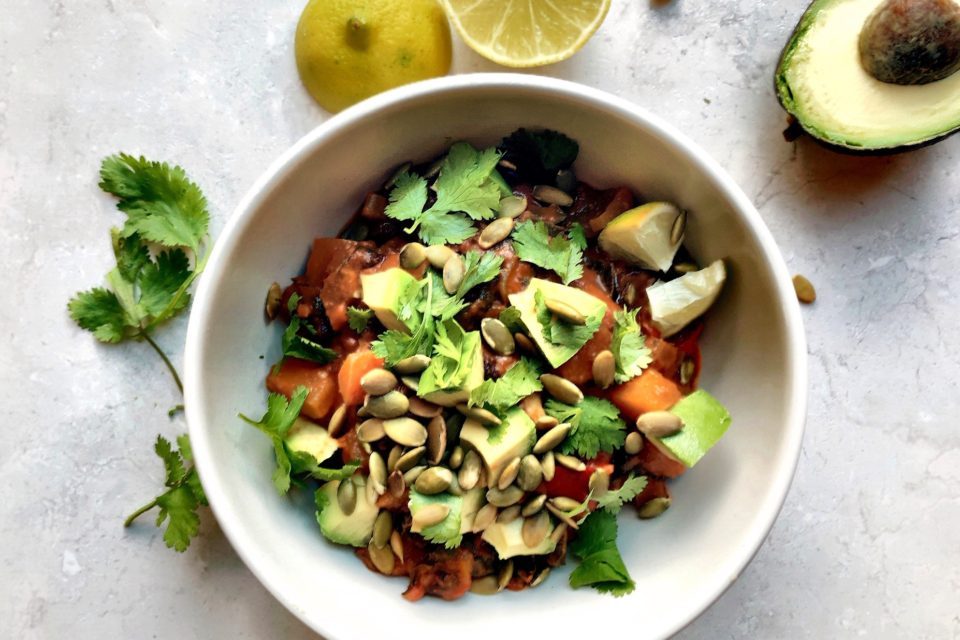
If in your previous life you’ve associated Chili with beef and grated cheddar cheese, I dare you to step away from your old ways and open yourself up to the Veggie Chili movement. Nothing is missing from this one, I kid you not! However, don’t forget to delight your taste buds with those tasty garnishes: fresh cilantro, avocado, cashew sour cream (if you like to go the distance  ), and definitely those toasted pumpkin seeds for a little crispy crunch!
Make this my way or change it up to suit your heart’s desires! But do let me know how you like it, if your family devoured it, and if you brightened someone’s day with it!

Nutritional Notes: Kabocha squash is loaded with Vitamin A (beta-carotene) known for its immune support, eye, skin & hair health, Vitamin C, plant-based iron, B vitamins & fibre. We love beans for their incredible protein power, fibre density, and benefits to cardiovascular health. Onions and garlic are amazing antioxidants, cancer fighters, and protectors against heart disease. And we are still crazy about Kale, no matter what they say, for its antioxidant properties, nutrient-density, Vitamin C, mineral dosage and heart protective capabilities!

Print

Veggie Squash Chili

Yield: 10-12

Veg-Squash-Chili-Close-Up.jpg

Ingredients

  • 2 Tbsp coconut oil

  • 1 medium red onion, chopped

  • 1 small kabocha squash, cubed

  • 1 large red bell pepper, chopped

  • 2 medium carrots, chopped

  • 2 ribs celery, chopped

  • 1 tsp salt

  • 6 cloves garlic, minced

  • 2 Tbsp chili powder

  • 2 tsp ground cumin

  • 1 tsp coriander

  • 1 ½ tsp smoked paprika

  • 1 tsp dried oregano

  • 1 large can (28 oz) diced tomatoes with juices

  • 1 can (15 oz) black beans, drained and rinsed

  • 1 can (15 oz) pinto beans, drained and rinsed

  • 2 cups vegetable broth

  • 1 bay leaf

  • 1 bunch kale, washed, stemmed and chopped

  • Juice of 1-2 limes

  • Fresh pepper

  • For Serving: Avocado, Cilantro, and Toasted Pumpkin Seeds

Instructions

  1. In a large heavy-bottomed pot over medium heat, warm the coconut oil and onion and sauté until softened. Add the squash, onion, peppers, carrot, celery and salt. Stir to combine and then cook, stirring occasionally, until the vegetables are tender, about 7 to 10 minutes.

  2. Add spices and cook until fragrant, stirring constantly, 3-5 minutes.

  3. Add the tomatoes, beans, vegetable broth and bay leaf. Stir to combine and bring to a simmer. Maintain a gentle simmer for 30 minutes or until vegetables are tender. Stir in kale, cook another 10 minutes and then remove from heat

  4. Before serving, add lime juice and fresh pepper, and adjust to taste. Serve with fresh avocado, cilantro or basil and toasted pumpkin seeds.

  5. Note: Best on day 2 (or 3 or 4 or 5).


Love this Recipe? You might like this one too!

Happy Mama Hormone Balancing Chocolate Mousse

Hormone-Choc-Mousse.jpg

If you are a woman, or know a woman, you need this recipe.

That’s it.

The ladies crave chocolate, okay?! Particularly at certain times during their cycle. There is a reason for this and it goes beyond a typical chocolate craving: women crave chocolate during the week leading up to menses because as the body prepares to lose extra volumes of blood, it demands more nutrients, particularly minerals. Real, unprocessed, high-cacao content chocolate (no, not mars bars & snickers, my Loves) is very high in minerals and the perfect mineral booster pre-menses (in small doses of course!). Eating a particularly nutrient-dense diet during this time encourages regular hormonal function, decreasing excess inflammation and reducing stress on the adrenals and the endocrine system.

Other Hormone Balancing Ingredients in this Recipe:

  • Avocado: Full of fiber, potassium, magnesium, vitamin E, B-vitamins, and Folic acid, avocados are a powerhouse food for hormone balance. They are a great choice for balancing insulin metabolism in your body and are also anti-inflammatory.

  • Coconut Oil: Provides necessary building blocks for proper hormone function, stimulates the immune system & metabolic function, and helps to balance mood disruptive blood sugars 

  • Tahini: I love love love tahini and use it liberally in many of my recipes. This beauty seed butter is loaded with phosphorous, magnesium, potassium, iron, and is one of the best plant-based sources of absorbable calcium. It is also helpful in liver detoxification, is high in protein, is alkaline, and promotes healthy skin and cell growth.

  • Maca: Maca is an endocrine adaptogen, gaining a gleaming reputation for its positive influence on hormone regulation. Maca stimulates and nourishes the hypothalamus and pituitary glands, which can have positive influences on the thyroid, pancreas, adrenal, ovarian and testicular glands.

My Dear Ladies:
Eat Chocolate. Not Too Much. Choose Good Quality. Eat with Joy.


Print

Happy Mama Hormone Balancing Chocolate Mousse

Choc-Mousse-2.jpg

Ingredients

  • 1 avocado

  • 1 Tbsp coconut oil

  • 2 Tbsp cacao powder

  • 2 tsp maca powder

  • 1/8 tsp sea salt

  • 1 Tbsp honey

  • 1 Tbsp tahini

  • 1/4 tsp vanilla

Instructions

  1. Combine all ingredients in your food processor or blender and blend until smooth.

  2. Serve immediately.

  3. Number of servings: 1 

Want to learn more about balancing hormones?


Roasted Tomato & Black Bean Soup

Rstd-Tomato-Black-Bean-.jpg

When I say easy, what I mean is: your hubby, your kids, your nanny, maybe even your poodle could make it, easy! Well, almost, anyways 😉 but you get the idea.

So, here you are: a minimal ingredient, week night soup, that’s been a surprise hit in our home for a few weeks now. Most of the ingredients are the kinds of things that I have on hand, which makes this soup particularly fantastic when it comes to the last minute, no-idea-what’s-for-dinner, gotta-pull-something-outta-your-hat-and-quick, kinda night. Just be sure to use roasted diced tomatoes (and yes, absolutely you can roast them yourself, you go getter, you!) and not plain diced tomatoes because the flavour will certainly be lacking.

We topped this soup off with some cubed avocado and fresh cilantro, but you are most free to be creative and turn that garnish scene into whatever your lovely heart desires. Just be sure to let me know how amazing it turned out!

Roasted Tomato & Black Bean Soup

Prep & Cook Time: 25 minutes
Makes 6-8 servings

Cans-soup.jpg


Ingredients

3 Tbsp coconut oil
1 large onion, diced
4 cloves garlic, minced
1 tsp cumin
1/2 tsp coriander
1 tsp salt
Fresh pepper
1 can black beans, drained and rinsed (15oz)
1 can roasted diced tomatoes, with juices (28oz)
3 cups vegetable stock
1 bunch of kale, washed, stemmed and chopped
1 Avocado (optional, for serving)
Chopped fresh cilantro (optional, for serving)

  • In a medium-large soup pot, over medium heat, melt coconut oil and add onions, stirring until softened. Add garlic, stirring until just softened. Add spices and stir just until fragrant.

  • Add beans, tomatoes, and vegetable stock and reduce heat to a strong simmer. Cover with lid and allow to simmer 15-20 minutes until beans are tender.

  • Stir in kale, reduce heat, and allow to wilt another 10 minutes. Adjust seasonings as needed.


As with most soups, this one gets better and better day after day!

Roasted Cauliflower & Arugula Salad

Roasted-Cauliflower-Arugula-Salad.jpg

If you are the kind of person who gets intimidated by all the gorgeous food photos online and wonders how those people can find the time and energy to make such gorgeous food all the time. This one’s for you.
This recipe is SUPER simple, uses easy to find ingredients, and has a very versatile dressing that you can easily use again and again for many other (potentially less-than-instagram-impressive) salads of all kinds!

If you felt like boosting the volume and density of this salad, by turning it into more of a meal, then I would suggest adding in some cooked quinoa or even a kamut rotini pasta kinda thing.
But simply as is, is quite lovely.

Print

Roasted Cauliflower & Arugula Salad

Prep Time: 15 minutes

Cook Time: 35 minutes

Total Time: 50 minutes

Category: Salad, Side Dish, Main Course

Cuisine: Vegan, Real food, Nutrient-dense, Vegetarian

Yield: 2-4

Roasted Cauliflower.jpg


Ingredients

  • 1 head cauliflower, cut into small florets

  • 2 Tbsp coconut oil

  • Salt & fresh pepper

  • 1 red pepper, diced small

  • 2 cups lightly packed arugula, roughly chopped

  • 1/4 cup toasted pine nuts (or slivered almonds)

  • 2 Tbsp pitted kalamata olives, roughly chopped

  • For the dressing:

  • 1 tsp dijon

  • 1 tsp maple syrup

  • 2 Tbsp red wine vinegar

  • 4 Tbsp olive oil

  • 1/4 tsp salt

  • 1 small clove of garlic, minced

  • Lots of fresh ground pepper

Instructions

  1. Preheat your oven to 375F.

  2. Toss cauliflower florets with coconut oil, salt & pepper and spread on a lined baking sheet. Roast for 30-35 minutes until lightly browned and fork-tender. Set aside to cool.

  3. In a medium bowl, place cooled cauliflower and all other salad ingredients.

  4. In a medium glass jar, place all dressing ingredients and shake well.

  5. Toss salad ingredients with enough dressing to coat, adjusting seasonings as desired. Serve immediately.


Coconut Mango Blueberry Muffins

Coconut Mango Blueberry Muffins.jpg

Mango + Blueberry + Coconut = I’m IN!!
This delicious powerhouse combo works beautifully in these muffins. What’s extra awesome, is that they are minimal ingredient and made simply with all, easy-to-find, whole food ingredients. My son’s first reaction should have been one of those funny-crazy kid youtube videos, because he was so excited about how good they were, that he had us all busting a gut in the kitchen over it. I haven’t met a kid yet who wasn’t pretty stoked on mangoes and blueberries, so these ones should be an easy sell 

If you feel like going the extra mile with this recipe, make your own almond flour by simply grinding up your favourite almonds in a dry food processor until a fine meal is formed.

Nutritional Tip: Store your almonds (and all nuts & flours) in your fridge, they will last longer and stay fresh. Once a nut gets too old, the oils start to turn. These rancid oils are at the root of many health struggles, including inflammation, cancer, atherosclerosis, Alzheimer’s, and many other damaging health conditions. Take good care of your nuts, my friends 

Print

Coconut Mango Blueberry Muffins

Yield: 12

Coconut-BM-muffins-1.jpg


Ingredients

  • 1 1/4 cups almond meal

  • 1/4 cup coconut flour

  • 1/2 tsp baking soda

  • 1/2 tsp baking powder

  • 1/2 tsp good quality salt

  • 2 eggs

  • 1/3 cup maple syrup

  • 1/4 cup coconut oil, melted

  • 2 tsp vanilla

  • 1/4 cup fresh lemon juice (1-2 lemons)

  • 2 Tbsp lemon zest (2 lemons)

  • 2 Tbsp chia seeds

  • 1/2 cup shredded, unsweetened coconut

  • 1/2 cup blueberries, fresh or frozen

  • 1/2 cup fresh mango, diced small

Instructions

  1. Preheat oven to 350F.

  2. In a large bowl, whisk together almond meal, coconut flour, baking soda, and salt. Set aside.

  3. In a medium bowl, whisk together egg, maple syrup, coconut oil, vanilla, lemon juice and zest. Stir in chia seeds and allow to set a few minutes.

  4. Pour wet ingredients into your large bowl with the flour mixture and stir until just combined (do not over-mix). Fold in shredded coconut and fruit.

  5. Distribute evenly among your lined muffin pan. Bake 25 minutes or until slightly browned and an inserted toothpick comes out clean. Cool for at least 30 minutes before serving (they will need time to set and will otherwise be crumbly). Enjoy!