Coconut Curry Butternut Soup

Butternut soup.png

It’s a great time of year to use squash. They are abundant and satisfying, but are also nutrient-rich powerhouses. Butternut is one of my favourites! It is versatile, creamy, full-flavoured, and easy to work with. High in Vitamin C, iron, potassium, magnesium, and bursting with beta-carotene, this starch is low on the Glycemic Index and wonderful for hungry littles, growing teens, and adults needing something satiating.

This recipe is simple, quick, and just real yummy!

This soup is so flavourful, you needn’t add anything extra!

Print

Coconut Curry Butternut Squash Soup

Ingredients

  • 2 cups butternut squash, peeled and cubed

  • 1 large onion, chopped

  • 3 Tbsp coconut oil

  • 1 Tbsp minced garlic

  • 1 Tbsp minced ginger

  • 2 cups veggie broth

  • 1 apple, peeled and cubed

  • ½ tsp cumin

  • 1 tsp curry powder

  • ½ tsp cinnamon

  • pinch salt

  • 1 can coconut milk

Instructions

  1. Preheat oven to 400F. Toss squash with 1 Tbsp coconut oil and season with salt and pepper. Roast for 15minutes or until just tender.

  2. Heat remaining oil on medium-low, in a large soup pot. Add onion. Saute until soft and translucent. Add garlic and ginger and stir until fragrant.

  3. Add veggie broth, apple, cooked squash and remaining spices, and simmer 10minutes or until squash is soft. Add coconut milk and stir.

  4. Remove from heat and puree in blender. Return to stove and heat through. Enjoy!

Bonk Bars

Bonk-Bars-Star-.jpg

I have to admit that I have a big time soft spot for my Bonk Bars.
They were one of my first original recipes that people were really excited about. On top of that, the honest-to-gosh-golly-goodness truth is that I just LOVE them SO much. They are my absolute favourite bar to have hanging around when I’m training for a distance run, rehearsing like mad for a dance show, or just being the busy body, high-functioning human that I am. They are THE perfect afternoon slump, pick-me-up bar with all those great combinations that we love so much: macronutrient balance, nutrient-density, and total flavour jam!

These bars were inspired by a good friend who is hypoglycemic and tends to “bonk” (have a blood sugar crash inducing fits of rage and/or extreme grumpiness) if he doesn’t eat good food regularly.  Loaded with blood-sugar stabilizing fiber (dates), fats (coconut oil & chia), proteins (nuts & seeds), complex carbs (oats), and natural sweetness, these are fool-proof bars for active people, athletes, teenagers, regular “bonkers”, and sweet-treat lovers everywhere. Easy to throw together and incredibly satisfying, these will keep well for weeks in the fridge (I dare you to try) and freeze well too!
Stay grump-free.
Look out for your friends.
Prevent “Bonking”.

Print

Bonk Bars

Prep Time: 20 minutes

Total Time: 20 minutes

Category: Snack, Healthy Treat, Power Snack

Cuisine: Vegan, Real food, Nutrient-dense, Vegetarian, Raw

Yield: 16 bars

Bonk-Bar-Stack-LG.jpg


Ingredients

  • 1 cup medjool dates

  • 1 cup almond butter

  • 1 cup oats

  • 3 Tbsp coconut oil, melted

  • ¼ cup sunflower seeds

  • ¼ cup sesame seeds

  • ¼ cup pumpkin seeds

  • ¼ cup shredded coconut

  • 3 Tbsp chia seeds

  • 1/4 tsp salt

  • 1/4 cup raisins

  • 1/4 cup chocolate chips

  • ¼ cup goji berries (mulberries/golden berries)

Instructions

  1. Soak dates in boiled water until soft (about 7-10 minutes).

  2. In food processor, combine dates and almond butter until smooth. Add oats and coconut oil and pulse until roughly combined. Transfer mixture to a large bowl.

  3. Add all remaining ingredients and combine.

  4. Pour into a lined 8 x 8 square pan and press down with wet hands until evenly distributed and smooth.

  5. Refrigerate for at least 1 hour before cutting into squares. Store in fridge.


If you try these Bars and love them (or not), let me know how they worked out for you!!

Love these? Want more recipes like this? Check these out:
Sesame Chocolate Power Balls

The Ultimate Cookie

Banana Oat Bars

Banana Oat Bars.jpg

Inspired by some very ripe bananas, a hungry family, and the need to have something on hand for either a quick breakfast or avoiding an afternoon crash, these bars are super easy to whip up, satisfying, and full of flavour. They are gently sweet and so moist, they might be able to pass as cake.  AND a little chocolatey goodness is always well received! A great recipe for little people, ravenous teenagers, and busy people alike. Enjoy!

Banana-Oat-Bars mine.jpg


Banana Oat Bars

Prep time: 15 mins
Bake time: 15-20 mins

Ingredients

2 ¼ cups oats
¼ cup ground flaxseeds
½ tsp baking powder
½ tsp baking soda
¼ tsp salt
1 tsp cinnamon
3 very ripe bananas
2 tsp vanilla
¼ cup applesauce
¼ cup honey
½ cup coarsely chopped almonds (or other nuts of choice)
¼ cup unsweetened dried coconut
1/3 cup chocolate chips

Chocolate Sauce:
3 Tbsp cacao
2 Tbsp coconut oil, melted
1 Tbsp honey

Instructions

  • Preheat the oven to 350F.

  • Place oats in your food processor and grind into a coarse flour. Place flour in a bowl and whisk together other dry ingredients.

  • Combine bananas, vanilla, applesauce and honey in your food processor and process until creamy. Stir into your dry mixture.

  • Stir in almonds, coconut and chocolate chips.

  • Pour into a lined 8 x 8 pan and smooth the top. Bake for 15-20 minutes until an inserted toothpick comes out clean and the edges are slightly browned. Cool.

  • To make chocolate sauce, stir together all ingredients in a small bowl and drizzle over bars. If the chocolate sauce is too thick, place bowl over a steaming pot of boiled water for a few minutes until slightly melted.

Feeding little (or big) hungry bellies something to feel good about!


Easy Chewy Granola Bars

Granola-bars-.jpg

It’s taken me a good while and several tries to come up with a granola bar recipe that is full of good stuff, stays chewy, and is quick and easy to throw together. Here it is. These are super popular with the kiddos, my active lady friends, and the backcountry boys alike.  This is a dependable, fool proof recipe, that turns out well every time.  Feel free to experiment and add your own flare!
Note: if your kids can’t bring nuts to school, simply swap out the almond butter for sunflower seed butter, pumpkin seed butter, or tahini!

Easy Chewy Granola Bars

Granola bar single.jpg

Ingredients

1/2 cup almond butter
1/2 cup honey
2 tsp vanilla
2 tsp cinnamon
Good pinch of salt (1/4 tsp)
2 Tbsp coconut oil, melted
1/8 cup coconut sugar
1/2 cup pumpkin seeds
1/2 cup shredded unsweetened coconut
2 cups oats
1/2 cup dried cranberries
1/2 cup good quality (high cacao content) chocolate chips
1/4 cup water

Instructions

  • Preheat oven to 350F and line an 8 x 8 pan with parchment.

  • Combine almond butter and honey in a small saucepan over low heat until just melted. Remove from heat and transfer to a large mixing bowl.  Add in all remaining ingredients, stirring until well-combined (I will often use my hands for this).  If the mixture seems dry, add a few Tbsps of water at a time until desired consistency is reached.

  • Pour mixture into your lined baking pan and press down with wet hands until evenly distributed. Bake for 30-45 minutes until edges are slightly browned.  Cool completely and cut into squares (I like to pop it into the freezer for 10 minutes before cutting).  Will keep refrigerated for up to a month.


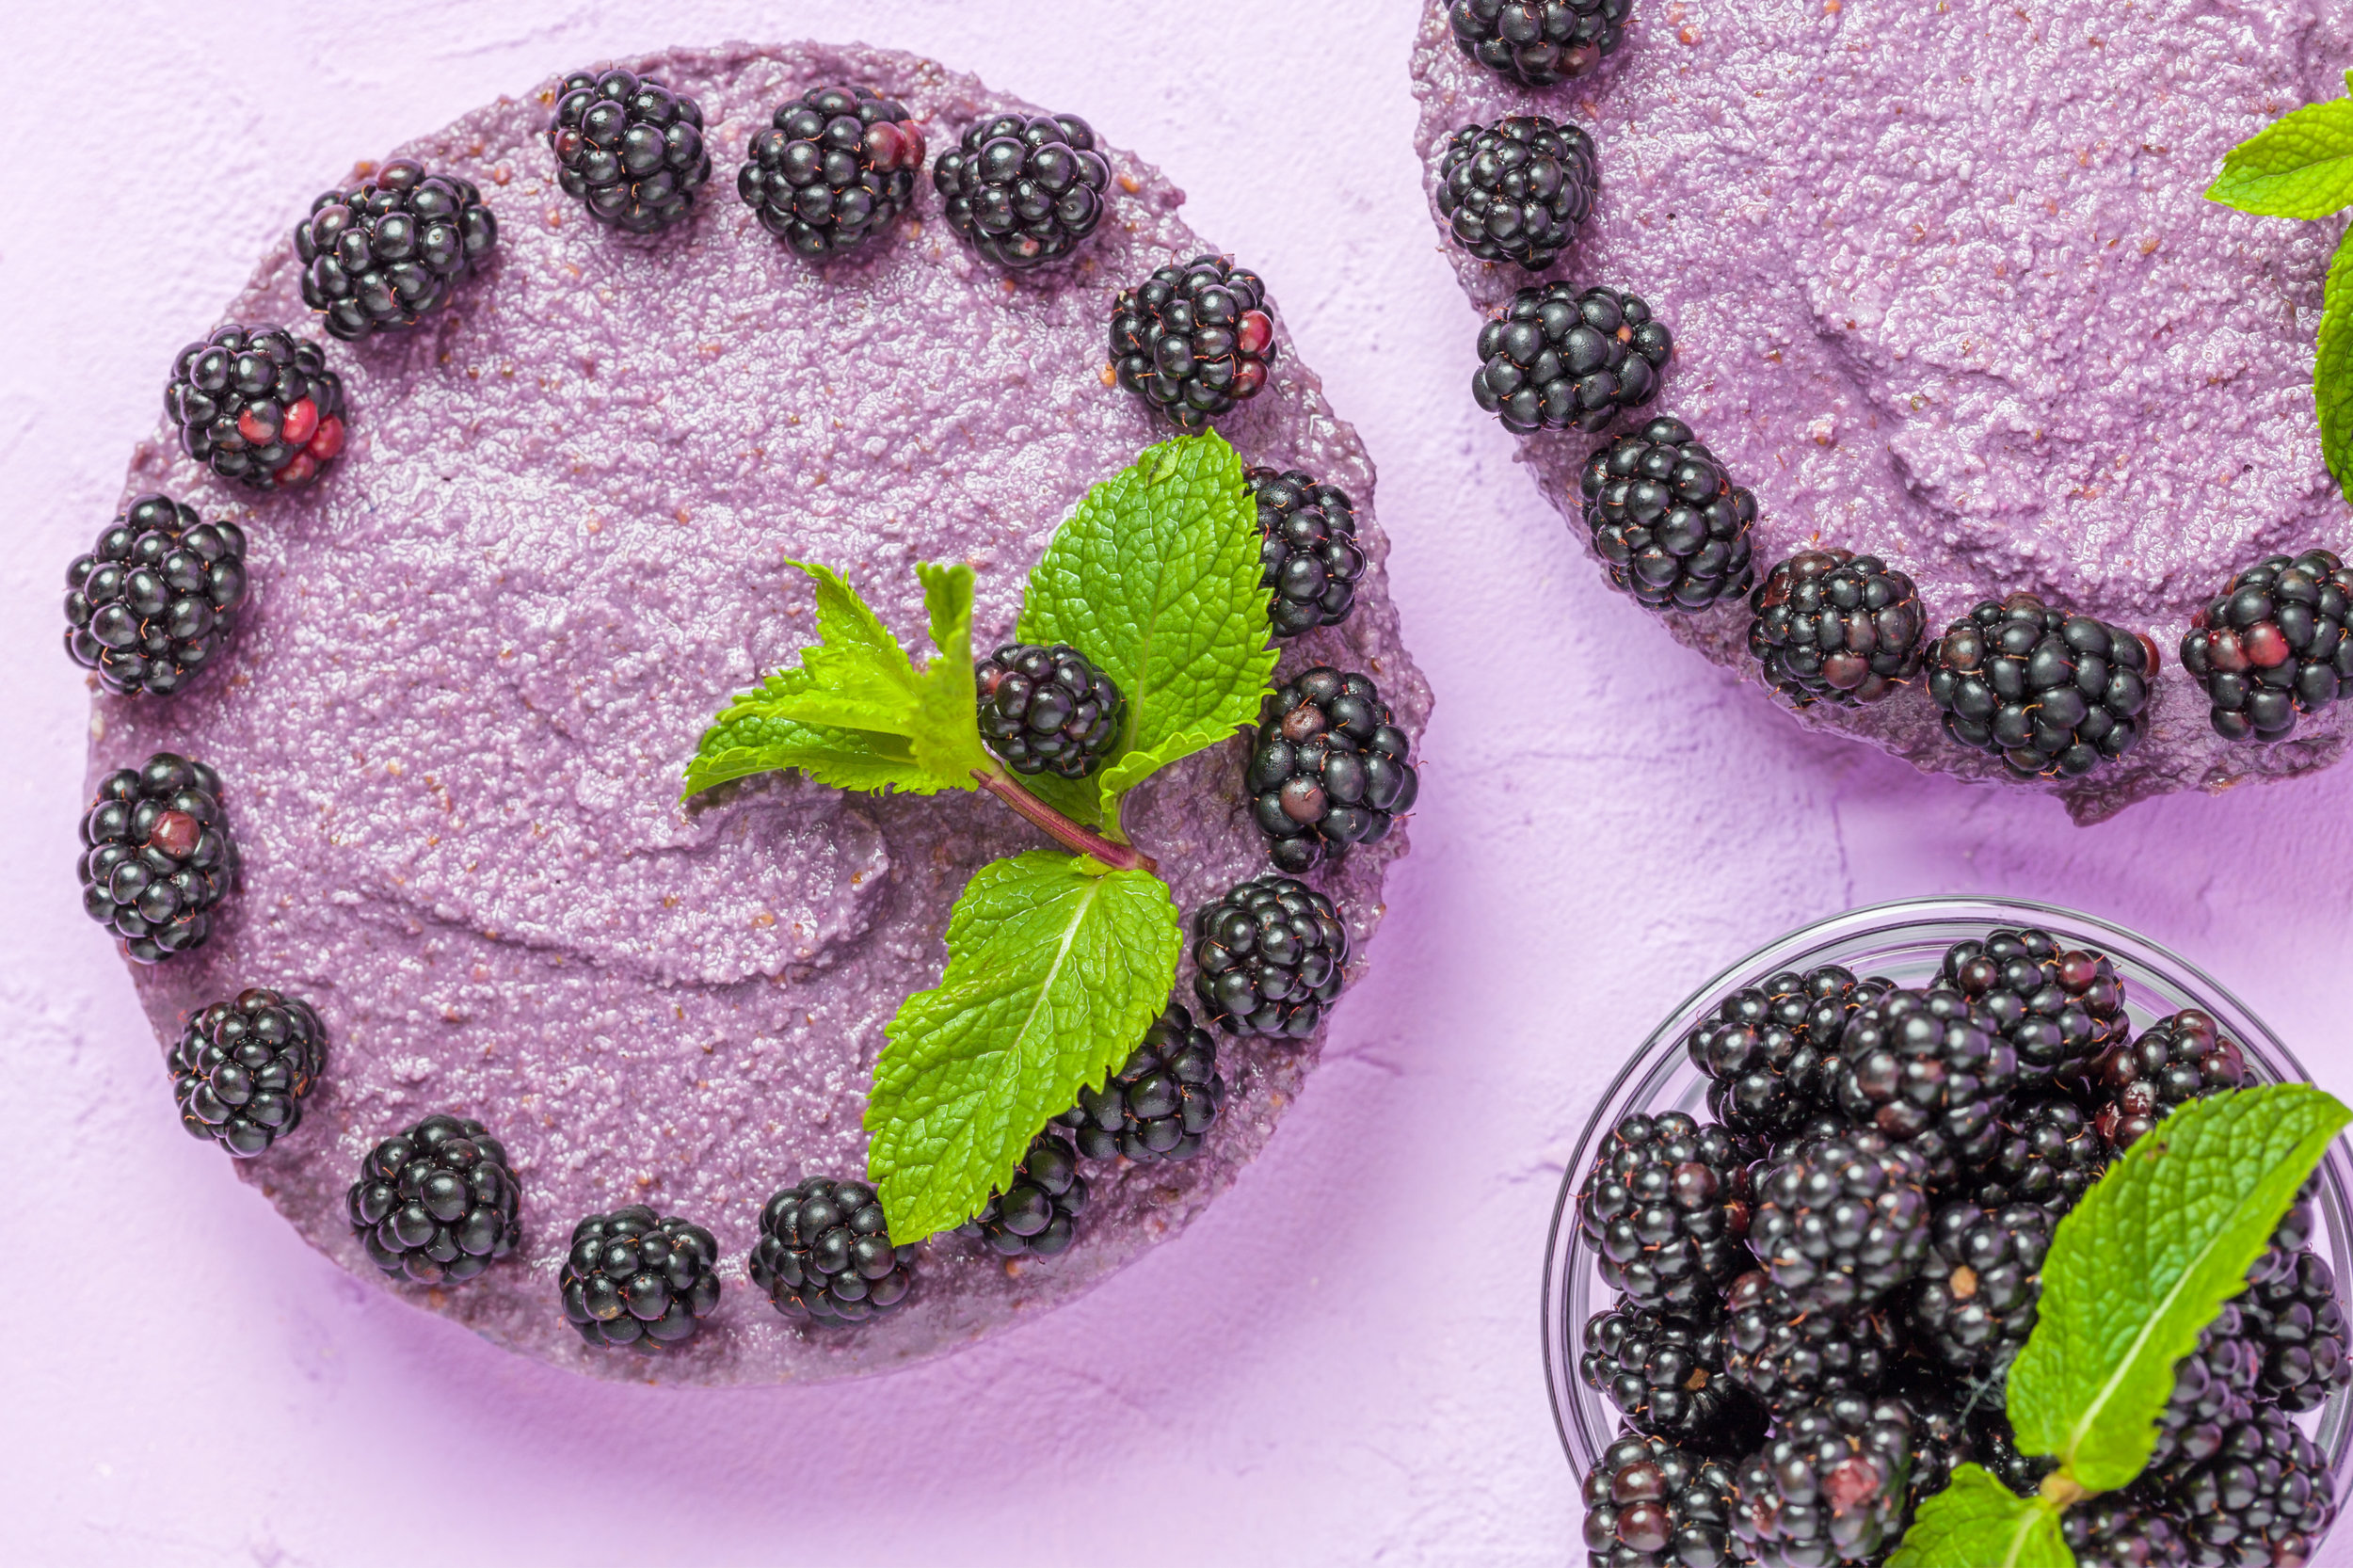
Blackberry Lemon Cashew Cheesecake

Blackberry Cheesecake (1).jpg

It all started with a vision (it usually does) of rich purple hues, a little tartness, a little sweetness, and a whopping load of flavour.  This recipe is really easy and loaded with high-quality, nutrient dense ingredients, which I love.  It finishes without the heaviness often accompanied by rich, sweet desserts and will leave you with energy as opposed to weight. I love this cake, it’s at the top of my list at the moment.  I just used this recipe at a Vegan Cooking workshop last weekend and it was a total hit!
The only warning I have for you is that this must be made the night before to allow time for the cashew filling to set.  I would slice it straight out of the freezer, but leave it to warm up a bit before serving.

Enjoy. Share. Or don’t. Above all, feel good about this one.

Lemon Blackberry Cashew Cheesecake

Ingredients

Crust:
1 cup medjool dates
½ cup pecans
½ cup almonds
¼ cup shredded, coconut
1 tsp vanilla
Pinch of salt

Filling:
1 ½ cups cashews, soaked overnight
1 cup blackberries
1/3 cup fresh lemon juice
1/3 cup maple syrup
1 tsp vanilla
¼ cup coconut cream (from a can of coconut milk)

Instructions

  • To make the crust, combine all ingredients in your food processor and process until well combined and mixture sticks together. Press into the bottom of a lined 7” round spring-form cake pan. Place in the freezer.

  • For the filling, combine all ingredients in food processor and process until smooth (this make take several minutes), scraping sides. Pour over crust and gently tap cake pan to settle ingredients. Place in the freezer overnight.

Not much more to say about this one, but ENJOY!

If you try this recipe, please leave a comment below and let me know how it went!

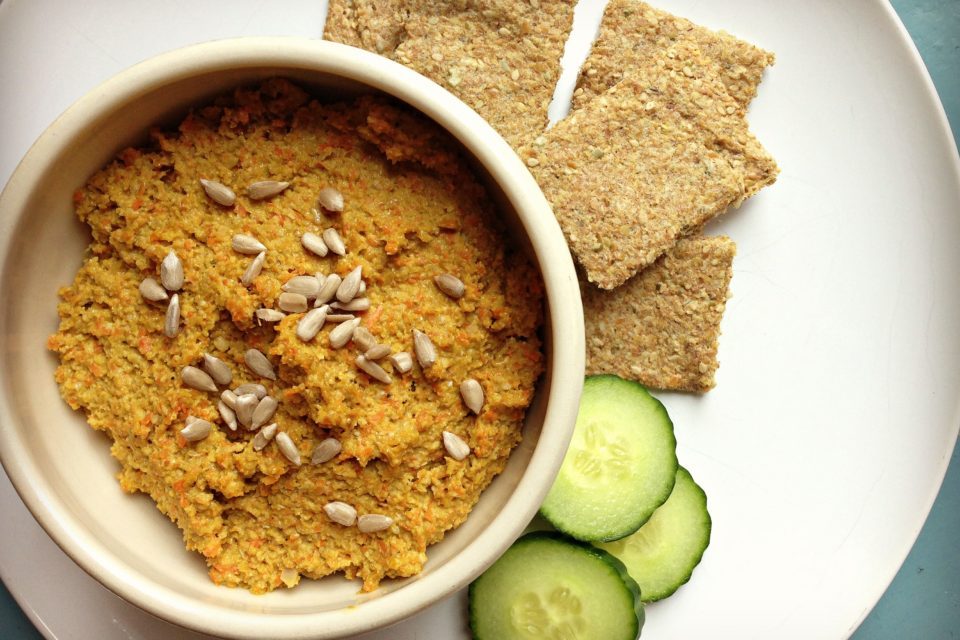
Curried Sunflower Seed Spread

sunflower-dip-w-crackers-.jpg

Here’s a pretty simple, easy to bang-off, “dinner party impresser” of a spread.  The only real pre-emptive here is that the sunflower seeds need to soak for a few hours before hand.  I love to use seeds as a base for sauces, dressings, and spreads, because they are nutritional powerhouses, high in protein, and super satisfying.  I’ve got big respect for the sunflower seed; they make great seed butter, are high in magnesium, vitamin E, selenium, support the cardiovascular system, help regulate mood, and are an excellent source of good quality fat.

Note: always keep your seeds refrigerated to preserve the integrity of the oils and to keep them fresh and tasting scrumptious.

Curried Sunflower Seed Spread

Ingredients

1 cup sunflower seeds, soaked 2 hour minimum
1 cup carrots, roughly chopped
1 inch fresh turmeric, minced
1.5 inch fresh ginger, minced
1/3 cup cashew butter
1/2 tsp salt
1/2 tsp curry powder
1/4 tsp cumin
1 Tbsp tamari
Fresh ground pepper to taste

Instructions

  • Drain and rinse sunflower seeds and place them in the bowl of your food processor along with all other ingredients. Process until smooth (this will take about 5 minutes), scraping sides frequently with spatula.

  • Serve with chopped veggies and homemade crackers or use as a filling in a tortilla or nori wrap.

  • Will keep refrigerated for up to 7 days.

Coconut Banana Muffins

Banana-Muffins-tray-.jpg

Our summer has finally chilled out enough to turn my oven back on and it’s good timing because my boys were craving some muffins and I was dying to create.  I also happened to have some pretty brown, fruit fly lovin’, bananas begging to be a part of something fantastic!

These muffins are vegan, gluten-free, and as sweet as brown are your bananas! (The browner the better). Note: if your bananas aren’t quite there yet, pop them in a brown paper bag overnight to quicken the ripening period.

Coconut Banana Muffins

single-muffin.jpg

Ingredients:

2 cups DIY gluten free flour blend (I use this one)
1 tsp baking powder
1 tsp baking soda
1/2 tsp himalayan sea salt
4 large, very ripe, bananas
1/2 cup coconut sugar
1/4 cup coconut oil, melted
1/2 cup coconut cream (if you don’t have any coconut cream, scoop off the cream from a can of coconut milk)
2 tsp vanilla extract
1 cup shredded, unsweetened, coconut (1/4 cup reserved)
1/3 cup high cacao content chocolate chips

Instructions:

  • Preheat oven to 350F. Line muffin tin with parchment paper or reusable silicon liners.

  • In a large bowl, combine the flour, baking soda, baking powder, and salt, and whisk together.

  • In a medium bowl, mash bananas with a fork. Add in sugar, oil, cream, and vanilla, and combine. Pour wet mixture into dry and stir with a large spoon.  Stir in 3/4 cup of shredded coconut and chocolate chips.

  • Spoon muffin mix into the tins and sprinkle with remaining coconut.

  • Bake for 22-25 minutes until slightly brown around the edges and an inserted toothpick comes out clean.

  • Cool completely and store covered with a dish towel to enable air circulation.

Note: I like to set half the batch aside to freeze for lunches and watch the others get devoured in just a few days. Enjoy!

Sesame Chocolate Power Balls

Sesame-Choc-balls-.jpg

These little babies were inspired by the need for more protein packed lunchbox snackeroos for the little kiddos who can’t pack nuts in their lunches due to school specifications. I came up with these easily, as they’re super quick to whip together, they contain staple ingredients that live in my kitchen, and I love love love the combo of sesame and chocolate: salty-sweet-earthy deliciousness!

Designed with the littles in mind, these are full of protein, beneficial fats, fibre, calcium, magnesium, and immune boosting antioxidants, they are perfect for an afternoon boost without the blood sugar crash of refined sugar. They are not to be reserved just for your kids though, so hide a couple in the back of the fridge and try them out mid-afternoon when you’re feeling sluggish and unfocused, they are sure to satisfy in many ways! Enjoy!!

Sesame Chocolate Power Balls

Yield: 12 - 16 Balls

Sesame-ball-single.jpg

Ingredients

  • 1 c dates, soaked in hot water for 10 minutes

  • 1/2 cup raw tahini

  • 1/4 cup hemp hearts

  • 1/2 tsp salt

  • 1/2 cup cacao powder

  • 1/4 cup dried cranberries

  • 1/3 cup toasted sesame seeds

Instructions

  1. Toast sesame seeds in a hot, dry, frying pan over medium heat until lightly brown. Remove from heat and empty onto a small plate and set aside.

  2. In a food processor, combine soaked dates, tahini, hemp hearts, salt, and cacao. Blend until smooth and well combined.

  3. Add dried cranberries to processor and pulse a few times until they are incorporated, but not blended.

  4. Using clean hands, roll 1-2 tbsp of mixture in your hands until a smooth ball is formed. Roll each ball in toasted sesame seeds until completely coated (or just coat half). Place onto a cookie sheet.

  5. Place finished balls into the fridge until firm (2-4 hours). Store refrigerated. Will keep 3-4 wks in fridge or 6 months in the freezer.


Be sure to let me know how these work out for you!

Ginger Plum Crisp

Ginger Plum Crisp.jpg

It is Fall Harvest and plums are in abundance! This crisp is super simple but really really good. Gluten-free and made will all ingredients that live in my house, it’s an easy one to pull off for a dinner party, potluck, or just because there are loads of plump purple goodies begging to be baked! I served the leftovers to my boys in the morning with a dollop of coconut kefir and we all felt good about that!

plums-for-crisp.jpg

Print

Ginger Plum Crisp

Prep Time: 15 minutes

Cook Time: 45 minutes

Total Time: 1 hour

Category: Dessert, Breakfast, Snack, Tea time

Cuisine: Vegan, Real food, Nutrient-dense

Serving Size: 6

plum crips baked.jpg

Ingredients

  • 3 cups diced plums

  • 1 heaping Tbsp minced ginger

  • 2 Tbsp maple syrup

  • Good pinch of sea salt

  • For the Topping:

  • 1 cup oats

  • 1/3 cup oat flour

  • 1/4 cup slivered almonds

  • 1 tsp cinnamon

  • 1/2 tsp ginger powder

  • 1/4 tsp sea salt

  • 2 Tbsp coconut sugar

  • 1 Tbsp maple syrup

  • 3 Tbsp melted coconut oil

Instructions

  1. Preheat oven to 350F.

  2. In a medium bowl, combine plums, minced ginger, maple syrup, and sea salt. Spread evenly along the bottom of a small glass or ceramic baking dish (mine is 6 x 8).

  3. For the topping, combine all ingredients in your mixing bowl and spread over top of the fruit bottom.

  4. Bake for 40-45 minutes until edges begin the brown and you see the juices boiling along the sides.

  5. Serve with coconut whip cream or coconut vanilla ice cream.

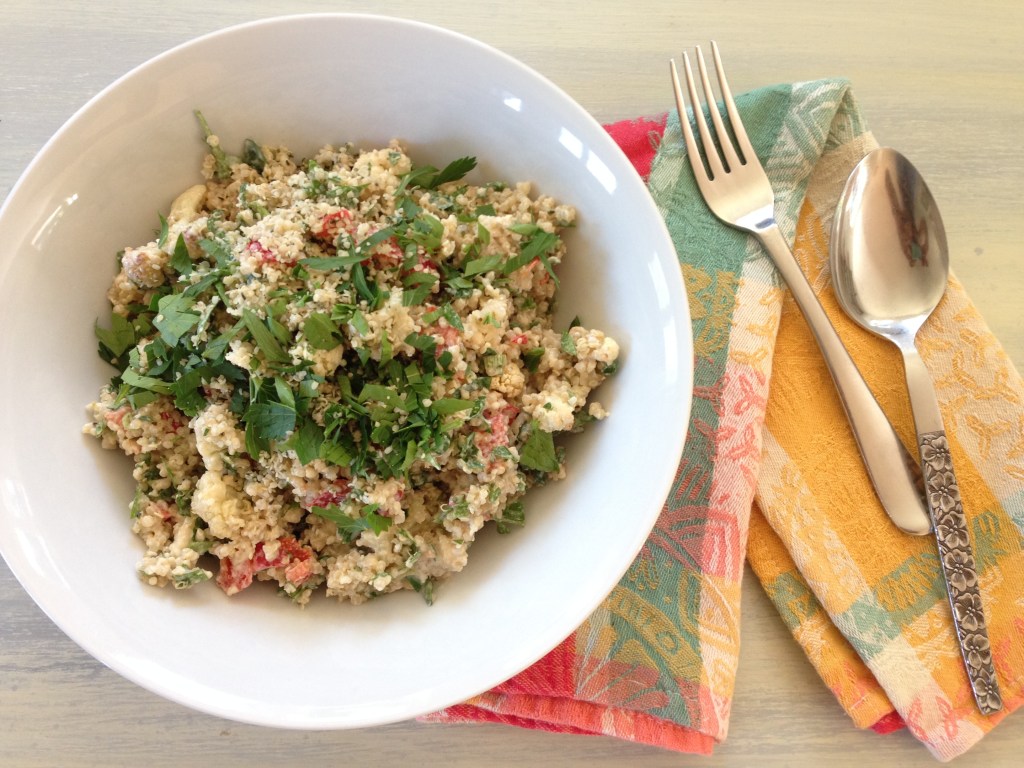
Herbed Cauliflower Quinoa Salad with Lemon Tahini Dressing

Cauliflower quinoa salad.jpg

I have a secret (not-so-secret) love affair with roasted cauliflower. It is sooooo good! This recipe began with some roasted cauliflower amazingness and just exploded in flavour from there.

Roasted Cauliflower.jpg

This particular salad is spectacular for lunchtime. It is easy, makes a good sized batch, is filling and satisfying, grounding, and is well-rounded without needing anything else along side. I’m a big fan of eating grains at lunchtime, as we digest them better than in the evening, and they tide us over throughout the afternoon slump without any sugar highs and lows.

I do have to say something about this dressing.
Just one thing.
Or two.
Whoa…YUMMY!!
So make a double batch if you have it in you and use it for leafy salads, salmon, over cooked veggies and rice, or just spoon it right out of the jar. Go for it!

Feel free to add in some of your favourites to this salad, it could easily handle some cucumbers, spinach, steamed kale, toasted almonds, pumpkin seeds, or fresh dill.
Or don’t, tis straight up good just the way it is! (just like you).

Print

Herbed Cauliflower Quinoa Salad with Lemon Tahini Dressing

Prep Time: 15 minutes

Cook Time: 35 minutes

Total Time: 50 minutes

Category: Salad, Lunch, Side dish, Potluck

Cuisine: Vegan, Real food, Nutrient-dense, Vegetarian

Yield: 4-6 servings

Cauli quinoa salad 2.jpg

Ingredients

  • 3/4 cup dry quinoa

  • 1 1/2 cups water

  • Pinch sea salt

  • 2 Tbsp coconut oil

  • 1 head cauliflower, chopped into bite sized pieces

  • 1 red pepper, diced

  • 1/2 cup minced parsley

  • 4 Tbsp hemp hearts

  • 2 spring onions, minced

  • For the Creamy Tahini Dressing

  • 1/3 cup tahini

  • 1/3 cup water

  • 1/4 cup fresh lemon juice

  • 1/2 tsp himalayan sea salt

  • 1/4 tsp fresh ground pepper

  • 3 Tbsp olive oil

  • 1 Tbsp maple syrup

  • 1 Tbsp apple cider vinegar

Instructions

  1. To cook quinoa: in a small pot, bring quinoa, water, pinch of salt and an optional tsp of coconut oil to a boil. Reduce to simmer and cook until all water has been absorbed (about 15 minutes). Remove from heat and allow to cool at least half an hour.

  2. To roast cauliflower: preheat oven to 375F. Toss cauliflower pieces in 1-2 Tbsp of melted coconut oil and sprinkle with sea salt. Bake for 20-25 minutes until lightly browned and soft. Set aside.

  3. In a large bowl, combine all salad ingredients and toss together with a fork.

  4. For the dressing, place all ingredients in a high-powered blender (although a regular blender will do the trick), and combine until smooth.

  5. Toss salad with a generous helping of dressing, sprinkle with hemp hearts and parsley and serve.

  6. Will keep in fridge for 3-4 days.

Creamy Roasted Red Pepper & Tomato Soup

Tomato Soup.jpg

On a dark and stormy night, with the first fallings of snow, the candles were lit and the soup pot was a calling.
This soup created a buzzing of mmmm’s and ahhhh’s and this creative chef did a little slippered happy dance around the kitchen when it was finally time for the final reveal!
Great for a Sunday afternoon, when you’re in the house putzing about, or a weekday meal, this soup will fill the house with sultry aromas of roasting garlic and red peppers, and satisfy your desire for a creamy soup without the addition of dairy.

roasted-peppers.jpg


Print

Creamy Roasted Red Pepper & Tomato Soup

Prep Time: 20 minutes

Cook Time: 1 hour, 15 minutes

Total Time: 1 hour, 35 minutes

Category: Soup, Appetizer, Lunch, Dinner

Cuisine: Vegan, Real food, Nutrient-dense, Vegetarian

Serving Size: 6-8 servings

tomato soup-pot.jpg

Ingredients

  • 2 red peppers

  • 2 heads of garlic

  • 2 Tbsp melted coconut oil for roasting + 3 Tbsp for soup

  • Salt & Pepper

  • 1 cup cashews, soaked overnight and rinsed

  • 2 cups vegetable stock or bone broth

  • 1 onion, diced

  • 4 cloves garlic, minced

  • 1 tsp salt

  • 1 28 oz can diced organic tomatoes

  • 1 tsp basil

  • 1/2 tsp thyme

  • Fresh pepper to taste

Instructions

  1. Preheat oven to 400F. Cut red peppers in half and place skin side up on a lined baking tray. Drizzle with coconut oil and season with salt & pepper. Cut tops off garlic bulbs. Drizzle with coconut oil, season with salt & pepper and wrap in aluminum foil. Roast peppers and garlic for 35-45 minutes until nicely soft and skin on peppers begins to bubble. Remove from heat and set aside to cool slightly.

  2. Meanwhile, in a large soup pot, melt coconut oil and add onions, and stir until softened, about 5 minutes. Add garlic and salt and stir for another 2 minutes or until fragrant. Add diced tomatoes and spices.

  3. In your blender, combine cooled peppers and roasted garlic cloves (just squeeze them out from the whole bulb), cashews, and stock. Blend until smooth.

  4. Add cashew blend to your soup pot. Bring to a gentle boil and then reduce heat to low and simmer for 15-20 minutes. Adjust seasoning to your desired taste.

  5. Serve with drizzled coconut cream, your favourite crackers, kamut toast, or straight up. Delicious every way!


I hope you enjoy this soup as much as we have in our house! This one has quickly been added to the home staples and soup repertoire, and is perfect for the onset of this wintry beauty!

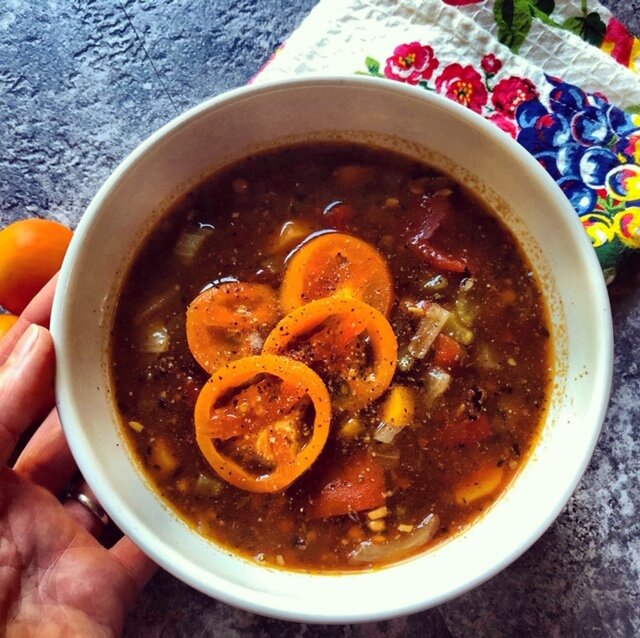
Balsamic Tomato Lentil Soup

Balsamic Lentil Tomato Soup.JPG

The onset of wintry days beckon a healing pot on the stove and this soup is a front runner in nutrient density, protein power, and broth soothing satisfaction. And also, so very simple & easy!

A twist on a warming tomato lentil combination, this soup will satisfy both your tastebuds and your hungry belly. It is best served on the second day, once the flavours have been given some time to settle and merge together, and with a hunk of fresh spelt bread from the neighbourhood baker (thank you Ymir Bakery!).

And those lentils? I love me some lentils! Not only are these little beauties packed with protein, but they are loaded with nutrition and so good for the digestive tract. Be sure to soak them overnight before using, this simple act will make those magnificent nutrients more bioavailable and give them a smoother sail down that GI tract👍

Health Benefits of Lentils:

  • They’re full of polyphenols: active compounds that fight against harmful agents in the body—everything from ultraviolet rays and radiation to heart disease and cancer. They are also beneficial in protecting against cardiovascular disease and diabetes.

  • They’re super high in protein: 1 cup of lentils brings in a whopping 18gr of protein, which is a serious protein injection!

  • They’re full of fiber: crucial for healthy digestion, balanced weight, and preventative in pretty well everything nasty: heart disease, cancer, diabetes, high cholesterol. Fiber is also helpful in maintaining proper gut bacteria, energy levels and regular detoxing.

  • They are high in absorbable calcium: which not only makes them good for your bones, but also beneficial for your heart, muscles, nerves, and protective against heart disease, cancer, and high blood pressure.

  • High in magnesium: also beneficial for healthy bones, magnesium is responsible for hundreds of biochemical reactions in the body. It may contribute to sleep balance, stress levels, mood, blood pressure, is anti-inflammatory, and helps to reduce insulin resistance.

Balsamic Tomato Lentil Soup

Prep Time: 10 minutes
Cook Time: 45 minutes
Total Time: 55 minutes
Category: Appetizer, Soup, Main Meal
Cuisine: Vegan, Real food, Nutrient-dense, Vegetarian
Serving Size: Serves 10

tomatoes on vine.jpg

Ingredients

3 Tbsp coconut oil
1 large yellow onion, diced
1 1/2 tsp full mineral sea salt
4 cloves garlic, minced
2 medium carrots, diced
2 stalks celery, diced
2 tsp fresh thyme or 1 1/2 tsp dried
1/2 tsp dried basil
1 cup french lentils, soaked overnight and rinsed
1 28 oz can organic diced tomatoes (fire-roasted are best🍅)
6 cups homemade veggie broth, bone broth, or veggie soup stock
1/4 cup balsamic vinegar
1/4 tsp freshly ground black pepper
More salt, if desired
Serve with a drizzle of balsamic vinegar (optional)

Instructions

  • In a large soup pot, heat coconut oil and onions over medium heat and saute until soft, translucent, and browning slightly.

  • Add the carrots, celery, and garlic, and saute until slightly softened.

  • Add the salt, thyme, and basil, and stir until fragrant.

  • Add lentils, stir to coat (2 minutes), then add tomatoes and vegetable stock.

  • Cover soup and bring to a boil. Reduce the heat to a gentle simmer and cook until lentils are tender, about 30-35 minutes. Add balsamic and pepper, and simmer low for another 5-10 minutes Adjust seasoning with more salt, pepper, or balsamic.

  • Allow to cool, store overnight, gently reheat, and serve with a drizzle of balsamic.

This is one of my oldest recipes that a friend just reminded me of. We’ve just had it for dinner several times this week and it’s definitely better & better as it ages. I am reminded of the simplicity of some pots of soup and feeling grateful for this little gem.

If you make this soup, please leave me a note below and let me know how you enjoyed it or if you made any changes. I truly LOVE to hear your feedback!

The Ultimate Cookie

Ultimate Cookie.jpg

What makes a really good cookie?

And by good, I mean health benefiting, energy boosting, and super satisfying, just to be clear. A truly good cookie can be everything you want it to be AND make your body, mind, and soul happy.

What do we love most about cookies?  They’re chewy, sweet, salty, satisfying, and usually contain chocolate.

When constructing the healthy cookie, we can honour all of these delicious qualifications with a few simple alterations to the average cookie recipe.

Healthify Your Cookie:

  • Chewiness: something to hold your cookie together. Some good health benefiting suggestions: chia + water, ground flax +
    water, eggs, and nut butters.

  • Sweetness: oh so necessaire!! What’s key to gaining ground in the daily health challenge is to swap out those refined sweetness wannabes (and I mean permanently) for body-loving goodness such as honey, maple syrup, bananas, or dates.

  • Salty: this one’s easy! Just say no to iodized salt. For true mineral uptake and to receive actual nutrition from salt, choose good quality sea salt or pink himalayan salt.

  • Satisfaction: what makes a cookie’s satisfaction meter shoot through the roof is not the sugar and chocolate, my friends, it is the fat + carbohydrate + protein quotient. Using all 3 macronutrients in a power snack allows you to feel full longer, to keep your blood sugar levels stable, and to boost your energy and brainpower in a way that doesn’t mess with your metabolism. Some ideas: for good fat: coconut oil/nuts/seeds; good protein: nuts/seeds/hemp hearts; and good carbohydrates: oats/oat flour/almond meal/banana.

  • Chocolate: be choosy about chocolate! Real dark chocolate is full of beneficial minerals and antioxidants, but don’t let the store shelves fool you! There are many variations on chocolate out there will a LOT of added nonsense.  Find some dark goodies with as few ingredients as possible (3), look for cacao in the ingredients list and choose minimal sweetness.

Here’s my latest and most ingenious cookie recipe that I am so proud of and that my family and I did the kitchen happy dance for when I first took them out of the oven! The absolute bonus? They’re SO easy!

The Ultimate Cookie

ultimate-single-cookie.jpg

2 Tbsp chia seeds + 2 Tbsp water
2 ripe bananas
⅓ cup honey
⅓ cup almond butter
1 tsp vanilla
½ heaping tsp cinnamon
Good pinch of sea salt
¼ cup hemp hearts
1 ½ cup oats
⅓ cup raisins
⅓ cup chocolate chips

  • In a small bowl, whisk together chia seeds and water and let sit 10 minutes.

  • In a medium bowl, whisk wet ingredients together with a fork.

  • Add in dry ingredients and combine. Fold in raisins and chocolate chips. Form into cookies of whatever size you like and place on a parchment lined baking sheet.

  • Bake at 325 for 25 mins.

Layered Lemon Chocolate Cheesecake

Layered-cake-side-.jpg

Creamy Coconut Lemon Filling meets Avocado Chocolate Mousse.
Oh.
Yes.

This cake not only looks spectacular, inciting noises of mmm’s and ahh’s, it is also quite easy to whip up. It’s not overly sweet, which I love, the decadence takes care of providing so much flavour and nutrient density, that extra sweetness is just unnecessary. As with all raw cheesecakes, you do need a little fore thought, as these decadent desserts need to set overnight in the freezer. I will usually make a layered style cake like this on a day when I’m puttering around the house or am doing some batch cooking or prep. It’s best to let each layer harden before adding the next, so don’t rush this process.
Do feel free to make this style of cheesecake your own, depending on what you have on hand or what’s in season. You may feel like adding a cup or so of fresh raspberries or peaches to the middle layer or covering the chocolate mousse with toasted coconut flakes and raw cacao nibs. Note on the chocolate mousse layer, this also makes an incredible icing - you can increase the sweetness a little, if you like, and use it as a chocolate frosting for cupcakes or chocolate cake 😋. Definitely be careful not to leave it unattended on your kitchen counter, as it may gain some finger marks or mysteriously lose volume….
Any which way, I have ultimate confidence in the satisfaction level of this layered beauty.
However you make it, share it, and be sure to savour every bite!

Layered Lemon Chocolate Cheesecake

Prep Time: 35 minutes
Total Time: 35 minutes + 1 hour 20mins for freezing time
Category: Vegan, Dessert, Cheesecake, Decadent
Cuisine: Vegan, Real food, Nutrient-dense, Vegetarian
Yield: 10-12

Layered-chz-cake.jpg

Ingredients

For the Crust:
1/2 cup pecans
1/2 cup almonds
1/2 cup shredded coconut
1 cup medjool dates (or other soft dates), pitted
2 Tbsp raw cacao nibs
1/4 cup cacao powder
Good pinch of salt
A little water if needed (2 Tbsp)

For the Cashew-Lemon Cheesecake:
2 cups soaked cashew pieces (soaked at least 4 hours)
1/4 cup fresh lemon juice
1 cup coconut cream
2 tsp vanilla
1/4 tsp salt
1/3 cup maple syrup/honey

Chocolate Avocado Mousse:
2 ripe avocados
1/2 tsp salt
1/4 cup melted coconut oil
1/2 cup cacao powder
2 tsp vanilla
1/3 cup maple syrup/honey

Instructions

  • For the Crust: Combine all ingredients in your food processor and process until a coarse meal forms (do not over-process or it will lose it's crunchy-goodness appeal). If the mix is quite dry, add a few Tbsps of water until it sticks together. With wet hands, press crust into a lined 8 x 8 springform cake pan. Place cake pan in the freezer for 10 - 20 minutes until set.

  • For the Cheesecake Filling: Combine all ingredients in your food processor and combine until smooth. This may take several minutes. Note: if it looks like the mixture has curdled, just continue processing, it will become creamy with a little patience. Pour over crust and return to the freezer to set for at least 1 hour.

  • For the Chocolate Mousse: Combine all ingredients in your food processor and combine until smooth. Pour over top of the hardened cheesecake and smooth top with a spatula. Return cake to the freezer and allow to set overnight.

  • When it is time to remove the cake from the pan, run a thin knife under very hot water and slide it along the sides of the pan. While still quite frozen, use this warmed knife method to cut the cake into slices. I recommend allowing the cake to soften before serving - rest on the counter for 15-20 minutes.

    *Notes: It is important to remember to soak the cashews overnight the night before. The cake will also need an hour to harden in between adding the cashew layer and topping with the mousse.


Roasted Squash & Almond Salad with Lemon Tahini Dressing

Roasted squash & almond salad.JPG

Do not underestimate the loveliness of squash at lunchtime, dear friends.
The bright orange squash is a kind of “hiding in the shadows” nutritional superhero. The kombocha is my personal favourite, full of Vitamins A & C, beta-carotene, iron, copper, magnesium, and all those amazing B vitamins.  It is a low-glycemic index carbohydrate but not a low quantifier for energy supply.

Having squash at lunch is a super way to add some veggie power, a carbohydrate hit that will get you through the afternoon slump, and lend a tummy satisfying addition to your same-old lunchtime salad bar.
You know who you are!! I see you and your same boring salad.
Try something new.
Come on, get out of that comfort zone.
You will not be disappointed!

Roasted Squash & Almond Salad with Lemon Tahini Dressing

Prep Time: 20 minutes
Total Time: 20 minutes
Serving Size: 4-6 Large Portions

Squashes.jpeg

Ingredients

  • ½ a kabocha, acorn, or butternut squash, chopped into ½ inch cubes

  • 2 Tbsp coconut oil, melted

  • Sea salt & Fresh pepper

  • 4 cups Mixed greens (I like spinach)

  • ¼ cup red onion, thinly sliced

  • ½ red pepper, diced small

  • ½ cucumber, seeded and sliced

  • ½ cup slivered almonds, toasted

  • Tahini Dressing

  • ¼ cup fresh lemon juice

  • ¼ cup tahini

  • 2 cloves garlic

  • 1/3 cup water

  • ½ tsp cumin

  • ½ tsp sea salt

  • 1 tsp maple syrup

  • 3 Tbsp olive oil

  • Fresh pepper

Instructions

  1. Preheat oven to 375F. Toss squash with melted coconut oil and season with salt and pepper. Roast for 30 – 40 minutes until for tender, remove from oven and set aside.

  2. For the dressing, combine all ingredients in your blender or with an immersion blender and blend until smooth.

  3. To assemble: in a medium bowl, place washed greens and roasted squash, then top with diced vegetables, red onion, and toasted almonds. Toss with dressing. Serves 2.

Vanilla Cashew Coconut Milk

cashew-milk-.jpg

Making your own nut milk has unending health benefits.
The store bought ones are mostly water, loaded with preservatives to extend shelf life, sweetened with added sugars, and bulked up with stabilizers and thickeners.

One of the most common additives we find in store-bought nut milks is carrageenan. There are piles of studies that link this preservative to intestinal inflammation, liver & colorectal cancers, as well as immune suppression and fetal toxicity & defects.  Packaged nut milks also tend to have the addition of health depleting vegetable oils and are often fortified with vitamins and minerals that are difficult to absorb and may stress the digestive system and the kidneys.

Making nut milk your self ensures that you know exactly what’s in there.

There is no processing that removes the nutrient qualities of the nuts (or the coconut in this case), you get to choose your quality of water, you may sweeten it with whatever you like or omit what you don’t, and the satisfaction just has no substitute.

It may seem overwhelming to think about regularly pulling off homemade nut milk to feed your family. But honestly, once you get into the groove of soaking the night before and allotting 10 minutes of blending and squeezing, it becomes something far more attainable than just giving it a pass because it’s easier to buy it. The benefits far out-weigh the hassleand it feels pretty good to watch your loved ones glug down your homemade goodness.

This here is our current most favourite day-to-day nut milk that we consume in our house. Feel free to swap in the nut of your choice or reduce the sweetness. I’ve been using cashews lately because they are creamy and more affordable than almonds, but this milk is wonderful with almonds.

Even if you are unable to keep up with the homemade nut milk demands, just give it a try a few times and see how it feels. My guess: it’s gonna feel pretty darned good.

Print

Vanilla Cashew Coconut Milk

Prep Time: 10 minutes

Total Time: 10 minutes

Category: Breakfast, Drink, Snacktime, Anytime

Cuisine: Vegan, Real food, Nutrient-dense, Vegetarian

Yield: 6-8 servings

jar milk.jpg
  • Ingredients

    • 1 cup cashews, soaked overnight

    • ½ cup shredded coconut, soaked overnight

    • 5 cups water

    • 2 medjool dates

    • 2 tsp vanilla

    • Pinch sea salt

Instructions

  1. Soak cashews and coconut overnight.

  2. Drain and rinse cashews and coconut.

  3. Place all ingredients in a blender and blend until smooth and creamy.

  4. Strain through a nut milk bag, squeezing as much liquid as possible, and transfer to a large glass container.

  5. Will keep for 3-5 days in the fridge.


Be the kitchen super star I know you can be.
Know what’s in your food & make it your self.

Easiest (Make It Anywhere) Guacamole

Guacamole.jpg

When we are travelling to warmer climates during the winter, chasing the sun and yearning to stand by the ocean’s side, feeding my family well can sometimes be a challenge. I often find myself leaning back on my basic knowledge and training, being creative without being too bold, as my kitchen tools and ingredients are much more limited than at home.

The biggest part of eating well on a vacation, is to source out good local food. I will generally begin this process before we travel, searching for farmer’s markets or local farms, Health food stores or best traveller store reviews. My husband is a lot more bold than I am with new people, so he’s great to have on holiday (for many many reasons  ), as he’s pretty breezy about chatting up the locals to find out where we can get our hands on some organic fruits & veggies and if there’s anywhere to find fresh fish.

When putting meals together, I tend to rely on a few staples, although it will depend what’s in season wherever we are. Avocados tend to be easy to find in the warmer climates, limes, garlic & tomatoes, too. Once I know I can put together some easy guac, than the doors open up for lots of meals & snacks.

I’ve been making guacamole for as long as I can remember being capable in the kitchen. It has gotten better over the years, I must admit. For me, guacamole tends to be a little of this and a little of that, mash it all up and give it a taste, kinda thing, but I thought I’d write a recipe out for those of you that don’t like to wing it  or are still building your kitchen confidence. This one’s for you!

Print

Easiest (Make it Anywhere) Guacamole

Prep Time: 10 minutes

Total Time: 10 minutes

Category: Dip, Snacks, Appetizer, Vegan, Gluten-free, Dairy-free

Cuisine: Vegan, Real food, Nutrient-dense

avocado.jpg

Ingredients

  • 1 large, ripe avocado

  • Juice of 1 lime

  • 1 clove garlic, minced

  • 1 Tbsp minced red onion

  • 1 medium tomato, diced

  • ½ tsp cumin

  • ½ tsp salt

  • Freshly ground pepper

Instructions

  1. In a small-medium sized bowl, mash avocado and lime juice with a fork.

  2. Add garlic, onion, tomato and spices and mash further with a fork.

  3. Serve immediately.


Our favourite dishes with Guac? Fish tacos, veggie burritos, guac & chips, baked yams with guac, morning eggs’n guac, and layered guac’n bean dip. Be creative. Or don’t. But do try this Guac recipe, it’s a hit every time!


10 Minute Hemp Chocolate Energy Balls

hemp-choc-energy-balls-.jpg

Quick, easy and packed with high-end nutrition, these little powerhouse balls are designed to pick you up from the afternoon blahs, re-charge your energy supplies after a good workout/run, and for little lunchboxes labelled: afternoon treat.

Use them however you need them, but be sure to treat them with love, as high quality ingredients are oh-so-necessaire with powerhouse snacks. Our goal here is to tell the body that with this one, little, satisfying dose of food, we can gain a good dose of clean energy, some protein to rebuild and maintain muscular strength, good fat for the brain & for a happier mood  , and some full mineral cacao to nourish our cells.
What more is needed?
De Nada.

What we LOVE about hemp hearts:

hemp-hearts.jpg
  • They are high in GLA (Gamma-Linolenic Acid), incredible for proper hormone function

  • They are anti-inflammatory, useful for everyone, but particularly beneficial for those who suffer from inflammatory related illness (cancer, arthritis, GI disease, asthma, cardiovascular disease)

  • Useful in weight-loss: these little cuties are packed with fibre, healthy fats & protein, so they are excellent at fuelling the body in the right way, igniting satiety signals and allowing you to stay full and satisfied for longer

  • Digestive & Immune supportive: high in both soluble and insoluble fiber, hemp hearts can help you move your bowels regularly (good for those who bung up easily  ) and provide immune support through feeding the healthy bacteria in your gut

Enjoy these lovelies and remember: if you make them, do let me know how much you loved them!

Print

10 Minute Hemp Chocolate Energy Balls

Prep Time: 10 minutes

Total Time: 10 minutes

Category: Snack, Energy Snack, Post-Workout

Cuisine: Vegan, Real food, Nutrient-dense, Vegetarian

Yield: Aprox. 16 Balls

chocolate-hemp-balls-2.jpg

Ingredients

  • 1 cup dates, pitted & soaked in boiling water for 5-8 minutes

  • 1/2 cup almond butter

  • 1/4 cup hemp hearts + 3 Tbsp for rolling

  • 2 tsp vanilla

  • 2 Tbsp cacao powder

  • 2 Tbsp coconut oil, melted

  • 1/4 tsp salt

  • 1/4 cup dried cranberries

  • 1/4 cup mini chocolate chips

Instructions

  1. Drain softened dates. Transfer sweetened date water to a glass jar and reserve for smoothies or sweet drinks - keep refrigerated up to 3 or 4 days.

  2. Place dates, almond butter & vanilla in your food processor and blend on a medium setting until a sticky, dough-like consistency forms (you may need to stop and spread the mixture evenly in the processor a few times with a spatula). Add hemp hearts, cacao, coconut oil & salt and blend until well incorporated.

  3. Add cranberries and chocolate chips and blend once more until well combined.

  4. Roll into balls of your preferred size (mine were about 1.5 inches round) and coat in reserved hemp hearts (or sifted cacao, shredded coconut, or chopped nuts/seeds) and place onto a lined cookie sheet and transfer to the fridge. Allow to set at least an hour, overnight is preferable. Store in a sealed container in the fridge for up to 3 weeks. ENJOY!!


3 After-School Smoothies Your Kids Will Love

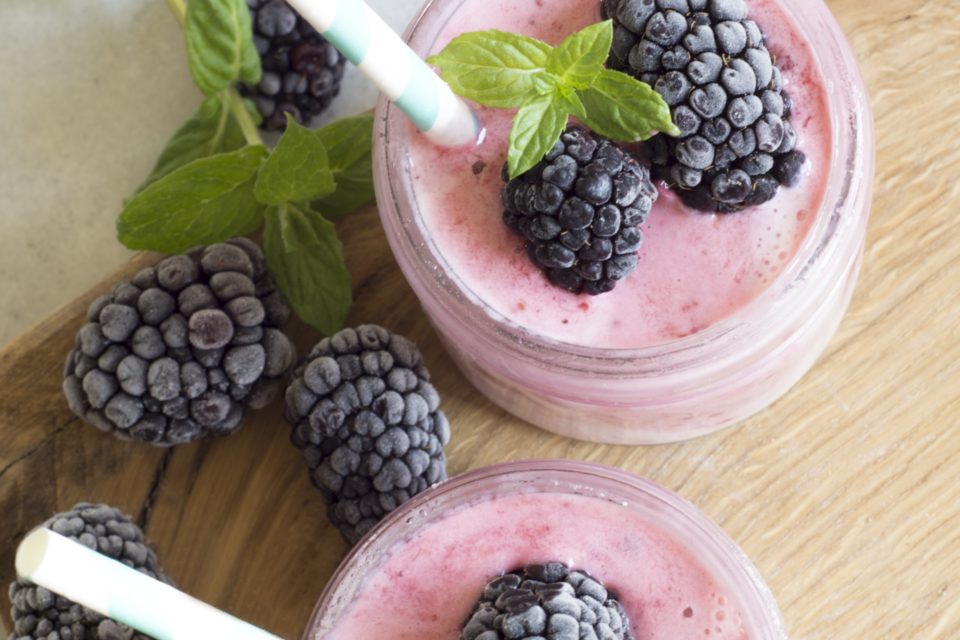
blackberry-smoothies-.jpg

Every parent is familiar with the after school blood sugar crash. The kids come home from school, rockin’ the grumps, dragging their feet, dumping their backpacks and mitts and hat and jacket and whatever else they’ve got all over the floor while they whine that they are SOOOOOOOOOO hungry! They “can’t handle anything” and must eat right this minute!
When you make a suggestion, they let out an exasperated sigh and give you the look of hangry death.

I hope you are laughing (and not crying) by now, because you’ve seen this a thousand times.

Well, fellow Feeding-Hangry-Kids Enthusiasts, I’ve got a plan for you:

Make it a smoothie.
In fact, let them make it themselves. 

We’ve been on the after-school smoothie train here for a while and let me tell you, it’s changed the atmosphere in our house considerably. Ok fine, so the dumping of all the clothing is still a work-in-progress (you got me there), but my son will often come in from school and head straight for the freezer. He’ll pull out whatever frozen fruit we have and line up some other tasty ingredients on the counter (often coconut milk, hemp hearts, almond butter, vanilla, cacao) and hit up the blender. It is such an effective way to nip the hangry quickly, deliciously, and plus, he’s become quite the smoothie maker (we are still working on the cleaning up part  ).

Here are some of our favourite recipes that have become staples over the last few years. I will often use these recipes with Kids Cooking Camps and after-school programs and the kids love to try coming up with their own creations. I believe that giving kids some reins in the kitchen early is a great way to set them up with the desire to cook. It also nurtures a more connective relationship with food and provides them with some basic guidelines for good nutrition & a general set of kitchen skills.

Good Morning Sunshine

1 ½ cup spinach (or other leafy greens)
1 cup coconut water
1 orange, peeled and diced
1 cup frozen mango or pineapple or a mix of both
Juice of 1 lime
Pinch of salt

  • Place all ingredients in your blender and blend until smooth.

Strawberry Shortcake Smoothie

1 cup frozen strawberries
1 cup coconut milk
¼ cup grated beets
1-2 handfuls of chopped spinach
2 Tbsp hemp hearts
1-2 Tbsp honey (optional)
1 Tbsp coconut oil
1 tsp vanilla

  • Place all ingredients in your blender and blend until smooth. Serve immediately. Makes 2-3 servings.

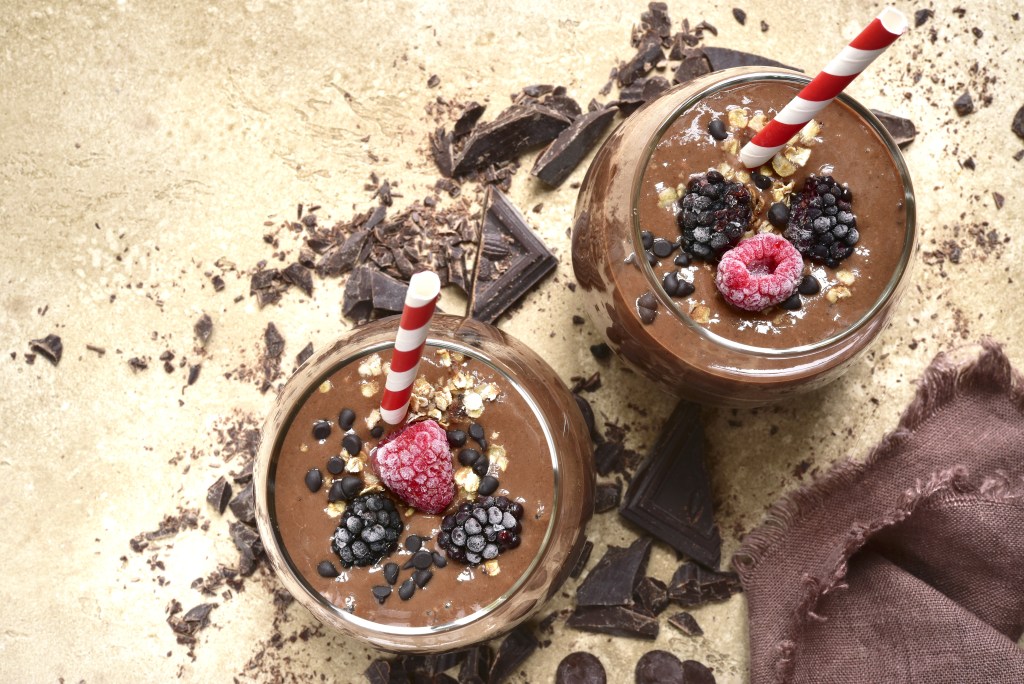
chocolate-smoothies.jpg


Afternoon Pick-Me-Up Chocolate Smoothie

½ cup coconut milk
½ cup water
2 Tbsp cacao powder
Pinch salt
½ – 1 whole banana
1 pitted medjool date
2 Tbsp almond butter
1 Tbsp coconut oil
A few ice cubes

  • Place all ingredients in your blender and combine until smooth.

Stay SMOOTH & Don’t let the After-School Hangrys get you down!

Like always, if you try these smoothies and love them, please let me know!!
Better yet, take a pic and tag me on facebook or instagram!

Looking for more healthy kid inspiration?