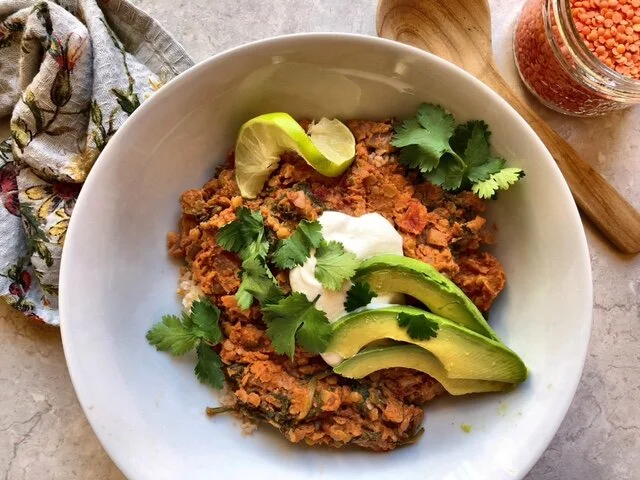
Weeknight Lentil & Spinach Masala

Masala.jpeg

We love this recipe at my house. It’s perfect for that night you forgot to plan for, when the fridge is mostly empty, but you really don’t want to run out to the store. I have often added more veggies to this recipe, when I just have a few things lying about that need using up, but the simplicity of this meal, just the way it is, really does the trick, is flavourful and nourishing, high in plant protein, fiber, and low glycemic-index carbohydrates.

Pro Tips: Red lentils do not need the overnight soaking time like the others, so you can easily get away with soaking them for just a 2-4 hour period. I always recommend soaking your brown rice for a minimum of 6 hours to help breakdown the antinutrients and hard-to-digest components of the grain, while also increasing digestibility and the release of beneficial nutrients. After soaking, always rinse your beans/pulses and grains well, to wash away antinutrients. I also like to add a little piece of kombu seaweed to my rice when cooking, which will increase the mineral content of the rice.

Weeknight Lentil & Spinach Masala

1 large red onion
3 Tbsp coconut oil
1 tsp salt
4 large cloves of garlic, minced
1.5” fresh ginger, minced/grated
2 tsp cumin
2 tsp garam masala
1/2 tsp ground coriander
1 - 28oz can diced tomatoes with juices
1 - 14oz can of full fat coconut milk
1 cup red lentils (soaked 2-4 hours & rinsed)
4-5 cups baby spinach, packed
Juice of 1 lime
Cashew Sour Cream (optional)
Fresh Cilantro (optional)
Slices of Avocado
Cooked Brown Rice for Serving (soaked 6 - 12hrs)

  • In a large wok, heat coconut oil and red onion over medium heat. Cook a few minutes until onions begin to soften and add salt. Stir and cook onions a few more minutes, until softened, then add chopped garlic and ginger, and all other spices.

  • Add your canned tomatoes, coconut milk, and lentils, and bring to a boil. Reduce heat to a medium heat and cook for about 20-30 minutes until lentils are cooked through.

  • Add spinach and stir gently until wilted and incorporated. Season with fresh lime juice and remove from heat.

  • To serve: serve lentil masala over cooked brown rice with 1-2 Tbsp of cashew sour cream (see below) and a sprinkle of fresh cilantro and enjoy!

Quick Cashew Sour Cream

1/2 cup cashew pieces (soaked overnight OR in boiling water for 30 mins)
1/4 cup water
1 Tbsp fresh lemon juice
1 tsp apple cider vinegar
1/4 tsp salt
1/4 tsp onion powder

  • Place all ingredients in your blender and combine until smooth.


Morning Apple Cinnamon Oatmeal

Apple Oatmeal 2.jpg

Need something new on your breakfast rotation?
I’ve been making this oatmeal for my family quite a long time and it feels like the right time to share it with you!

This recipe is super easy, uses ingredients you’ll likely have on hand, and is a very nourishing and delightful breakfast that all family members love. Stewing the apple chunks first is really what sets this oatmeal apart, so be sure to leave a bit of time to let the apples cook through until softened before adding in the oats. Once the oatmeal has cooked, don’t skip adding in those protein & beneficial fat-packed hemp hearts & chia seeds, and any additional nuts, seeds, ground flax, or fresh fruit you choose. These add ons push this simple meal into a more satiating and blood sugar balancing department to get everyone through a good morning feeling balanced, energised, and focused!

Happy Breakfast Making!

Looking for more Breakfast Tips? Read about Conquering the Breakfast Scramble here!

Morning Apple Cinnamon Oatmeal

Apple Oats.jpg

Serves 2
Cook time: 20 minutes
2 medium apples, peeled, cored and cubed
2 Tbsp coconut oil
1/4 tsp salt
1 tsp cinnamon
2/3 cup rolled oats
3/4 cup almond milk
1/4 cup water
1 tsp vanilla
2 Tbsp hemp hearts
2 Tbsp chia seeds
1/4 cup raisins
1 Tbsp maple syrup
Coconut kefir or yogourt or milk for serving
Optional add ins: ground flax, chopped nuts or seeds, fresh fruit

  • In a small sauce pan, warm apple chunks and coconut oil over a medium heat. Once hot, add salt and cinnamon and continue to cook, stirring often, until apple is softened (this will take a few minutes, approx: 7-10). Add oats and stir, toasting them slightly (about 2-3 minutes). Add milk and water and bring to an active simmer, stirring occasionally, until all the liquid is mostly absorbed (about 10 minutes). Remove from heat.

  • Stir in vanilla, hemp heart, raisins, and maple syrup. Serve with coconut kefir/yogourt, or with a drizzle of almond milk over top and any add ins your lovely sleepy head desires.

    If you make this oatmeal, please let me know how much you love it or what you did differently to make it your own! AND be sure to sign up for my Newsletter and don’t ever miss a new recipe or a new class offering ♥️

Easy Veggie Noodle Soup

Veggie Noodle Soup.jpeg

Inspired by the hungry teen boys that are often at our table after snowy adventure days, here is a soup that is nurturing and filling, AND quick & easy in a “use up whatever I have” kinda way. And the kids gobble it back 😊
What will differentiate one pot of this soup from another is the BROTH. I had some bone broth on hand from a crock pot chicken that had brewed for about 2 days, so the broth was dense with flavour and digestive supportive minerals. But a good veggie broth will do just as well here too. Either use a high quality stock cube or brew your own stock with your sad looking veggies that don’t quite make the cut for freshness anymore - be sure to add loads of onions, garlic, ginger, and herbs and spices for a beautiful flavour profile.
Noter: If you live in the Kootenays, try my friend Jen Gawne’s most amazing handmade broths: she offers bone & meat-free broths that are really delicious and bountiful in nutrients.

I’ve discovered that the simple soups are just as popular and joyful as the more complicated ones, and that offering both out to the Universe of varying chefs, of all kinds of skill levels, is an advantage. We all have differing comfort levels and time allowances, and for some, spending time in the kitchen isn’t a priority. I get that. I enjoy inspiring those that are maybe a bit less motivated to branch out their inner culinary adventurer and try something different, especially if it won’t cost them too much time (or $$) 😉

Easy Veggie Noodle Soup

Dried herbs on spoons.jpg

Makes 6-8 Servings
3 Tbsp coconut oil
1 large onion
5 cloves garlic, minced
1 heaping Tbsp fresh ginger, minced
2 medium carrots, diced
2 stalks celery, diced
2 medium potatoes, diced (skin on)
1 tsp salt
1 tsp EACH thyme, onion powder, & garlic powder
1/2 tsp rosemary
6 cups high quality veggie broth or bone broth
Noodles (I used 4 cups dry sprouted quinoa rotini)
Juice of 1 large lemon
Fresh parsley
Salt & pepper to taste

  • In a large soup pot, heat oil over medium heat and add onions. Saute until just becoming transparent, then add in garlic, ginger, veggies, and spices. Stir and saute several minutes until vegetables soften slightly.

  • Pour broth/stock over vegetables and bring to a boil, reduce and simmer for about 20 minutes or until veggies are tender. Meanwhile, cook your noodles as directed in a separate pot (you can throw your noodles right into the soup, but I find that it makes the soup very starchy), drain & rinse.

  • Add cooked noodles and lemon juice and adjust seasoning on your soup to please your palate. Serve with fresh parsley.

ENJOY THIS SOUP! Adjust it however you feel - add in some chopped kale or spinach, add cooked chicken or tofu, swap out some veggies for others you have on hand, and/or serve it with fresh bread or shredded cheese (vegan or not). If you make it, please leave me a comment and let me know how it goes! SOUP’S ON!

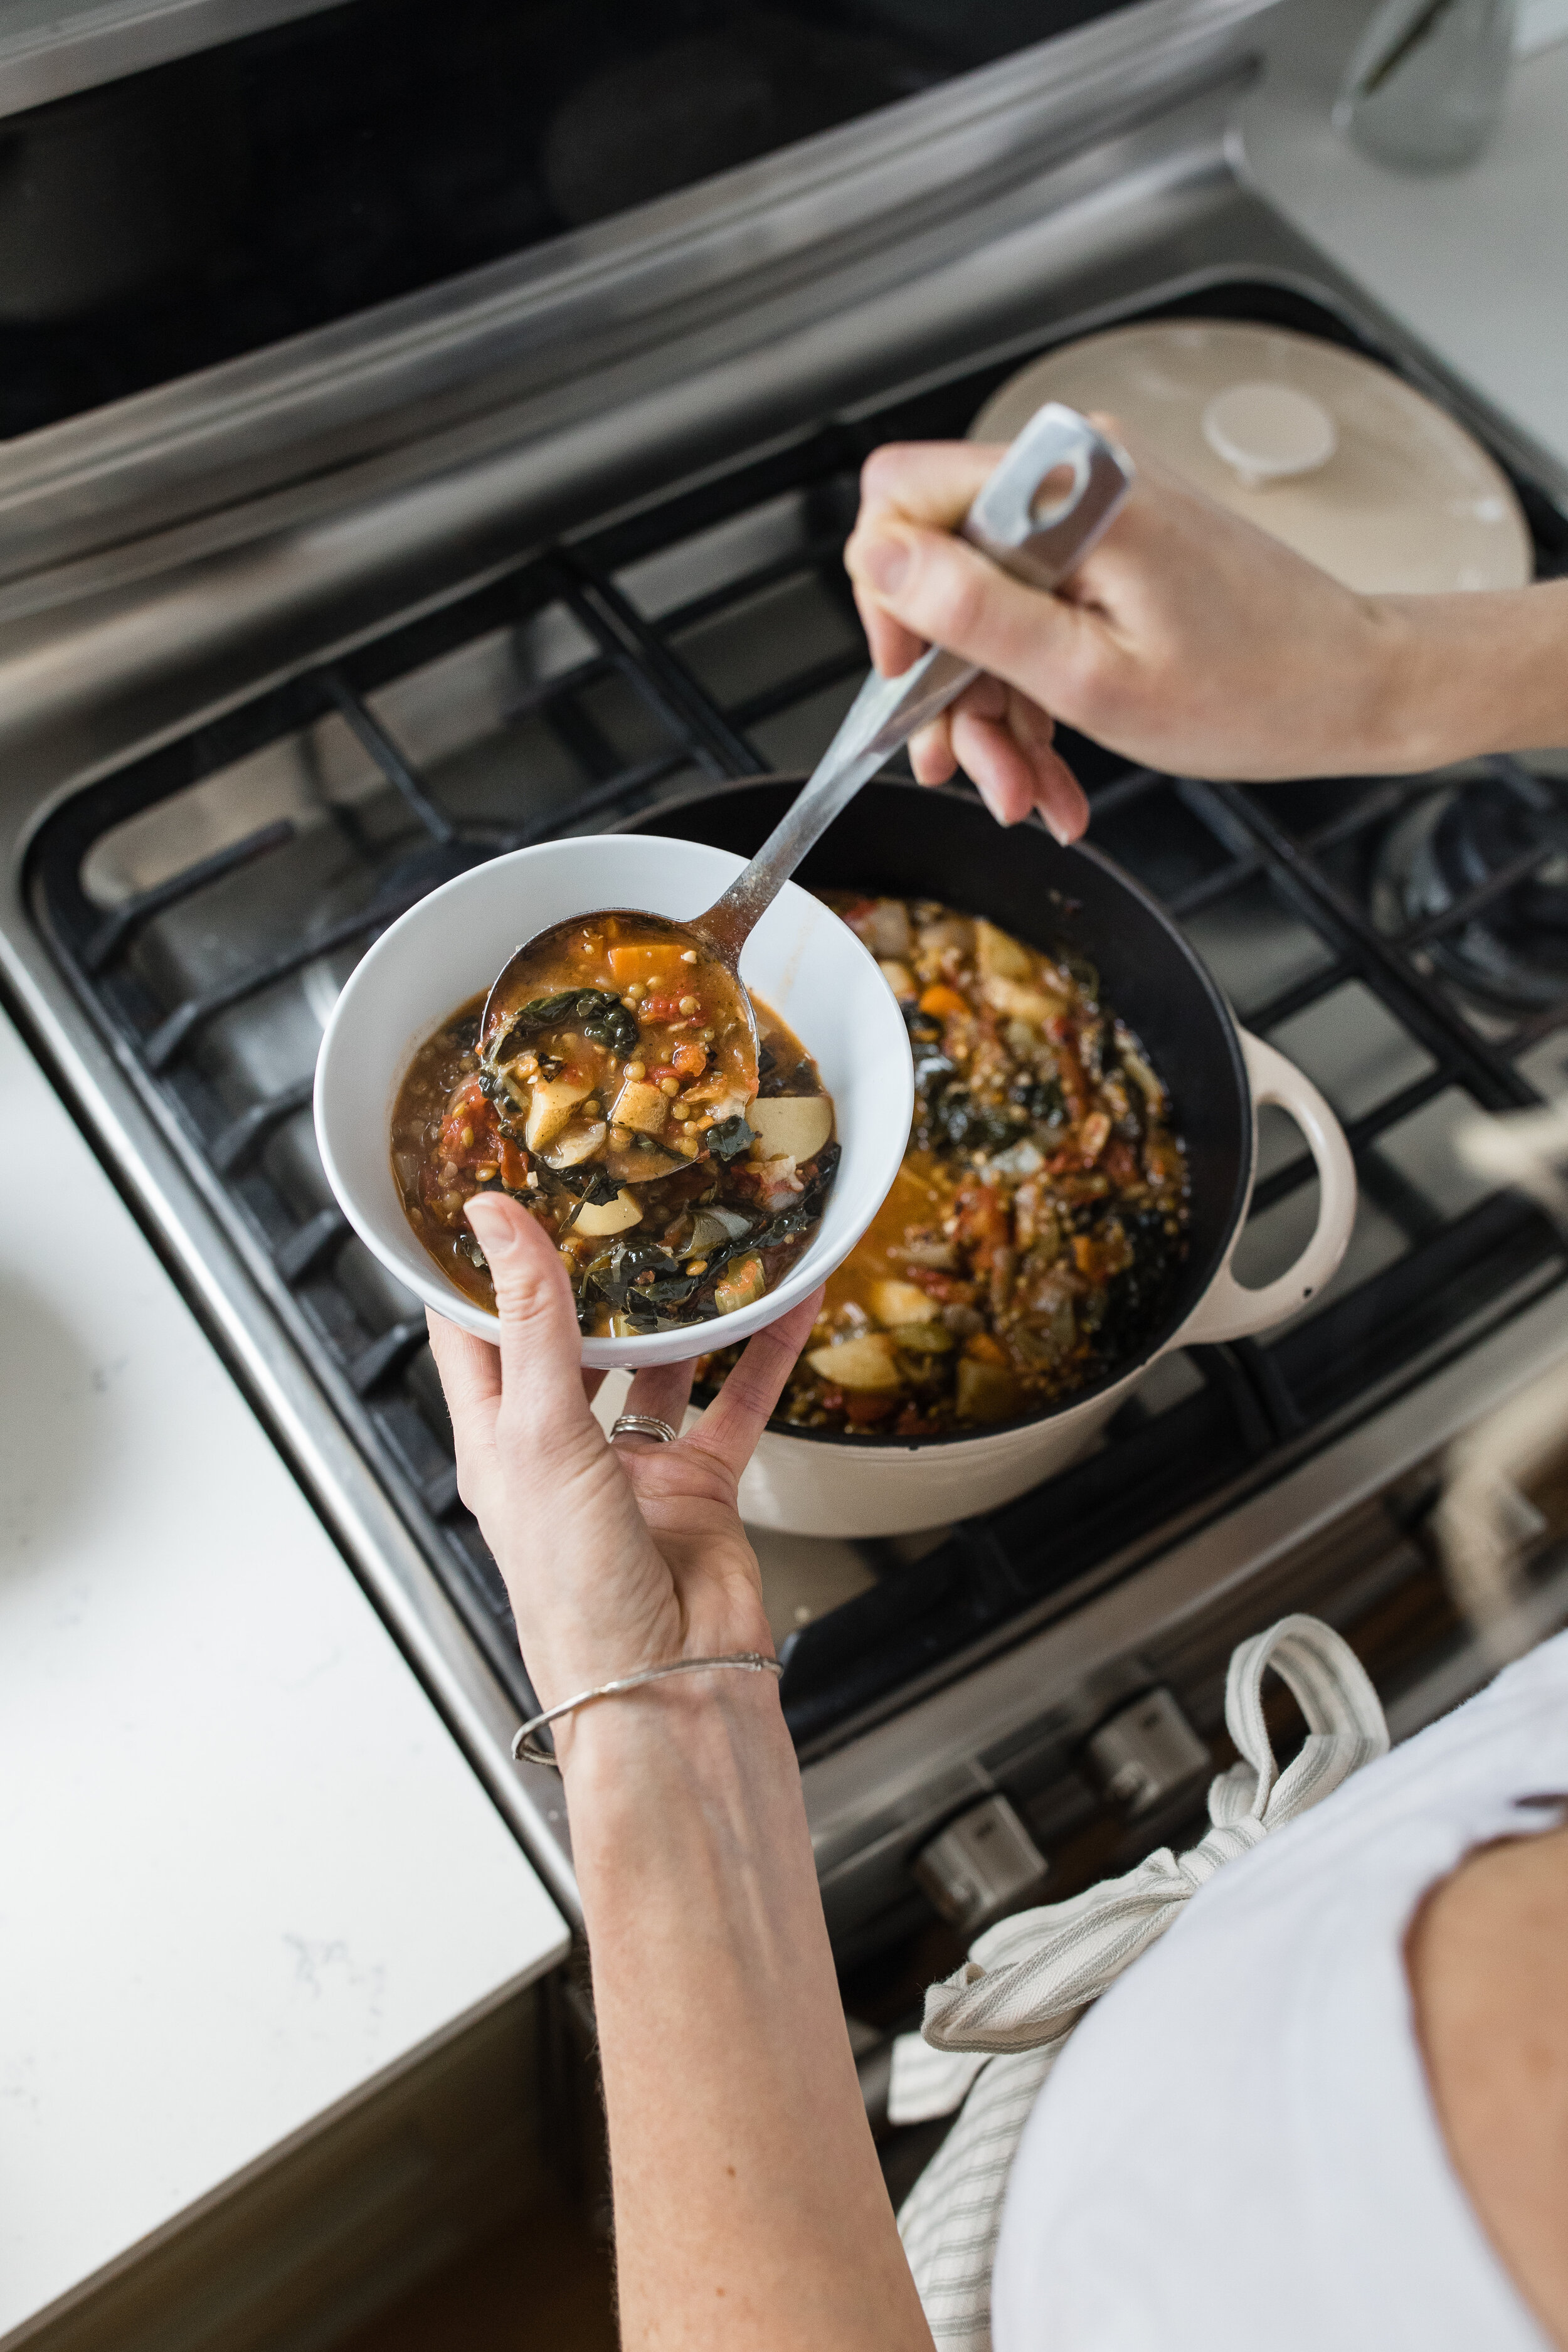
Cozy Winter Lentil Stew

Cozy Winter Lentil Stew.jpg

This here stew may seem like an unexciting bowl of mush, but you’d be better off giving her a chance, I assure you! Hearty & wholesome, packed with protein & nutrients, this bowl of yum is full-flavoured, satiating, easy on the belly, and will feed an army of eaters (or you, many times over 😉).

I LOVE a good, hearty lentil stew, it is so nourishing to the body, the digestive system, the blood sugar, and truly warming to the soul. This stew is an absolute hit at my house, it smells like pure comfort, and is full of soothing wintry flavours. I find the lentil to be a particularly grounding food, offering earthy notes and feelings of stability and connectedness to the earth, nature, and to our calmer selves. Those who struggle with anxiety, overwhelm, nervousness, or trouble focusing, may benefit from including more earthy and grounding foods in the die - other grounding foods to look for: mushrooms, nuts, seeds, legumes, beans, & root vegetables.

One note about this stew is that it really needs a decent amount of time to stew on the stovetop at a simmer, it does not like to be rushed - this is what will make it taste the best and offer the best consistency. Alternatively, you could throw all the ingredients into your slow cooker and cook it on low for 4 - 5 hours. Slow and low is the best way to cook a stew to optimize nutrient value, so I recommend that style over an instant pot, but make it however works for you.
Also, do not forget to soak those lentils the night before. Soaking beans and legumes overnight will increase their nutrient absorbability and value, reduce digestive discomfort as well as phytate, protease inhibitor, lectin, and tanin content, maximizing their nourishment and value to the body overall. Yes!

Lentils Colours.jpg

Cozy Winter Lentil Stew

1 large onion, diced
3 Tbsp coconut oil
1 1/2 tsp salt
4-6 cloves garlic, minced
2 tsp minced fresh rosemary
2 tsp minced fresh thyme
1 1/2 tsp garlic powder
Lots of fresh pepper
2 carrots, peeled and diced
2 stalks of celery, diced
3 medium potatoes, diced in 1/2” cubes
1 cup french lentils, soaked overnight, then rinsed
4 cups vegetable stock
1 - 28oz can fire roasted tomatoes, with juices
1 - 2” piece kombu seaweed
2 bay leaves
1 bunch kale, stemmed and chopped
Juice of 1 lemon
More salt and pepper as needed

  • In a large soup pot, heat onions and coconut oil to a medium - high heat and saute several minutes. Add salt and spices, carrots, celery, and potatoes, and stir and saute another several minutes until vegetables soften slightly and the flavours begin to come together.

  • Add lentils, vegetable stock, tomatoes, kombu, and bay leaves, and bring to a boil. Reduce heat to a simmer and cook at a low-medium for 40 - 50 minutes, stirring occasionally.

  • Once vegetables are cooked, add kale and lemon juice, stir, and simmer another 10 - 15 minutes, adjusting flavours as needed. Remember that the flavours will intensify over the next day or so, and, although delicious on day 1, stews are often better on day 2 or 3.

  • Serve this stew with a dollop of coconut kefir, if you have it, or some thick greek yogourt, and a sprinkle of parsley for colour. Enjoy with a chunk of fresh bread or toast smeared in coconut oil. YUM!


    If you make this stew, PLEASE let me know how it turned out for you and if you made any adjustments. I love to hear how others are enjoying my recipes!
    May you nourish your heart & nurture your soul with this cozy bowl of warmth ♥️

    If you love this recipe, you’re sure to love my Comforting Lentil Stew also, laced with the warmth of curry - YUM!

My Everyday Morning Power Smoothie

Berry Smoothi.jpg

After jumping on the Cancer Prevention band wagon, over a decade ago, I had myself on so many supplements and liquid formulas; I was juicing, and downing algae, consuming a LOT of powders and pills, and pulling my hair out trying to decide how to keep my body cancer free while keeping up with the expense and dedication to all the pill popping, powder pounding, and herbal shots I was on.
In the end, it wasn’t manageable long-term and I came to the realization that freaking out and experimenting with 100 supplements a day for a time period, was just a stage in the big process. Eventually, I learned how to stay calm, to prevent Cancer daily with regular regimes that were doable, that it was actually more beneficial to eat real foods and supplement sparingly and wisely, to prioritize rest and stress management, in order to fully heal and find a sustainable way forward.

One of the regimes I’ve held onto since then is the morning power smoothie and I cheerlead for it so loudly, that pretty well all my clients are pounding back the power smoothie every morning too.
Here’s the thing, you can get almost anything into a smoothie, if you’ve got a solid (and yummy) base to work with. And although I don’t advocate for out of control and/or random supplementation, there are a few that I swear by in order to keep those micro & essential minerals and vitamins at levels that help the body to thrive. It seems we can’t get around the vitamin & mineral depletions in a world where our output is so high and the toxicity levels unavoidable, that our body has to fight hard to consume enough, and utilize properly, all the vitamins & minerals it needs for optimal function. Supplementing smartly, with real food formulas, IS something I feel can greatly support better health and disease prevention long term.

As with everything I advocate for, the morning smoothie is entirely individualized according to the individual’s needs. For example, I may have a client add maca powder to aid with menopausal symptoms, or offer that another add moringa leaf powder to bring her iron levels up; we may decide that a distance runner needs a pumpkin seed powder boost to increase zinc and magnesium levels for recovery, and an autistic child would benefit from extra real food additions & protein, etc. So, individualize your own morning smoothie to suit YOUR NEEDS as you see fit. What I offer here is a base formula that you can change in whatever ways feel right for you.

Your Key Components to a Morning Power Smoothie

  • All Macronutrients: Number 1 rule with composing a smoothie is to be sure it contains Protein, Carbohydrates, AND Fat. This is what I call the “Magic 3 Combo” that will help support blood sugar stability, increase energy and endurance levels, will aid with mood and mental focus & clarity, and help keep the body full for longer.

  • Greens Powder Formula: Dried, real food, greens are an amazing way to add vital vitamins & minerals to your morning. Extra greens will aid with regular detoxification, elimination, with cell function & repair, will support regular Cancer & Disease Prevention, as well as all organ function. Look for a formula that does not contain additional flavours or additives that you don’t recognize as real food. The one I use is made by Enerex (I have no affiliation with this company, I just like the blend and can buy it locally).

  • Vitamin/Mineral Formula: Now being in my forties and accepting the fact that my body just doesn’t have the same stamina, endurance, and capability to recover as it used to, I want to be sure that I am getting all those additional vitamin/mineral requirements that I know are harder than ever to receive & absorb through real food sources. I have turned on to this real food supplement company that makes supplements ALL from organic, dried real food sources and I just LOVE that adding a daily scoop to my morning smoothie eases my mind a little knowing that I am, in the least, getting a good does of vitamins & minerals in this one meal. It’s called Women’s Pure Food A to Z, made by Pranin Organic (I do have an affiliation with this company, the ONLY one I have because I love it so much!). If you purchase, use discount code: cindy 😊

  • Berries: All berries are packed with antioxidants, which are potent cancer fighting, free radical neutralizing nutrients that are a DAILY MUST. We pick ours in the summer from the local organic farm and freeze them in ready-to-use containers so that we don’t have to buy them in plastic during the winter months. Any berry will do here: blueberries, blackberries, strawberries, huckleberries, etc. all are nutrient & antioxidant powerhouses.

  • Tahini: If you didn’t already know, tahini is a bit of an underdog in the world of nutrition. This superstar seed butter is PACKED with nutrition that every one needs! High in protein, healthy fat, calcium, selenium, iron, zinc, just a Tablespoon or two in your morning smoothie can give you a daily health kick like no other.

My Everyday Morning Power Smoothie

1 cup coconut water (electrolytes)
1/2 banana (carbohydrate)
1 cup blueberries/mixed berries (carbohydrate, antioxidants)
1-2 Tbsp tahini (protein, fat, minerals)
1-2 Tbsp hemp hearts (complete protein, fat)
1/4 cup coconut kefir (ideal) or coconut cream/milk (fat, probiotics)
1 scoop greens powder (minerals/vitamins)
1 scoop Pure Food formula (minerals/vitamins)
Personalized Add Ins (maca, mushroom blend, probiotics, ashwaghanda, goji powder, etc.)

  • Place all ingredients in your blender and combine until smooth.
Smoothie on people.
Live well, eat well, drink a smoothie a day.
Feel awesome.

Easy Mushroom Bean Burgers

Mush Bean Burger.jpeg

We LOVE veggie burgers in our house. It is a great, reliable meal that can be as complicated as you make it, or as easy as this one: cook mushrooms & onions, blend it with your other ingredients, form into patties, heat & eat. Throughout my years of recipe creating, I have truly learned that less is more. I know that my readers don’t want recipes with a mile long ingredients list, half of which they’ve never heard of, and that the recipe shouldn’t take them more than an hour to throw together or I’ll lose them. Am I right?

So here you have my simplest burger recipe yet. It really has all the taste you’re looking for in a veggie patty, with a shorter list of ingredients, but yet, misses nothing. This burger is lovely in a bun with all the fixings, but because it has such a dense nutrient profile, it’s very filling, so feel free to experiment with some serving options: on a bed of lettuce, in a lettuce wrap, make mini meat patties instead of larger ones and serve them in a tortilla or in a taco. Be creative. Above all else, make these patties with pride and love, because they are nothing but goodness and are designed to make your body feel good, satisfied, joyful 💛

A few Nutrient Powerhouse Notes:

Health Benefits of Black Beans:

  • High in protein & fiber, satiating, AND low glycemic level

  • May help to lower blood pressure and prevent or manage diabetes

  • Supportive of strong & healthy digestion

  • May help to prevent Cancer, Cardiovascular Disease, & other degenerative diseases

  • High in selenium, a potent antioxidant that can help lower free radical formation & prevent Cancer cells from proliferation. Selenium is also beneficial in preventing mental decline & neurological symptoms

  • Are beneficial to help maintain stable weight and may promote weight-loss

Health Benefits of Ground Flax:

  • High in Omega 3 Fatty Acids, beneficial for brain health, proper cell function, hormone health, paramount to heart health and disease prevention

  • High in minerals: calcium, magnesium, phosphorus, potassium, all beneficial for bone health, nervous system support, hormonal and immune function

  • Rich source of lignans, key component in lowering Cancer risk

  • Rich in dietary fiber, may improve Cholesterol levels & lower blood pressure

  • Contain quality protein, may help to stability blood sugars, and may promote healthy weight

Easy Mushroom Bean Burgers

Makes 6-8 Medium Patties
Prep & Cook Time: 45 minutes

Black beans.jpg

1 Large onion, diced
2 Tbsp coconut oil
3 cloves garlic, minced
1 tsp salt
4 cups mushrooms, chopped (any mix will work)
Fresh pepper
1 14oz can black beans, rinsed & drained
1 tsp onion powder
1 tsp garlic powder
1 tsp cumin
2 Tbsp brown rice flour
3 Tbsp tomato paste
1/4 cup ground flaxseeds

  • Preheat oven to 375F.

  • In a large frying pan, heat oil and onions over medium heat until onions start to soften. Add salt, garlic, and mushrooms and cook, stirring often, until mushrooms are cooked & a little bit browned around the edges. Season with pepper. Remove from heat.

  • In your food processor, combine cooked mushroom mix with all other burger ingredients and combine until all ingredients are well mixed together, but not overly smooth.

  • Form burger mix into patties (I like to use wet hands for this), and spread them out on a lined cookie sheet. Bake patties for 10 minutes, then flip and bake another 10 minutes (baking them in the oven will dry them out a bit so that they’re not too mushy). Serve right away or cool and freeze. Note: when you reheat these patties, I suggest frying them in a little oil on the stovetop, this will help them crisp up a bit.

  • Serve with whatever burger toppings you enjoy on a bun, without, or in whatever creative, genius way you like! ENJOY 😋

As always, if you make these burgers, please let me know how they turned out for you and how you served them! Better yet, take a fancy pic and post & tag me on social media! 🍔

Warm Thai Noodle Bowl with Almond Butter Sauce

Noodle bowl.JPG

Most families love a good noodle bowl and this one is no exception. I have replaced the traditional peanut sauce with an almond butter substitute for a few reasons, the most important being that peanut butter is not a healthful food (unfortunately 😩). Sorry to say! But it is my duty to educate and help others move in a direction of wellness with their diet, even if it means telling them some things they might not want to hear. More on peanut butter below.
The good news here, is that you needn’t have any feelings of guilt with a noodle bowl, particularly if you are loading it up with beautiful veggies, smothering it with a sauce made of quality ingredients, and are choosing better options with regards to the noodles. Yes, noodles are a refined food, and eating the whole grain would potentially have more benefits for your body, but choosing noodles sometimes can keep the kitchen fun rolling and support joy & happiness with food. Some of my favourite noodle choices are: brown rice, buckwheat, sweet potato, or quinoa noodles, all gluten free and offer substantially better health benefits than a traditional wheat noodle.
This almond butter sauce is super versatile! Feel free to make a double batch and use it as a simple veggie dip or for rice wraps, top some rice & veggies with it for lunch, or use it as a salad dressing. SO GOOD 😋 Also, feel free to try replacing the nut butter with a seed butter, if there are allergies or limitations at school/work - I would probably choose tahini or pumpkin seed butter or a mix of the two. I haven’t tried this yet, but if you do, let me know how it turns out!

Ok, so here’s some dreaded TRUTHS ABOUT PEANUT BUTTER my friends, and I am very sorry to say….

Peanut Butter Contains Aflatoxins: Because, unlike other nuts, peanuts grow underground, they are susceptible to mold and fungus and thus, are high in a specific carcinogenic type fungus called aflatoxins - linked to specific cancers, as well as delayed development in children.

High Toxic Load: Peanuts are one of the most heavily pesticide-ridden crops and, because they are grown underground, are also absorbing toxic waste and heavy metals from the soil. You can avoid these chemicals by choosing organic peanut butter, yes, but you will not avoid the mold/fungus.

High in the Wrong Kind of Fats: Although certain nuts contain beneficial, quality, fats, the peanut is not one of them. It is high in the polyunsaturated fat Omega-6, which, especially when consumed in large quantities (spoon in the peanut butter jar anyone?), will contribute to inflammation in the body, build up in the arteries, a potential increased risk in the development of heart disease, stroke, and many cancers.

Turn Rancid Quickly: Peanuts are a very volatile nut, meaning that their fats are rather unstable. If a peanut was harvested and you were to eat it right away, you wouldn’t have to worry about the freshness of this peanut or the stability of the oils within. However, that is simply not the case for North American consumers. By the time peanut butter reaches our shelves, (and who knows how long since they were harvested - months? years?) the fats, having been exposed to air & processing, have most likely turned rancid, regardless of whether the peanut butter is organic or not. The fats then, are now chemically altered, highly unstable and free-radical causing, which will increase cancer risk.

A decent answer: SWITCH TO ALMOND BUTTER!
Almonds are a healthful alternative to peanut butter and here are a few reasons why:

  • They are lower in Omega-6 fats and have anti-inflammatory properties

  • Contains quality monounsaturated fats, which can benefit heart health and lower cholesterol

  • Contain healthful fibre, protein, Vitamin E, copper, and phosphorus

  • High in magnesium, which can relax veins & arteries and improve blood flow & circulation

  • Contain antioxidant properties

  • Can improve digestion as well as stabilize blood sugar levels

Warm Thai Noodle Bowl with Almond Butter Sauce

Serves 4 - 6
Prep & Cook Time: 35 minutes

Almond Butter.jpg

1 medium onion, chopped
2-3 Tbsp coconut oil
1 tsp salt
1 clove garlic, minced
2 heads of broccoli, chopped into bite-sized pieces
1 yellow pepper, sliced thin
2 cups purple cabbage, sliced thin
1 carrot, peeled & julienned
3 cups baby spinach
1/2 package of rice noodles or your favourite noodles (serving sizes will vary - make enough for roughly 4-6 servings)
3 spring onions, chopped
1/3 cup sesame seeds, toasted Or cashew pieces, toasted
Fresh cilantro
Lime for serving
Almond Butter Sauce
1/2 cup almond butter
2 cloves garlic, minced
1 Tbsp ginger, minced
2 Tbsp honey
¼ cup minced cilantro
1 lime, juiced
1 Tbsp sesame oil
¼ cup tamari
2 Tbsp rice vinegar
1/4 tsp sea salt
1 tsp organic sriracha, optional
2 Tbsp water to thin

  • For the sauce, combine all ingredients in the blender and blend until smooth. Set aside.

  • Boil water in a large pot & cook your noodles according to package directions, rinse & drain (al dente is best, as we will add the noodles to the pan and cook them a little further).

  • In a large wok, heat oil & onions over medium heat until sizzling & onions are translucent. Add salt. Add broccoli & garlic and stir and simmer until broccoli begins to become tender (10mins).

  • Add pepper, cabbage, carrots, and cook until all vegetables are just tender (do not overcook). Add cooked noodles, spinach, and as much sauce as is needed to coat the noodles well. Toss with tongs or two spatulas to mix well. Taste & adjust seasonings as you wish: more lime or sriracha.

  • Serve in bowls topped with toasted sesame seeds or cashews, fresh cilantro, and a fresh squeeze of lime. Yum!

  • Note: This noodle bowl is really yummy as lunch the next day, you don’t even need to bother reheating it - she’s just as good cold 😍

Lastly, ENJOY this meal - share it with your family & friends and feel good about a healthier switch to Almond Butter….so long Peanut Butter, we will miss you, but are better off without you 😘

As always, if you make this noodle bowl, PLEASE leave me a comment and let us all know how it turned out for you! Better yet, take a pic and post it to social media & tag me!


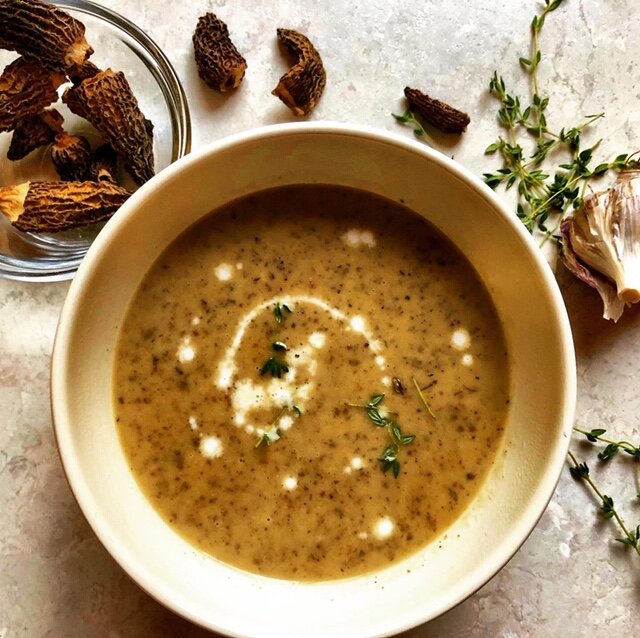
Creamy Wild Mushroom Soup

Wild mushroom soup.JPG

It is such an amazing thing to be able to walk into the forest, just a few steps from our door, and find funky edibles to create with and use to feed my family. This soup was inspired a while back, by a bountiful harvest of Honey mushrooms. I’ve made it many times since, with a mix of different wild mushrooms: morels, honeys, and just recently with some Conifer Bear’s Head (a weird looking one!). I’ve also made this soup during the winter months with some of our dried wild mushrooms and even with some store bought brown mushrooms & shiitakes. So if mushroom foraging isn’t your thing, or mushrooms don’t grow wild where you are, you can still make a mushroomy version of this soup that will taste amazing and nourish the soul 😋

A few great reasons to go mushroom hunting:

  • Time in nature is fun & relaxing & good for your nervous system

  • Wild mushrooms are high in protein, fibre, selenium, and one of the few natural food sources of vitamin D, which makes them a strong immune support

  • They can help defend against cancer by protecting our cells against damage

  • Cooking with wild mushrooms encourages experimentation & connection to your food, which is healing for the soul and promotes a positive relationship with food & body

  • They are super tasty little guys

Note: Before adventuring out into the forest, remember to know what you are picking and learn about wild mushroom foraging or pick with a smarty pants who knows!

Wild mushrooms.JPG

Creamy Wild Mushroom Soup

Makes 5-6 Servings
3 Tbsp coconut oil

1 large onion, finely diced

1 1/2 tsp sea salt

8 cloves garlic, minced

5 1/2 cups mixed wild mushrooms, sliced (honeys, shiitake, morel, brown, etc.)
2 Tbsp fresh thyme, packed
1/2 tsp fresh ground black pepper

3 cups high quality vegetable broth, preferably homemade

1 can full fat coconut milk


  • In a large soup pot over medium high, heat coconut oil. 
 Add the onion and salt and saute until gently softened.

  • Add the garlic, mushrooms, fresh thyme, and season liberally with pepper. Saute until mushrooms soften and flavours blend, this will take a good 15 minutes.

  • Pour in the vegetable broth and coconut milk, bring to a boil, then reduce heat to a simmer and simmer low-medium for 20 - 25 minutes until mushrooms are well cooked, stirring occasionally. Adjust seasonings if needed (we like a lot of fresh pepper 😊 ). Remove from heat.

  • With an immersion blender, blend soup until desired consistency is reached. You may also choose to transfer the soup to your blender and blend until creamy. Reheat gently. Soup will keep for 4-5 days in the fridge and also freezes well.

If you make this soup, be sure to comment below and let us know how it turned out!
Don’t want to miss a recipe? Join my Newsletter List below and never miss a thing!

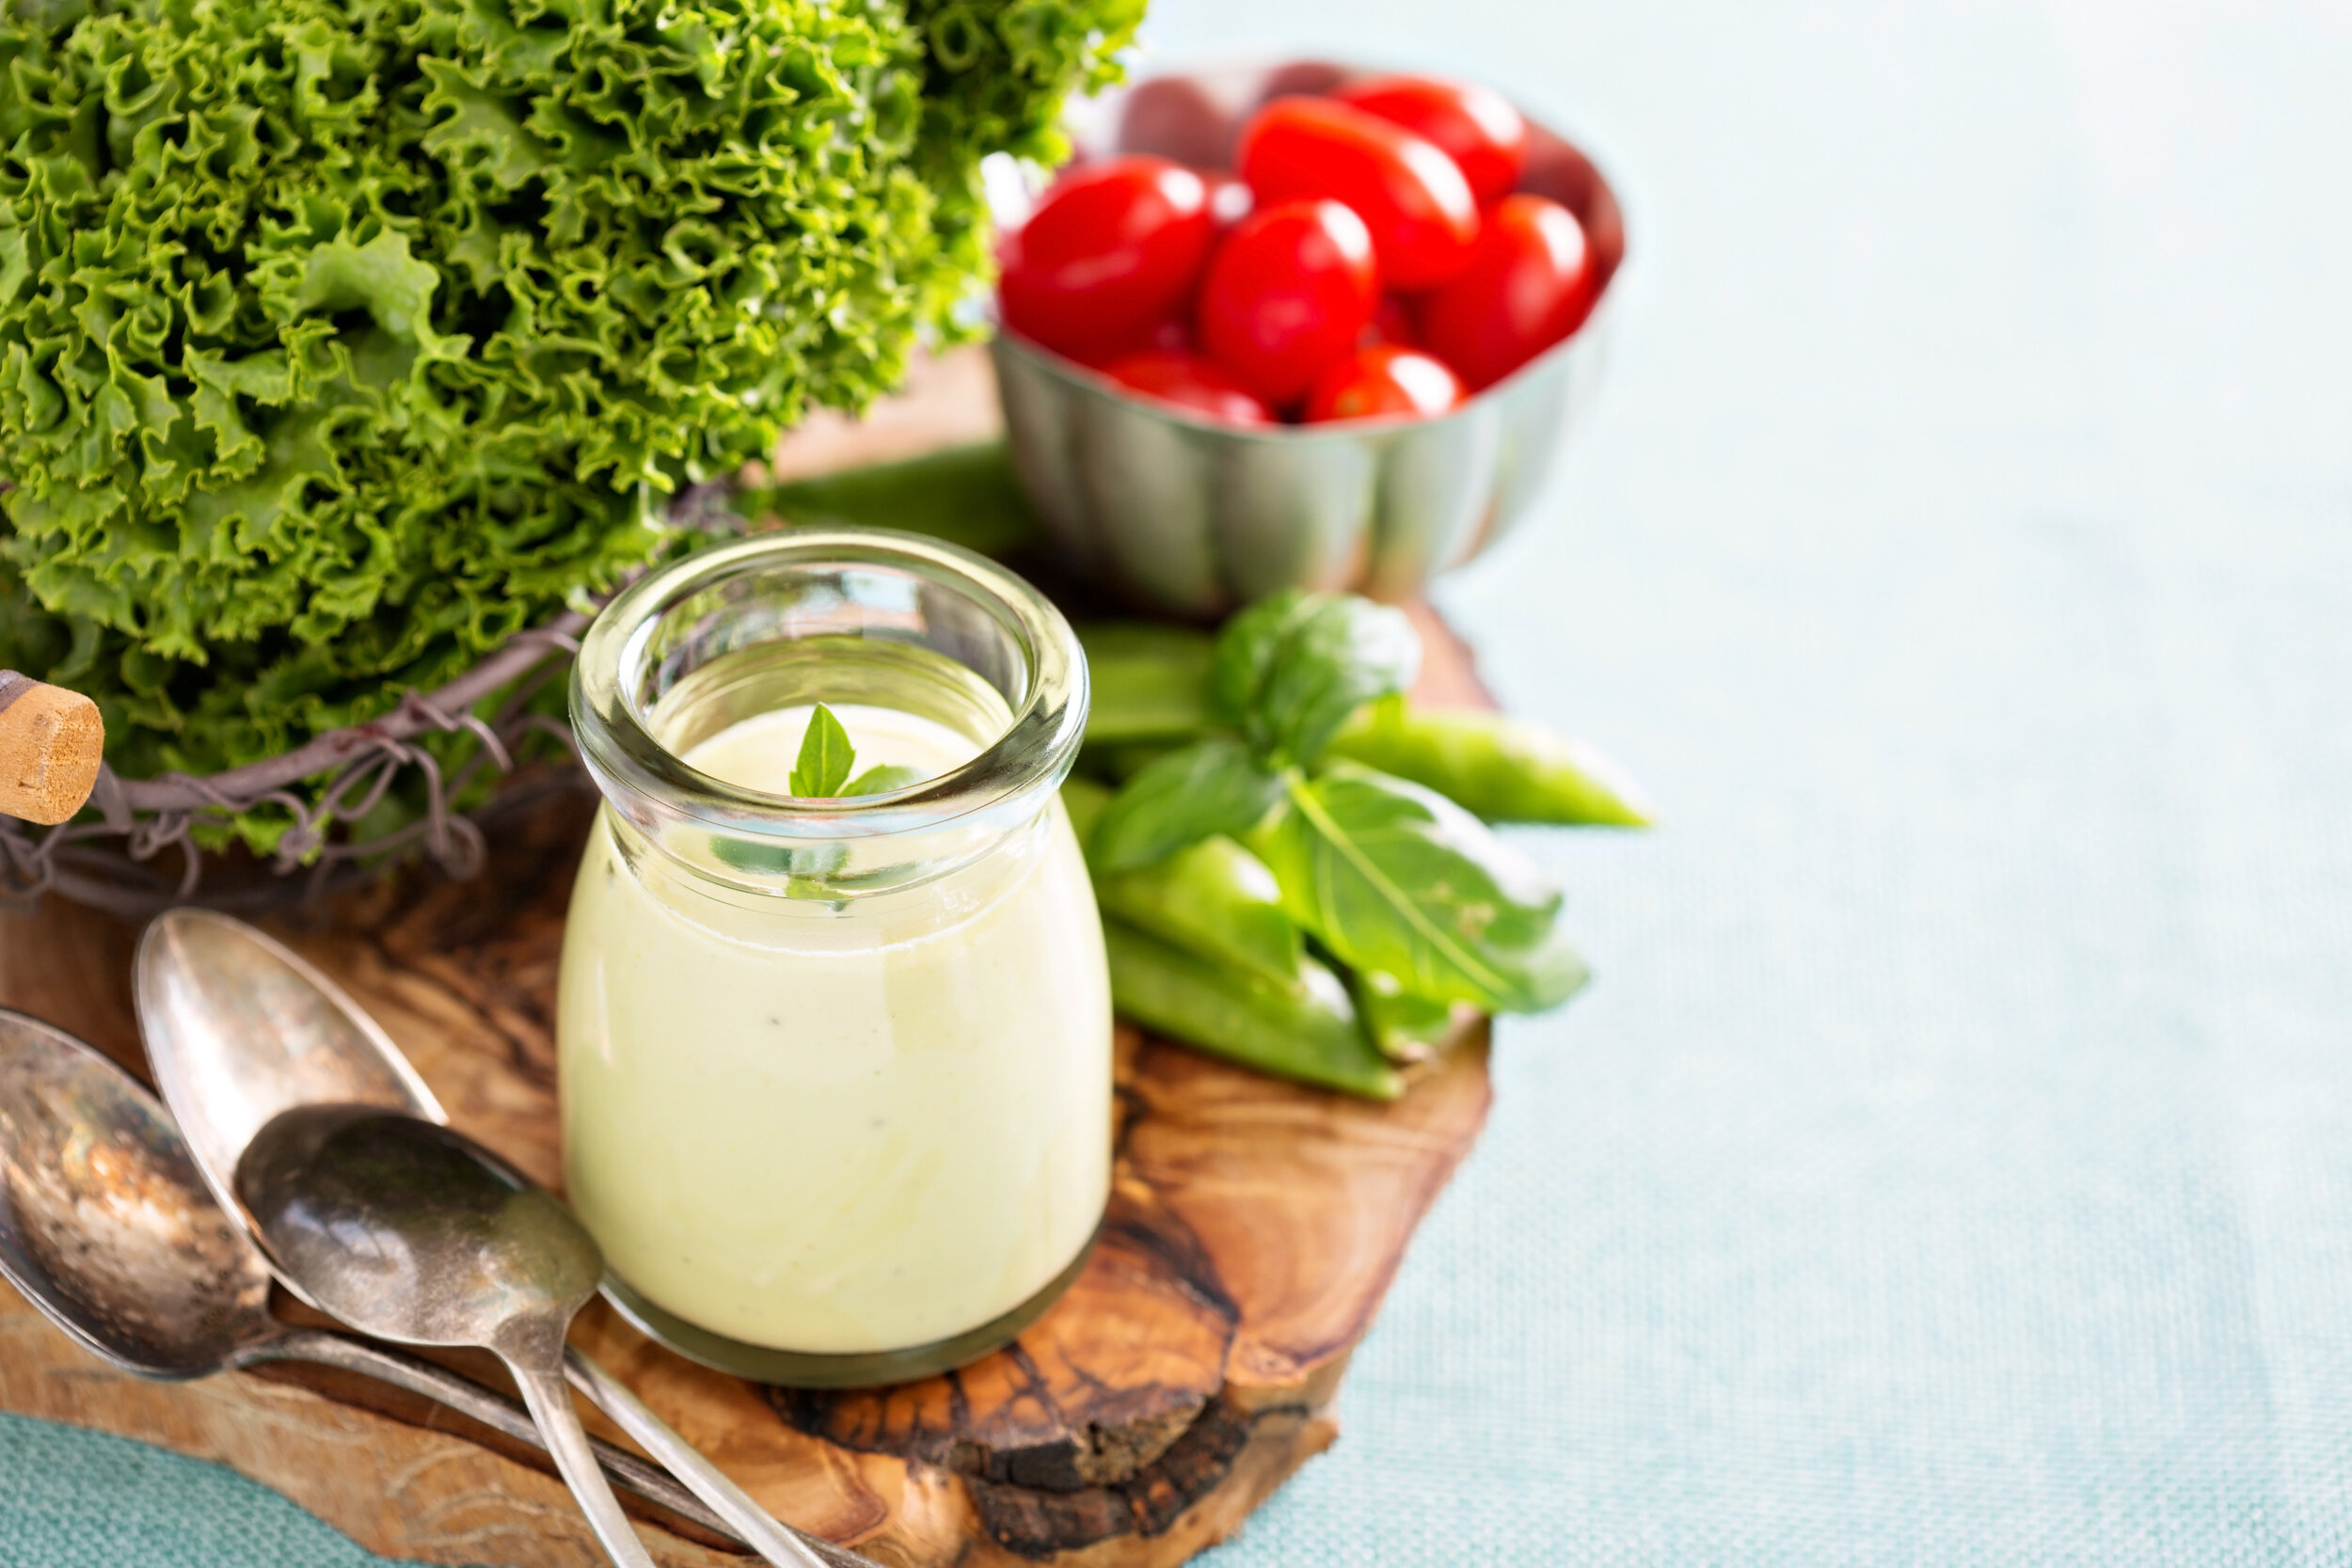
Creamy Turmeric Tahini Dressing

This dressing is an absolute stand-by in our house, I use it all the time.  We love it on a mixed green salad with chopped veggies, toasted almonds, and fresh sprouts, but you could use it on a quinoa or rice salad, in a veggie rice bowl, or straight up as a veggie dip. You may just want to double the recipe…it can disappear quickly. Enjoy!

Creamy Turmeric Tahini Dressing

3 Tbsp tahini
2 Tbsp tamari
1 clove garlic minced
1 Tbsp fresh ginger, minced
1 tsp fresh turmeric, minced or 1/2 tsp turmeric powder
1/4 tsp cumin
1/3 cup apple cider vinegar
2/3 cup olive oil
1-2 tsp maple syrup

  • Place all ingredients in a blender and combine until smooth.
Simple. Delicious. Nourishing. Versatile.
Enjoy 😊

Summer Harvest Zucchini Chili

Zucchini Chili.JPG

Here’s the thing: I had low expectations when i set out to make this chili. Truly. I had an abundance of ingredients and needed to process them and had a hankering for some chili and so, that’s where it all began.
To my surprise, this chili turned out just utterly fantastic! We couldn’t stop eating it on the very first day and we all know that chili is better on day 2 or 3 or 4. AND on the bonus side of things: all of the fresh ingredients in this recipe came from either my CSA box, the farmer’s marker, or my sister in law’s garden (sisters in law that garden are most awesome 😉). That’s just the best!

This recipe is particularly nurturing and I assure you, you will feel it in your belly & body, if you tune in. A quality, hearty veggie chili like this one, is packed with protein because of those amazing beans, loaded with garden vegetable carbohydrates which will fuel your energy stores and keep you balanced throughout the day, AND loaded with minerals due to the added kombu seaweed.
NOTE: If you have a hard time selling vegetarian chili to your kids or family, try serving it as an appetizer instead, in a small bowl, topped with chopped avocado and some corn tortilla chips - most kiddos (and partners alike) love a good chip dip!

Summer Harvest Zucchini Chili

Zucchinis small.jpg

1 Large Onion, diced
2 Tbsp coconut oil
2 tsp salt
5 large cloves of garlic, minced
1 chili pepper of choice for desired heat (optional)
1 green pepper, diced
1 red pepper, diced
1 Extra Large Zucchini or 2 medium, cubed (aprox. 1” cubes)
2 ribs celery, diced
1 can black beans, rinsed & drained
1 can red kidney beans, rinsed & drained
2 Tbsp chili powder
2 tsp cumin
1 1/2 tsp smoked paprika
1 tsp EACH coriander, oregano, onion powder, & garlic powder
Lots of fresh pepper
1x 28oz can fire roasted, crushed tomatoes with juices
1x 28oz can diced tomatoes with juices
1x 2” piece of Kombu seaweed (try not to omit this!)
I head of kale (I like to use lacinato), stemmed & chopped small
2 Tbsp maple syrup
For serving:
Fresh lime juice
Fresh avocado
Coconut Cream/Cashew Sour Cream

  • In a large soup pot, saute onion & oil until softened. Add salt, garlic, & chili and stir until fragrant - a few minutes. Add chopped veggies: peppers, zucchini, and celery, and stir/saute a few more minutes. Add beans and all spices and stir until evenly distributed and fragrant. Add tomatoes and kombu.

  • Bring chili to a gentle boil and then reduce heat to a good simmer for 20 - 30 minutes or until all vegetables are cooked and beans are soft.

  • Add kale and maple syrup and adjust any seasonings as needed - I added another tsp of salt and more pepper. Simmer on low another 10 - 15 minutes.

  • Serve chili with fresh lime juice (don’t skip this!), coconut cream or cashew sour cream if you have any, and fresh avocado. You could also try some avocado lime crema, if you’re feeling fancy 😉. This chili is best after it has sat for a day or two and the flavours are really well combined. You can freeze this recipe easily: I like to use large mason jars, being sure to allow at least 1.5-2” of space in the top of the jar.


I hope you make & enjoy this chili! Be sure to comment below, if you do, and let me know how it goes and what you may have done differently!

Lemon-Dill Quinoa Salad with Roasted Beets

Lemon Dill Quinoa Salad.JPG

We’ve been loving this salad for years. It’s one of those fabulous stand by’s that you can modify or swap in or out almost anything and it will still work well. You just can’t skip the fresh dill or the dressing!

This is a great salad to bring to a Barbecue or Potluck, or to make at the beginning of the week and eat for lunches and/or snacks throughout the week. It packs a nutritional punch, is loaded with protein & quality fat, and contains heaps of antioxidants and immune protective phytochemicals.
There are a few steps to this recipe, but none of them take much time. If you want to do a bit of prep to quicken the process, make your quinoa, roast your beets, and toast those pumpkin seeds ahead of time, the day before even, and this salad will be a quick & satisfying kitchen masterpiece!

Warning: You will definitely want to make more of this salad dressing to use on your leafy greens and/or to just have on hand for veggie dipping and the like - it’s my son’s favourite 😊

Lemon-Dill Quinoa Kale Salad with Roasted Beets

Roasted Beets.jpg

2 medium beets, peeled, cubed & roasted
3 cups cooked quinoa (1 cup dry)
1 head kale, stemmed & washed, chopped
Juice of 1 lemon
1 tsp salt
1 medium cucumber, seeded & diced small
1 red or yellow pepper, diced small
3 spring onions, chopped
½ cup chopped & packed fresh dill
½ cup pumpkin seeds, toasted
¼ cup hemp hearts
1/3 cup chopped pitted kalamata or black olives

Lemon Salad Dressing.jpg

Lemon-Dijon Dressing:
1 shallot, minced
1 clove garlic, minced
2 Tbsp fresh lemon juice
2 Tbsp white wine vinegar
2 tsp grainy Dijon mustard
1 tsp maple syrup
¼ tsp salt
½ cup olive oil
Lots of fresh black pepper

  • To roast beets, toss cubed beets with a little coconut oil and season with salt & pepper. Roast @ 375 for 25 – 30, stirring occasionally, until browned around the edges. Set aside to cool.

  • In a medium bowl, combine chopped kale, lemon juice and salt and massage kale well with your hands. Set aside.

  • In a large bowl, combine cooked quinoa, chopped veggies, dill, toasted pumpkin seeds, and olives. Add cooled beets.

  • To make the dressing: combine all ingredients in a blender or in a large jar and blend with an immersion blender.

  • To assemble: to your large bowl of chopped veggies, add massaged kale and enough dressing to coat and toss well. Adjust seasoning as needed.

  • This salad will keep 4 or 5 days. Toss with more dressing as the days progress to add moisture & flavour, as needed.

As always, if you make this beautiful quinoa salad, please let me know how much you love it (and even if you don’t) 😊 I would love to hear your feedback!

Black Bean & Cumin Spiced Cauliflower Tacos with Avocado Lime Crema

Tacos.JPG

To keep things interesting around here, during times of Covid-19 isolation, we’ve brought back taco night! I’ve been noticing how important it is to keep things engaging & somewhat challenging, coming up with new creative activities and little games that we can all play to keep it light.

Also, every one loves tacos!

Any kind of meal that involves a few different ingredient options that everyone can make on their own is great for kids and a good opportunity for creativity. We made fish tacos with a mango + avocado salsa this week and are talking about how to make a great mexi-spiced tofu taco….stayed tuned for that!

Don’t let the ingredients list length make you nervous, because most of these things you will already have on hand and, if you don’t, you can get creative and use up what’s calling to you from your fridge 😉

Black Bean & Cumin Spiced Cauliflower Tacos with Avocado Lime Crema

Tacos close.JPG

Makes 8 - 10 tacos
For the Cauliflower:
1 head cauliflower cut up into bite-sized bits
2-3 Tbsp coconut oil, melted
1 tsp cumin
½ tsp coriander
½ tsp chili powder
½ tsp salt
Fresh pepper
Avocado Lime Crema:
1.5 ripe avocados
Juice of 1 lime
1 small clove of garlic, minced
½ tsp cumin
¼ tsp onion powder
¼ tsp salt
2-3 Tbsp coconut kefir or coconut cream
For the rest of the Tacos:
1 can refried black beans, heated in a frying pan with a bit of coconut oil
Shredded lettuce (we use romaine)
Shredded purple cabbage
Chopped fresh tomatoes
Cashew sour cream
Salsa (fresh is best)
Fresh cilantro
Soft Taco Shells (our favourite brand is Abuelo’s, made in the Comox Valley)

  • For the cauliflower, preheat oven to 375F. Toss cauliflower pieces with oil and spices and spread out on a large glass-baking dish. Bake for 35-40 minutes or until crispy around the edges.

  • Meanwhile, prepare your avocado lime crema by blending all ingredients in a blender or with an immersion blender until smooth.

  • Prepare all other topping ingredients and warm your taco shells at 200F for roughly 10 minutes, or until just warm. To put together your tacos, start with a bit of refried beans, some shredded veg, the spiced cauliflower, and top with salsa and avocado lime crema. Devour immediately!

Make these tacos!
And may you find happiness in everything yummy 😋
Stay safe. Stay healthy. Remember laughter.


Decadent Chocolate Banana Bread

Double Chocolate Banana Bread.jpg

To be fair, this drool worthy loaf could actually be cake, disguised as “banana bread” in order to make it sound healthier. It’s one of those super decadent & delicious beauties that when you serve it to your friends & family, they won’t have a clue how real food focused, gluten & dairy-free, or vegan, and health supportive it actually is! Ha ha ha (she-devil laughing 😈)!
So, you could totally make it into a larger square brownie pan and call it dessert for sure, serve it up with some coconut whip cream or ice cream and even get away with it at a birthday party. No kidding 😉
Note: Cupcakes/muffins would definitely work too, although you would need to adjust the baking time.

That all being said, it should probably come with a warning: you may want to devour the entire thing in one sitting!! So take appropriate precautions: hide it from smaller fingers or nibbling kitchen invaders, and find a special time to cut yourself a lovely slice, sit down with your novel or your cat, tune in, and savour every bite instead! You deserve it.

Decadent Chocolate Banana Bread

(adapted from: Smitten Kitchen)
Makes 1 loaf
1 flax egg: 1 Tbsp ground flax + 3 Tbsp water
3 medium, overripe bananas
1/2 cup coconut oil, melted
3/4 cup coconut sugar
2 tsp vanilla
1 tsp baking soda
1/2 tsp himalayan sea salt
1 tsp ground cinnamon
1 cup gluten free flour blend (I use this one)
1/2 cup cacao powder (definitely use the good stuff here!)
1 cup high quality chocolate chips
1/2 cup chopped walnuts

  • Preheat your oven to 350F. Line your loaf pan with parchment.

  • In a small bowl, make your flax egg by combining ground flax with water. Set aside.

  • In a large bowl, mash bananas with a fork. Add oil, sugar, vanilla, baking soda, salt, cinnamon, and continue to mash with your fork. Add in flax egg.

  • Add flour and combine well with a fork, batter should be quite smooth. Lastly, stir in chocolate chips and walnuts.

  • Pour batter into lined loaf pan and bake for 45-55 minutes until an inserted toothpick comes out clean. Allow to completely cool before cutting (warning: this will be hard 😫 but you can do it!).

    If you make this banana bread/cake/cupcake/decadent deliciousness, please drop me a comment below and let me know how yours turned out!! And please share around the recipe with others who could use a little chocolatey goodness in their lives ♥️

Easy Banana Bliss Muffins

Banana Muffins.jpg

The best kind of muffins take just a few minutes to throw together, are made with all real food ingredients, and taste super yum as well. These beauties tick off all the right boxes!


Here is a great GO-TO banana muffin recipe that you probably have all the ingredients on hand for and works every time. Remember that the riper and mushier your bananas, the better, so wait until those old bananas are right brown and gross looking because that’s when they’re the sweetest and BEST for baking with! Although I have used spelt flour in this recipe, you could absolutely make them gluten-free by substituting your favourite gluten-free flour blend.

Potential add ins: chopped walnuts, raisins, and hemp hearts.

Easy Banana Bliss Muffins

Makes 12 regular sized muffins
3 overripe bananas
1 can full fat coconut milk
3 Tbsp coconut oil, melted
2 tsp vanilla
1 cup whole grain spelt flour
1 cup white spelt flour
1/2 cup coconut sugar
1/2 cup ground flaxseed
2 tsp cinnamon
1 tsp baking soda
1 tsp baking powder
1/2 tsp salt
1/2 cup good quality dark chocolate chips

  • Preheat oven to 300F and line your muffin tin with silicone or parchment liners.

  • In a medium bowl, mash bananas with a fork and add in coconut milk & oil, and vanilla, whisking to combine thoroughly.

  • In another medium bowl, whisk together all dry ingredients. Pour in wet ingredients and combine with a spatula until smooth. Do not over-mix.

  • Distribute evenly among muffin tin and bake for 30 - 35 minutes or until an inserted toothpick comes out clean.

As ALWAYS, if you make these muffins, let me know how you like them and remember to SHARE the recipe! Bliss Muffins can make everyone blissful 😊

Creamy Vegan Broccoli Soup

Broccoli Soup.JPG

I have a deep, deep love for broccoli. Sometimes I will steam some up and just sprinkle it with sesame oil & salt and have a big ol’ bowl of steamed broccoli for lunch. No joke. 🥦🥦🥦
But creamy broccoli soup. Ohhhh!! NEXT LEVEL!
Anything can be converted over to a vegan version, I’m pretty convinced, BUT making it taste just as delicious & satisfying is a bit of an art. Through a little cashew & coconut magic, here is a thick & creamy broccoli soup that ticks off all the right boxes AND contains potent healing and anti-inflammatory properties. In this life, it’s important to understand and BELIEVE that you can have it all: taste, satisfaction, enjoyment, AND support your health long term.

The Health Benefits of Broccoli are FAR REACHING! But here are just a few:

Beneficial for Digestion: The high fiber content is great for regular bowel function & proper elimination, but is also helpful in maintaining a healthy stomach lining as well as beneficial bacteria levels.
Chronic Disease Prevention: Broccoli contains phenolic compounds that can be beneficial in warding off diseases, such as diabetes, cancer, asthma, and heart disease.
Healthy Liver: Broccoli may help reduce fatty liver build up and risk of liver disease.
Brain Health: Rich in vitamin K & choline, broccoli may help to protect against neurodegenerative disease and symptoms of brain degeneration.
Anti-inflammatory: High in antioxidants like vitamin C, potassium, magnesium, sulforaphane, and kaempferol, cruciferous vegetables are naturally anti-inflammatory and have potent antioxidant qualities.
Anti-Cancer (my personal favourite 😉): Of particular potential benefit in reducing risk of uterine and breast cancers, it’s potent antioxidant quality and ability to help regulate estrogen make broccoli your ally for fighting cancer!

Creamy Vegan Broccoli Soup

broccoli.jpg

3 tbsp coconut oil
1 large onion, diced
2 tsp pink Himalayan sea salt
1 large head of broccoli, chopped (5-6 cups)
3 large cloves of garlic, minced
2 carrots, peeled & chopped
Lots of fresh pepper
1/2 cup of cashews, soaked 4-12 hours or 30 minutes in boiling water
4 cups vegetable stock/broth
1 can coconut milk
1/3 cup nutritional yeast

  • In a large soup pot, heat coconut oil over medium heat. Add onions and sauté until softened.

  • Add salt, broccoli, garlic, carrots, and season with pepper. Sauté until vegetables are slightly softened - roughly 15 - 20 minutes.

  • In a separate pot, bring vegetable broth to a boil. Drain and rinse cashews and place them in the blender with about 1 cup of the hot broth. Blend until smooth.

  • Pour remaining broth, blended cashew mix, and coconut milk into soup pot. Bring to a gentle simmer for about 20 minutes, or until vegetables are soft. Remove from heat and stir in nutritional yeast. When soup has cooled slightly, blend with an immersion blender or transfer to your blender and blend in batches until desired consistency is reached.

  • Reheat to serve and adjust seasonings as needed. We like this soup topped with pumpkin seed parmesan and a drizzle of coconut cream! Simple & delish!

MAKE THIS YUMMY SOUP & LET ME KNOW HOW IT TURNED OUT FOR YOU!
Make sure you’re on my email list (below) & don’t ever miss a new recipe, class offerings, and plant powered inspiration!
May you relish in real food deliciousness!


Red Lentil & Almond Burgers with Kale Pesto

Lentil Burger 2.jpg

Y-U-M!!! 😋
Rockin’ the New Year Plant-Based styles is making our bellies feel SO happy!
Inspired by the latest lentil challenge in our January Plant Based Transition Group, this burger has a few steps to make, but well worth the extra effort! This would be a great recipe to make on the weekend when you’re gearing up for a busy week of meal planning or when you’re hosting a dinner with some friends who are plant-based keeners (or are not, but could use some extra nutrients in their diet!). It makes a bunch of patties that can be used for dinner or lunch, can be served in a bun, on lettuce, in a wrap, or all by themselves, and can also be popped in the freezer to make your future weeks a little easier! 😉

Don’t skip the pesto though! Together, this combo is a bit of a late night dance party in your mouth, super filling & nutrient-packed, so that you won’t need much to go along side. I like to serve them up with a simple side salad or some steamed veg.
The best feedback I’ve gotten so far for this burger was my son’s clean plate!! YES!

Health Benefits of Red Lentils:

Low Glycemic Index (slow burning) Carbohydrates = Lots of solid, long-term energy
Rich, Plant-Based Source of Protein
High in Non-Heme Iron (the Plant kind)
High in Iron
Contain Vitamins A, K, C, B, and folate
High in Antioxidants & Phytonutrients, which aid the body to fight infection/disease
Contain Minerals: Calcium, Magnesium, Phosphorus, Potassium, Zinc, Manganese, Copper and Selenium
They are cute & yummy 😃

Red Lentil & Almond Burgers with Kale Pesto

Lentil Burger.jpg

Makes 12 – 16 medium sized burgers
For the Burgers:
2 cups red lentils, soaked 2- 4 hours, rinsed
4 cups water
2 bay leaves
1 large piece of kombu seaweed
1 Tbsp chia seeds + 3 Tbsp water
1 medium onion, sliced thin
2 medium red potatoes, grated
1 large carrot, grated
2 Tbsp coconut oil
1 tsp salt
3 – 4 cloves garlic, minced
1 tsp cumin
1 tsp paprika
1 tsp coriander
Lots of fresh pepper
1 1/4 cup almond meal/flour (or ground oats/oat flour)
2 Tbsp tamari
2 Tbsp maple syrup
½ cup sunflower seeds

  • In a medium pot, combine lentils with water, bay leaves and seaweed.  Bring to a boil and then reduce to medium until lentils are soft (about 20 minutes). Once lentils are cooked, place them in a fine mesh strainer in the sink to drain excess liquid.

  • In a small bowl, combine chia seeds with water and set aside to form a gel.

  • In a saucepan, heat coconut oil over medium heat. Add onions, potatoes, carrots, salt, and garlic and sauté several minutes until they begin to soften. Add spices and cook another few minutes. Remove from heat.

  • In your food processor, combine cooked lentils, chia gel, almond meal, tamari, and maple syrup. Blend until smooth. Transfer to a large bowl. Add remaining ingredients: cooked veggies and sunflower seeds and mix well with a spatula. Transfer bowl to the fridge to allow mix to set before forming into patties.

  • Preheat oven to 375. Form burger mix into burgers and place on lined cookie sheets. Bake for 40 minutes (flipping half way, if you like).

  • Serve burgers on a large leaf of lettuce with a dollop of pesto, some sprouts and any other toppings you may like. Enjoy!

  • NOTE: these burgers freeze well once they are cooked. To reheat, defrost aprox. 30 minutes and pan-fry or bake until heated through.

Kale Pesto

Lemon Kale Pesto.jpg

1/3 cup pine nuts
1/3 cup pumpkin seeds
1 large head of kale, stemmed - 4 cups, packed
1 large bunch of basil – 1 cup, packed
3 cloves garlic, minced
1/3 cup olive oil
½ tsp salt
1/3 cup Nutritional yeast
¼ cup hemp hearts

  • In a dry skillet, over medium heat, toast pine nuts and pumpkin seeds until toasted. Set aside to cool.

  • In a large food processor, combine all ingredients and blend until smooth.


    There is still time to join in on our January Plant Based Transition Facebook Group! We’re sharing loads of information, recipes, ideas, meal planning tips, and finding motivation & inspiration through the support of being passionate about our health together!!

Healing Coconut Curry Stew

Coconut Curry Stew.JPG

It is not surprising to me that we are seeing more and more folks interested in transitioning towards vegan eating. Time and time again, when evaluating diet styles that are making a difference longterm and ones that are simply a temporary trend, the plant-based or vegan style of eating has the best results. When we are looking at decreasing inflammation in the body, reducing blood pressure and clogged arteries, rebalancing fluctuating mood and mental difficulties, augmenting energy and endurance capabilities, reducing risk for disease development, and increasing quality of life with regards to our planet earth and the economy, we are seeing improvement, consistently.

But people need to choose for themselves, find the education that resonates with them and their lifestyle, and take directives that align with their intuitive nature. I feel as though the one thing that I can do over and over in order to help people make decisions that feel right for their health & meet their individual needs, besides offering dependable information and support, is to provide DELICIOUS & NOURISHING RECIPES.
It is my passion and a gift that I am happy to give (plus this is the BEST way to make a convincing argument 😉).

So here is a most nutrient rich stew that can support thriving health on so many levels: lots of protein, antioxidants, plant based fats, loaded with nutrient dense plants of differing colours, variety, and plentiful in micronutrients & minerals, supportive to the immune system, and warming for the soul 💛.

Enjoy this stew as a weeknight staple, feed it to a crowd, or dish it out into mason jars and give it away as a handmade, heart warming gift. Any which way, it is sure to make your mouth smile and your belly happy!

Healing Coconut Curry Stew

Makes 12 - 14 Servings
Ingredients:
1 large onion, diced
3 Tbsp coconut oil
2 tsp salt
2” ginger, minced
4 cloves garlic, minced
1 - 2 red peppers, sliced
2 cups broccoli, chopped
2 cups mushrooms (any kind), sliced thick
1 can chickpeas, drained & rinsed
2 cups purple cabbage, sliced
2 cans coconut milk (full fat)
4 cups vegetables stock
2 Tbsp red curry paste
1 tsp turmeric
1 tsp cumin
2 tsp curry powder
Lots of fresh pepper
I head kale, stemmed and chopped
Juice of 1 lime
1 - 2 Tbsp tamari
1 Tbsp maple syrup
Fresh cilantro for serving
Instructions:
In a large soup pot, melt coconut oil and saute onions over medium heat until translucent. Add salt, ginger, garlic and prepared vegetables and saute further until fragrant and slightly softened. Add curry paste and all other seasonings and stir until well combined. If pot gets a bit dry, add a little of your stock or water and continue to saute a few minutes more.
Pour stock and coconut milk over your veggies and lower temperature to a low-medium and simmer for about 20 minutes. Add kale, lime juice, tamari and maple syrup and simmer another 10 minutes until all vegetables are cooked through. Taste and adjust seasonings as needed. Serve with fresh cilantro, more lime, and/or toasted cashew pieces - yum! 😋

As with all of my recipes, if you make this stew, please comment here or take a lovely pic and share it on social media (be sure to tag me! 😊).
Help me spread the yummy food vibes and support one another in our effort to feel good about what we eat. LONGTERM.

Intensely Good Raw Key Lime Pie

Key lime.JPG

I’ve made many of these pies in my years as a Nutritionist, but they have continuously evolved. In the beginning, they contained 1 cup or more of Agave Syrup for sweetener, or Soy Lecithin for thickening, neither of which I can feel comfortable about promoting. So I’ve tried many times to get it right: the flavour balance, the consistency, not too sweet, not to tart.
I am finally satisfied.

Of note for this pie: it MUST set in the fridge overnight or you will be attempting to serve up a gooey pile of mush, which is not ideal. So be sure to make this recipe the night BEFORE you serve, and if you are serving up some coconut whipped cream along side, pop those cans of coconut milk in the fridge too so that you are entirely prepared for the dessert challenge and need only that 10 minutes to whip up your cream!! 😉

Intensely Good Raw Key Lime Pie

Key lime crust.JPG

Makes 1 large 8” round pie or 12 individual, muffin sized tarts
Ingredients:
For the Crust:
3/4 cup packed, pitted medjool dates (note, if your dates are dry, soak them in boiling water for 5-10 minutes)
1/2 cup almonds
1/2 cup pecans
1/2 cup shredded, unsweetened coconut
1 tsp vanilla
1/4 tsp salt
1/2 cup oats
For the Filling:
1/2 cup cashews, soaked overnight & rinsed
2 ripe avocados
2/3 cup freshly squeezed lime juice
1/2 cup coconut cream
2/3 cup maple syrup
2/3 cup coconut oil, melted
1/4 tsp salt
Instructions:

  • For the crust, blend all ingredients in your food processor until a coarse meal is formed. Mix should stick together. Press evenly into a greased pie plate with wet hands, bringing the crust mix up the sides. Place crust in the fridge while you make the filling.

  • For the filling, combine all ingredients in your food processor until smooth (this may take several minutes), scraping the sides a few times. Pour filling over your crust and set pie in the fridge or freezer overnight. If serving from the freezer, allow pie to defrost roughly 20minutes before serving.
    Serve pie with coconut whipped cream and fresh raspberries, if you have them 😋

Coconut Whipped Cream

Whipped cream berries.jpg

Simple.
Easy.
Delicious.
Dairy-free whipped cream.
Need I say more?
Note: Coconut milk cans MUST be refrigerated overnight in order for this cream to whip properly. DO NOT SKIP THIS STEP!

Coconut Whipped Cream

Ingredients:
2 cans full-fat coconut milk (refrigerated overnight)
Note:
You could also use cans of coconut cream, your volume will increase slightly.
2 Tbsp maple syrup
2 tsp vanilla

Instructions:

  • Place your beaters and a medium glass/stainless bowl in the freezer for 10 minutes.

  • Open coconut milk cans upside down, pouring off the coconut water (reserve for smoothies 😉) and remove only the cream into your cold bowl, adding all other ingredients.

  • Whip with a hand mixer until thick and creamy. Serve immediately.

Kabocha Squash & Red Lentil Coconut Curry

Squash & lentil pic.jpg

I have served up this curry to a crowd on numerous occasions and the feedback is always over the top. This is a super simple meal, made with simple (& affordable) ingredients, but slow cooked in such a way that really allows the flavours to come forward with warmth and strength. It makes a big batch, so plan to freeze some for a busy weeknight meal 😉.
The nourishment profile of this dish is definitely in the wow category. The Kabocha squash is one of my favourites because it has so much to offer in robust flavour as well as nutrition: rich in beta-carotene, Vitamins A & C, and a good source of iron, copper, magnesium, B vitamins, dietary fibre, and various antioxidants. Red lentils are an amazing source of plant based protein, beneficial for heart health, cancer prevention, blood sugar stability, and rich in B vitamins, minerals, and fibre.
This one is sure to make your belly & your body feel happy!

Kabocha Squash & Red Lentil Coconut Curry

PREP OPTION: Use slow cooker, prep and chop veggies the night before
Makes: 8 - 10 servings

Ingredients:
¼ cup coconut oil
1 large onion, minced
2 tsp salt
4 large cloves garlic, minced
3 inches ginger, minced
1 medium kabocha squash, cubed
1 Tbsp curry powder
1 tsp cumin
1 tsp coriander
1/2 tsp turmeric powder
Lots of fresh pepper
1 cup red lentils, rinsed
6 cups vegetable broth
1 can coconut milk
1 head lacinato kale, stemmed & chopped
2 Tbsp maple syrup
Juice of 1 lime
Fresh cilantro or basil
Toasted cashew pieces
Cooked Rice or Quinoa for serving

Directions:

  • In a large soup pot or wok, sauté onion in coconut oil over medium heat, until translucent. Add salt, garlic, ginger, and cubed squash and stir. Heat for 3-5 minutes, then add spices, stir and heat for another 3-5 minutes.

  • Add lentils, vegetable broth, and coconut milk, reduce heat and simmer 20 – 30 minutes, until stew-like in consistency and squash is cooked.

  • Add chopped kale, maple syrup and lime, and simmer another few minutes, until kale is wilted.

  • Serve with brown rice or quinoa, fresh cilantro or basil, and toasted cashews. Optional toppings: coconut kefir/yogourt, and/or mango chutney.

Check out my other main meal recipes!